January - December 2013
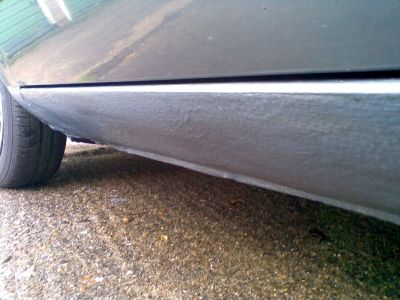
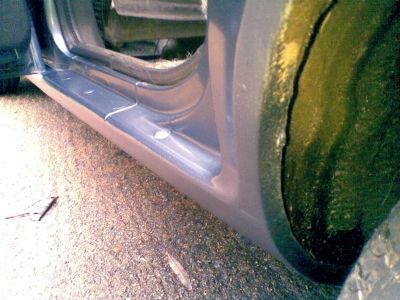
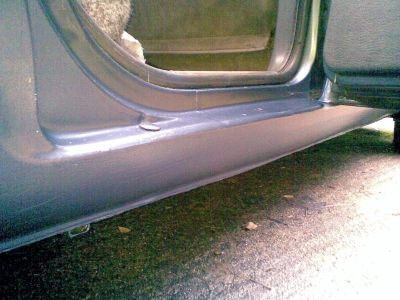
The first few days of 2013 saw Bess's sills given a brush-up with thin coats of the correct colour from Halfords and then a quick wash with very much thinned Citroen Fijian Blue which gives an awesome match to the existing paintwork on the rest of the car. The Fijian blue needs a second brush-over to achieve its full potential since it looks a bit streaky at the moment with some of the underseal leaching through, but I am sure that another wash of slightly thinned paint will look a bit better (famous last...).

Maybe a quick skim over with an aerosol of laquer will help later on, too.
The following weekend of Jan 2013 and a bash at hand-painting the sills gives flawed a result, even with thin washes, so I decide to do a judicious spray-over with an aerosol of Fijian blue (I keep saying that)... just a light spray with minimal masking of surrounding areas. Chancy, but the results look pretty OK, in my unbiassed opinion so the car is returned to everyday use on the road.... it was a teabag only three weeks ago, but now just look at its magnificent provenance.
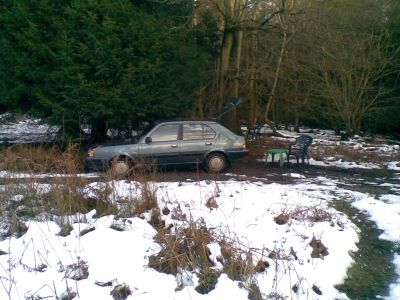
Mid-January 2013 and Blue Bess is firmly back in use as routine transport to the wild, wicked, wet and wintery woods.
Late Jan 2013 and snow brings more fun in the wilds.
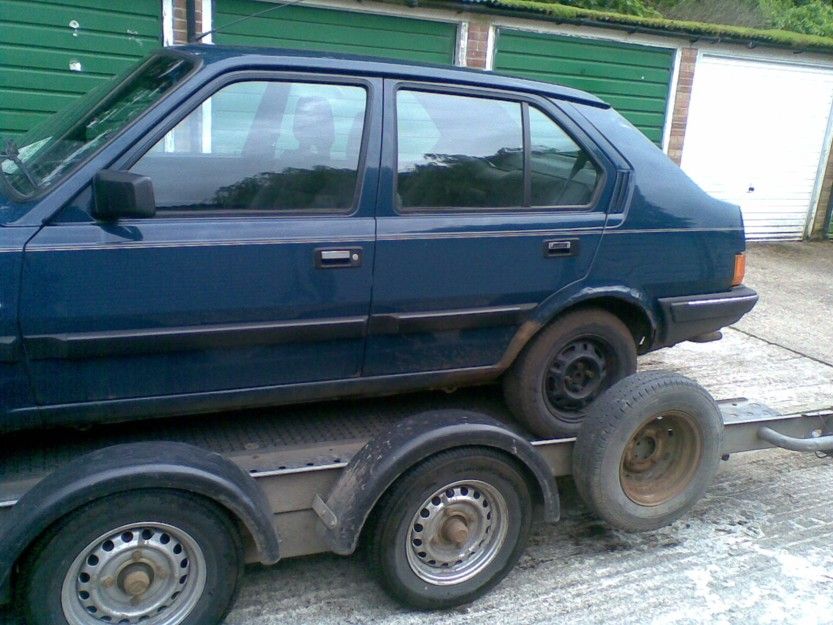
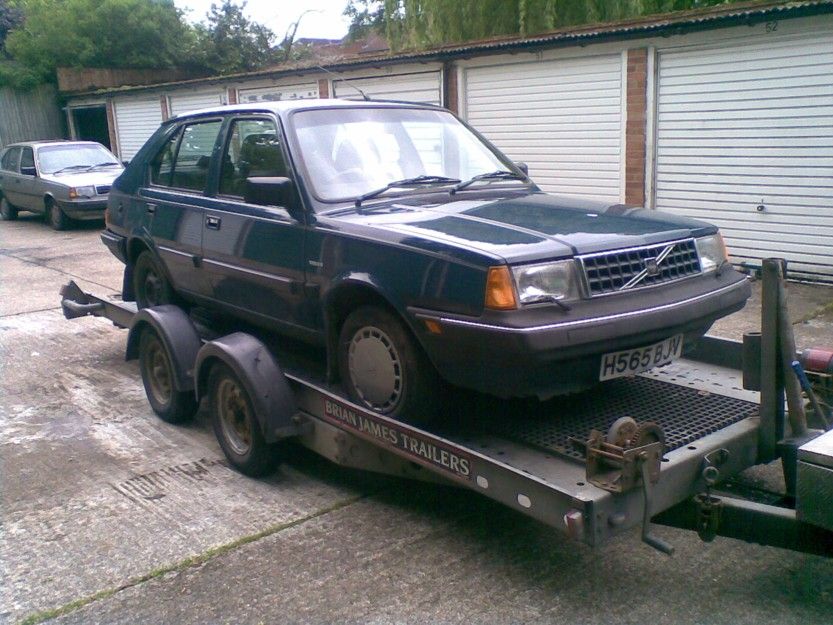
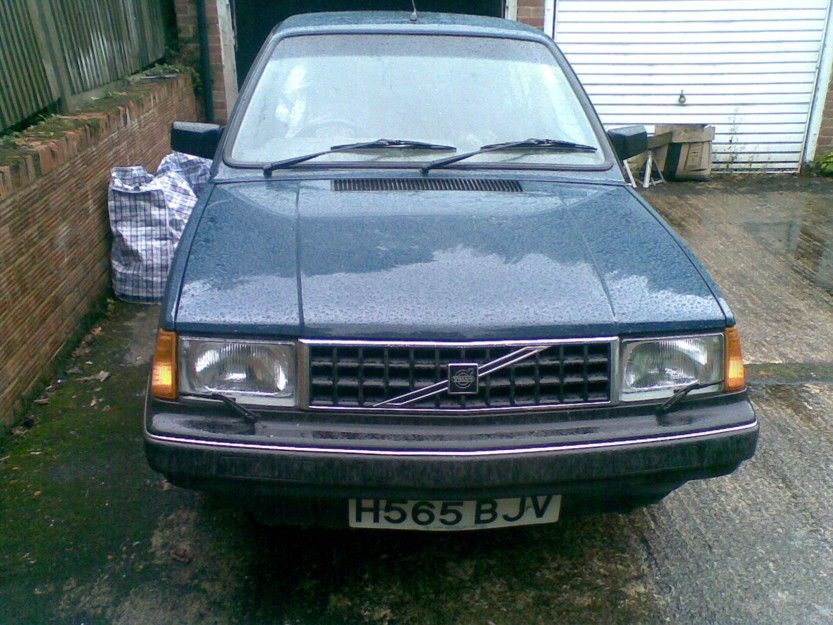
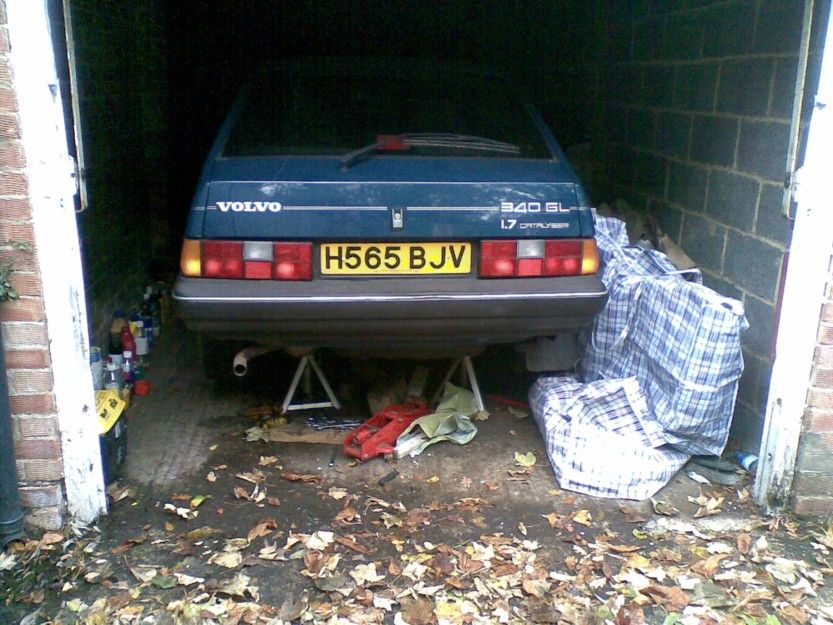
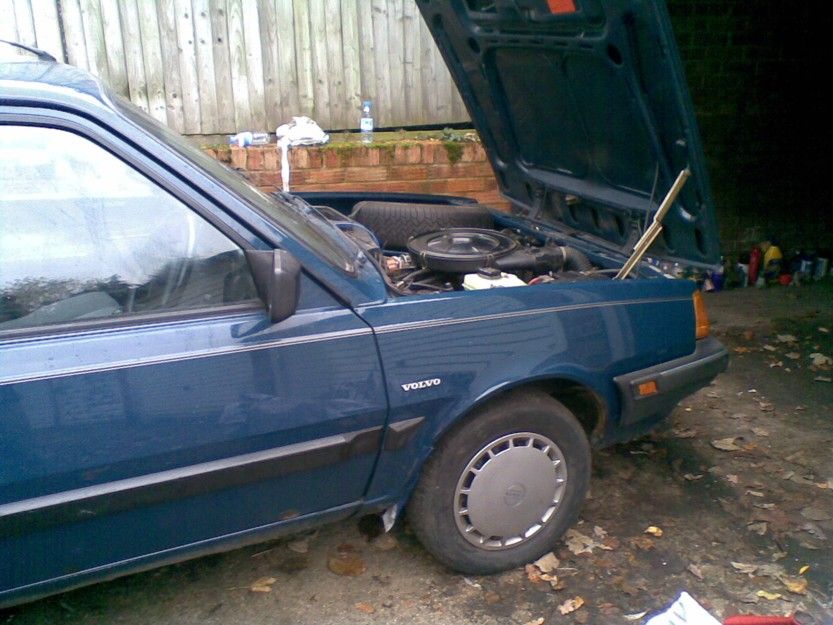
Now in late spring (end of May 2013) and groovy things are happening. I finally take delivery of a new, deep electric blue 1.7 GL made in 1991. One of the last few thousand to be made, in fact it was registered 3 months after 340 production ceased, so perhaps this could be called a 'murdered-out' model. This one will be worked on while the main Blue Bess is used as regular transport.
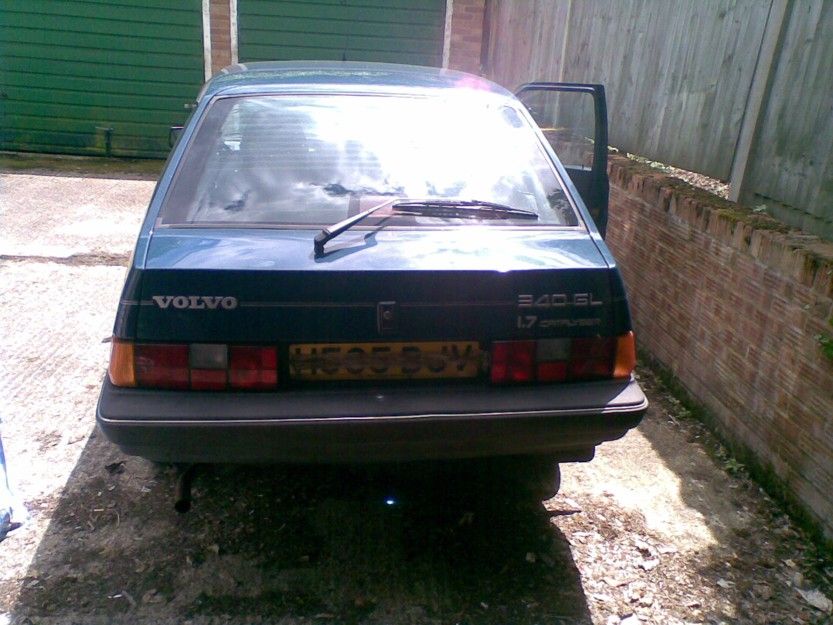
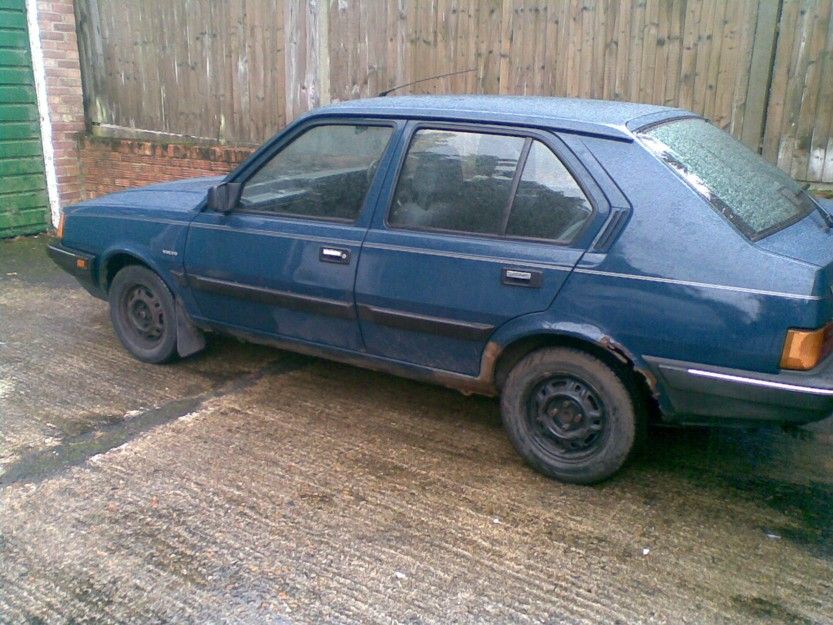
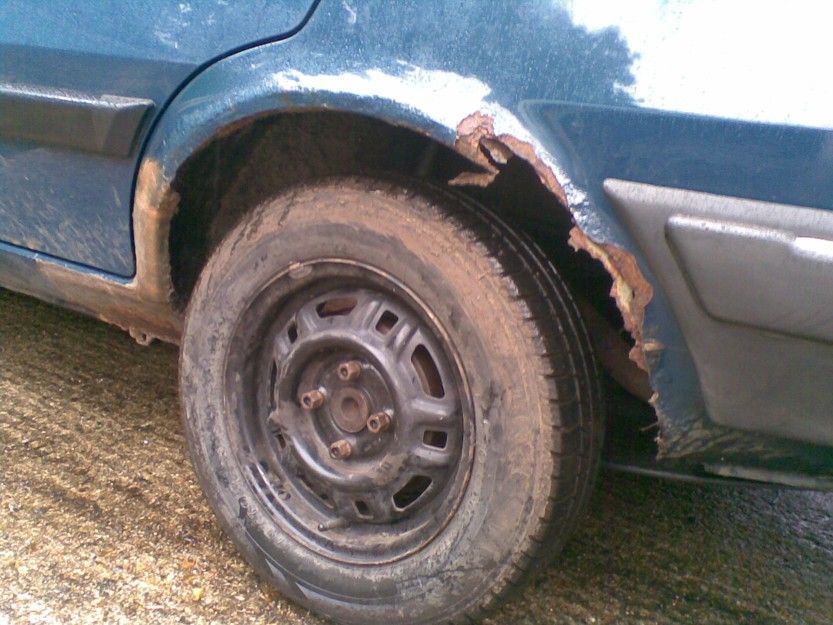
This one is pretty good apart from rust around the rear nearside wheel arch, the front valance and the front offside wheel arch. There's a bit of a ding on the rear bumper but its hardly worth talking about.
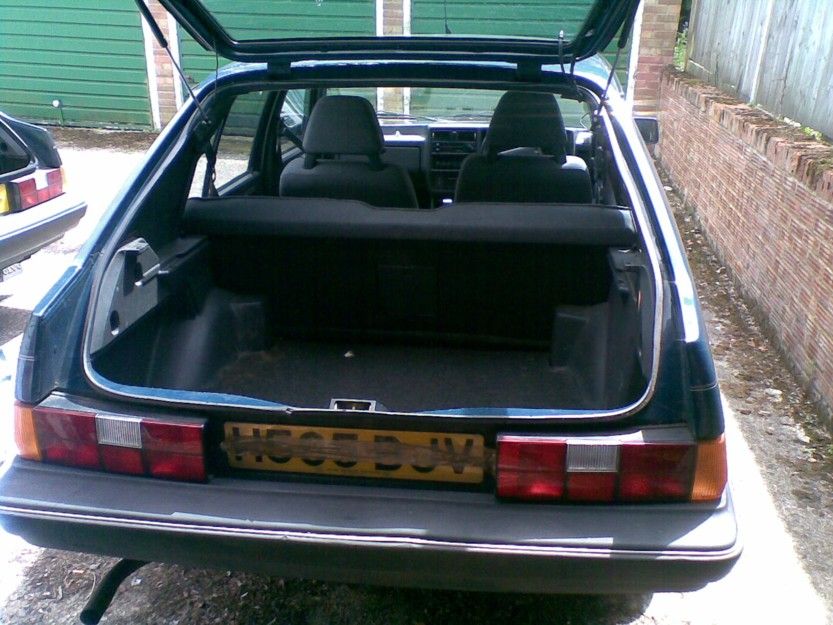
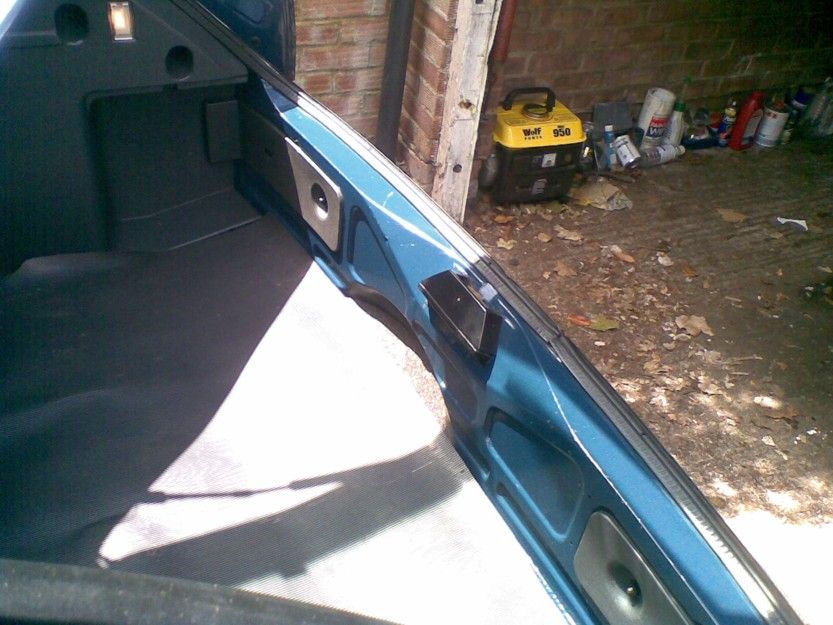
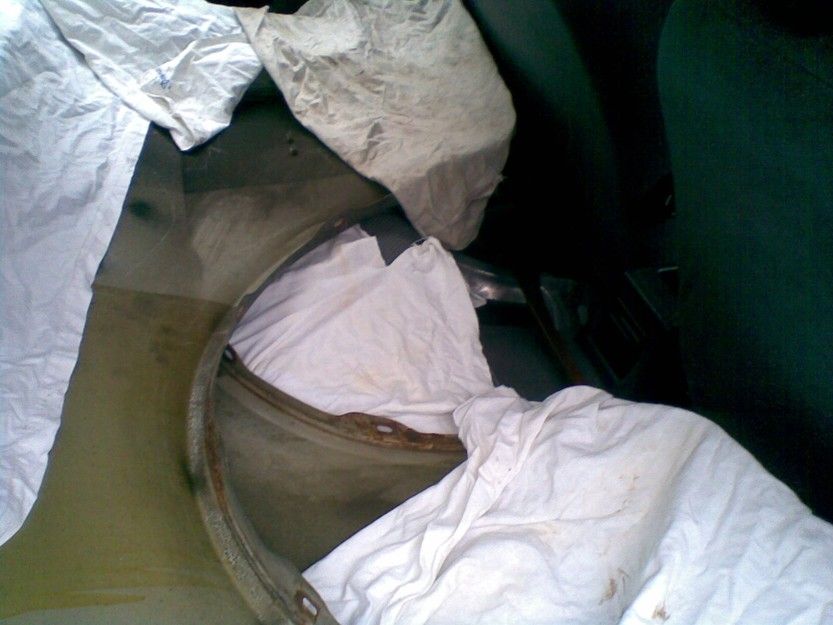
The interior trim is all pretty good and just needs a clean-out which starts in the boot and rear passenger compartment.
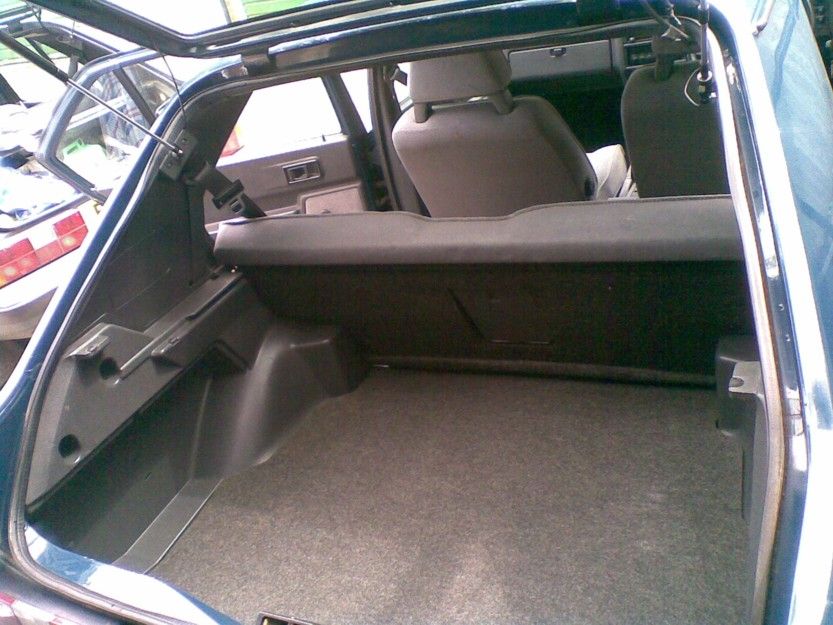
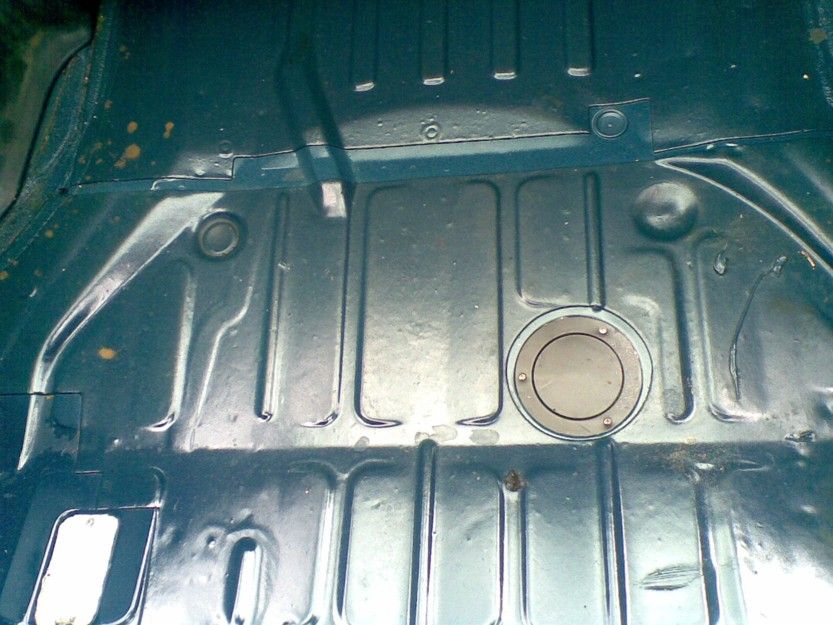
Cleaning-up around the rear hatch (why do my restorations always start with the boot?) shows the floor to be rust-free and the interior of the boot is pretty free from knocks and scratches. There is a nice thick boot mat, too, which I've not seen before.
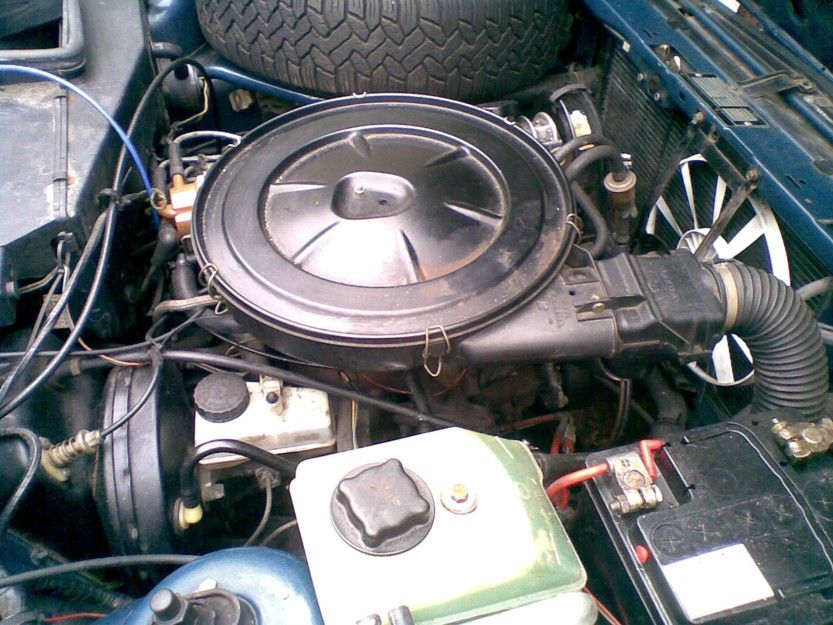
Engine-wise this car seems to be OK too, so fingers crossed that at a mileage of 58k, it might be alright for a bit.
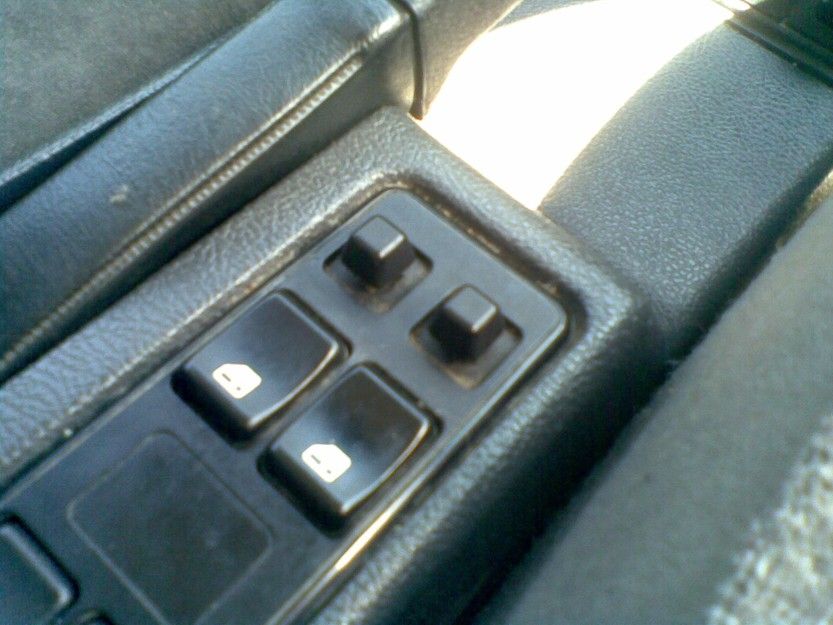
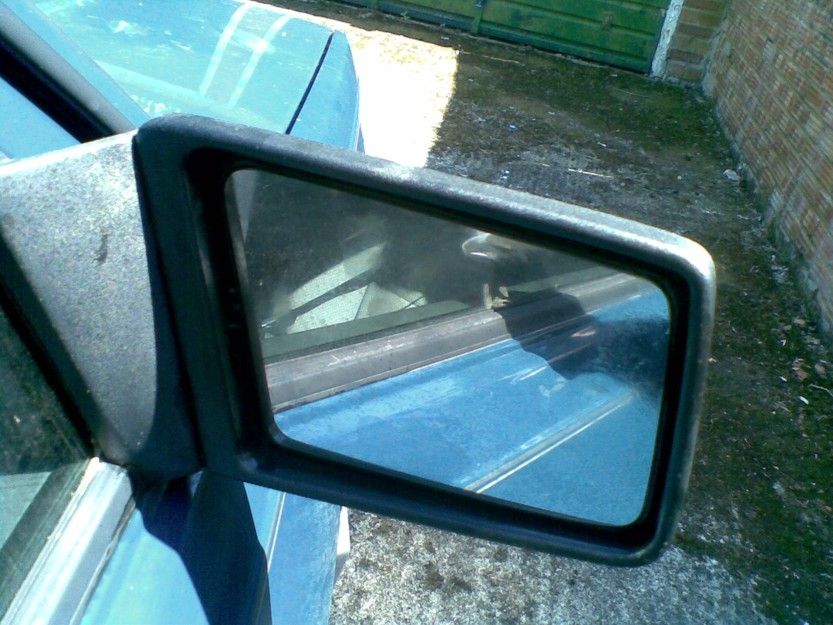
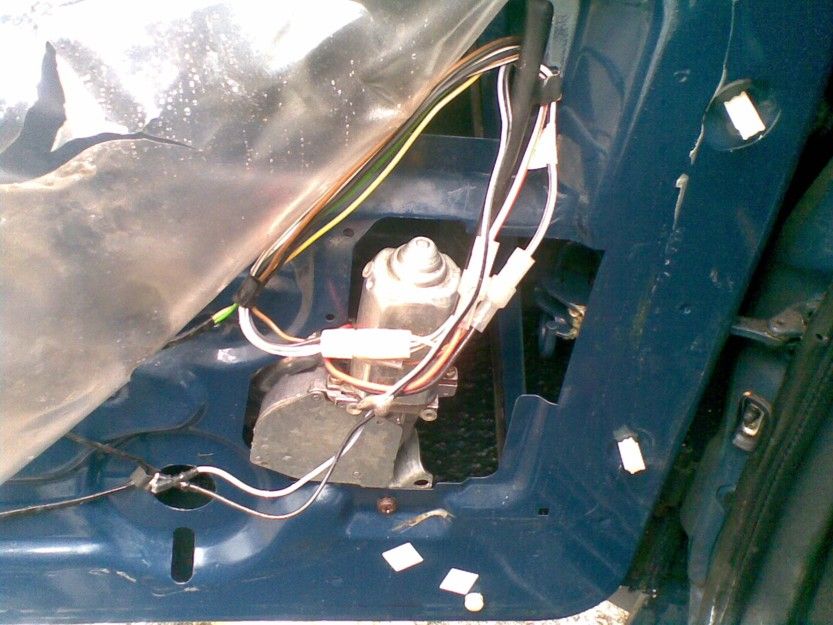
A couple of minor faults show up on the first look around, namely a broken rear, offside inner door handle and the buttons for the electric mirrors are missing. The said mirrors only partly work and the electric window motors are a bit wonky, too, but they will be tackled in due course.
Early June 2013 has seen the rear driver's side interior door handle fixed and the electric mirrors have been given a generous spray of oil to free them up. With a bit of encouragement, to my amazement, they all seem to work OK and even the little knobs that had fallen off the switches on the transmission tunnel were found hiding under the carpets and under the seats, etc.
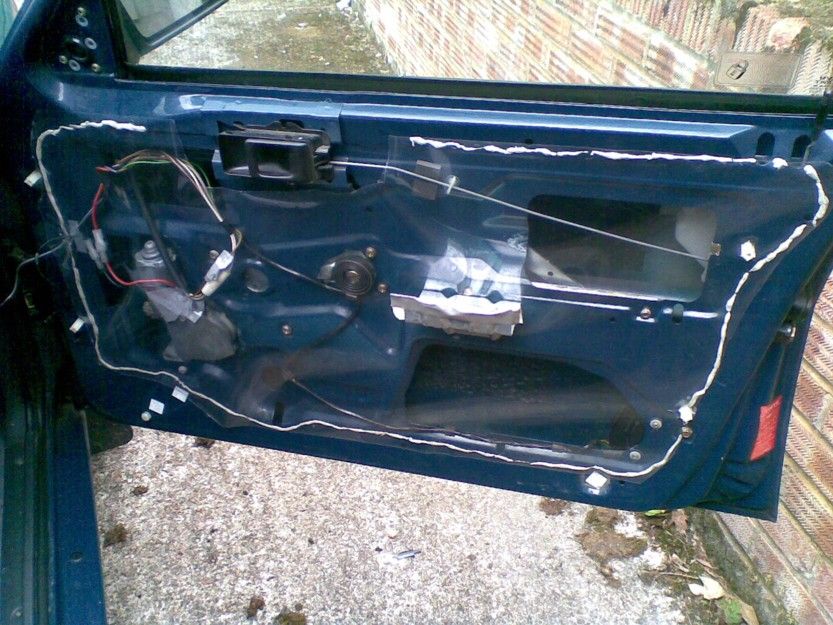
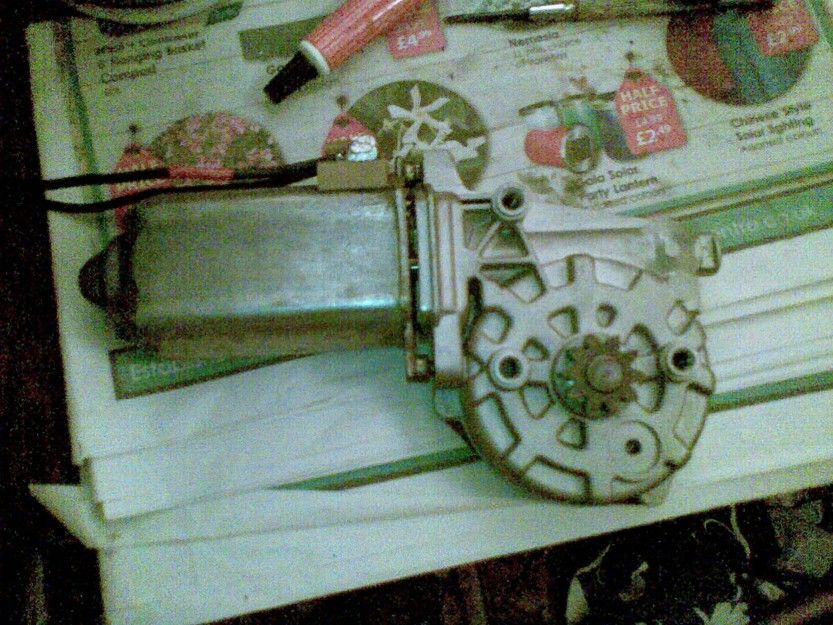
There's something looking very dodgy about this passenger side electric window motor and that's because I have partly dismantled it to refill the gearbox with grease and to spray WD40 into the motor itself. The motor has come back to life very well indeed, again to my surprise, so it may just be a case of putting it all back together again, which is proving to be a little harder than expected, as usual.
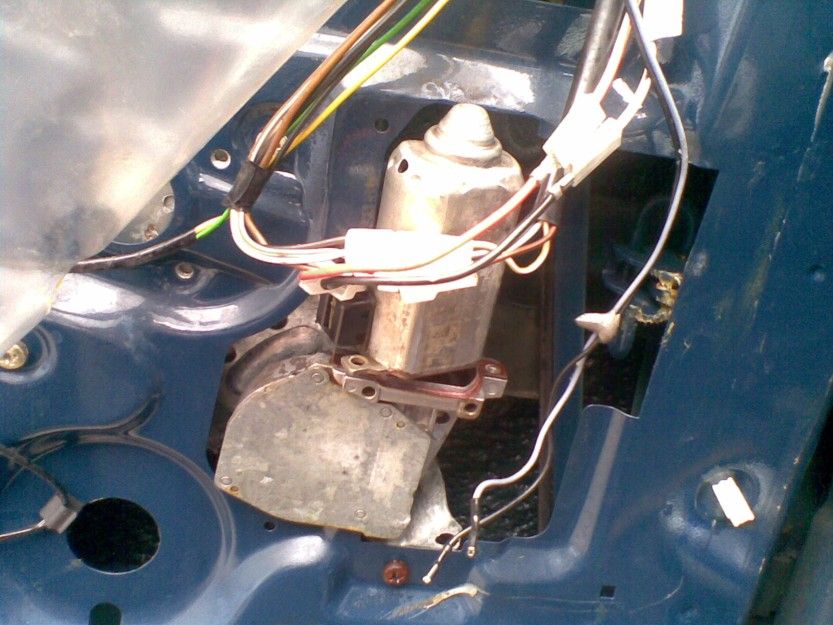
Its now mid-June 2013 and what has been going on? Well, it looks as though the electric motor for the front passenger window has been fixed by removing it, dismantling it and cleaning the commutator as well as greasing it all up and putting it back together again, with some waxoyl in the door-bottom.
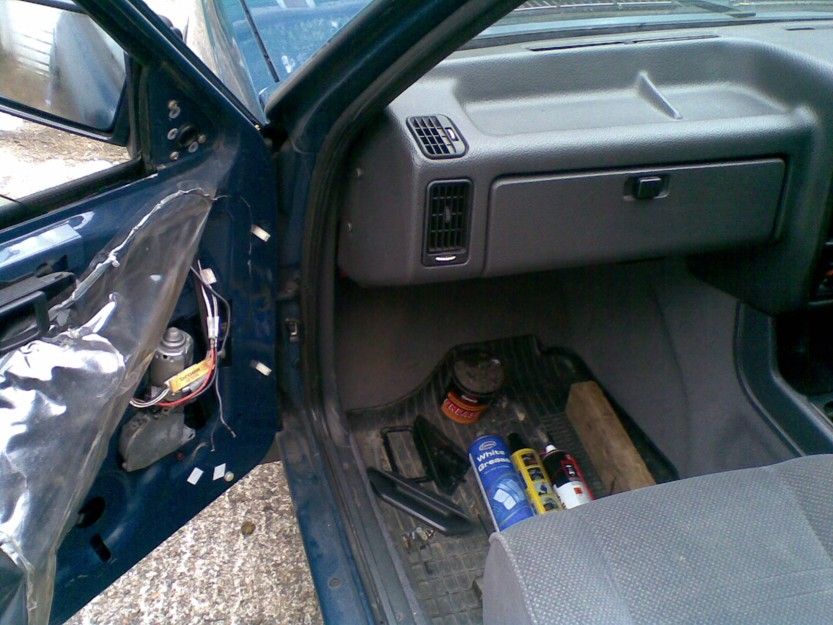
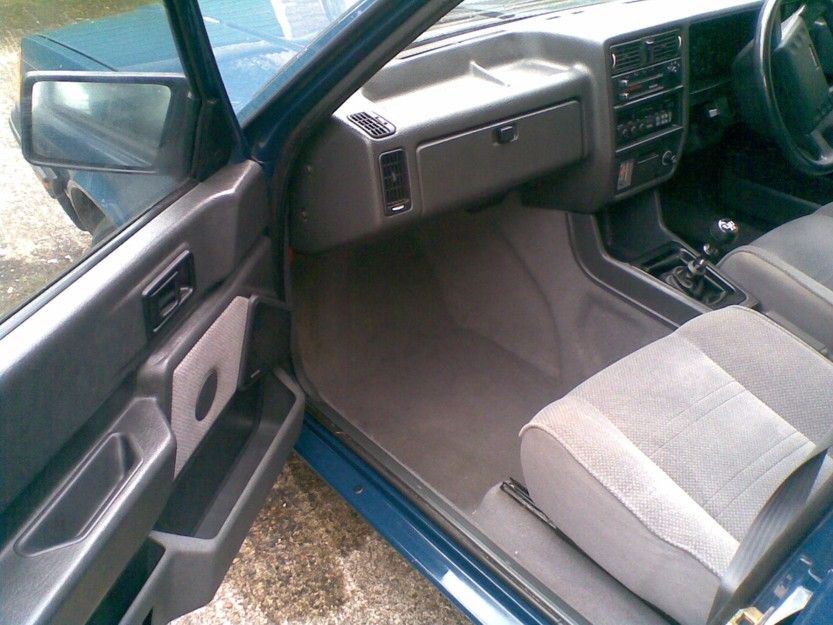
Indeed a few tests show that the electric window is now working fine, albeit a bit noisily. The front passenger side footwell has also been brushed-out and the trim given a general polish up.
Late June 2013 has seen the electric window motor in driver's door removed, cleaned out, re-greased and refitted. It seems to be working quietly and well, so hopefully it will be OK for a while.
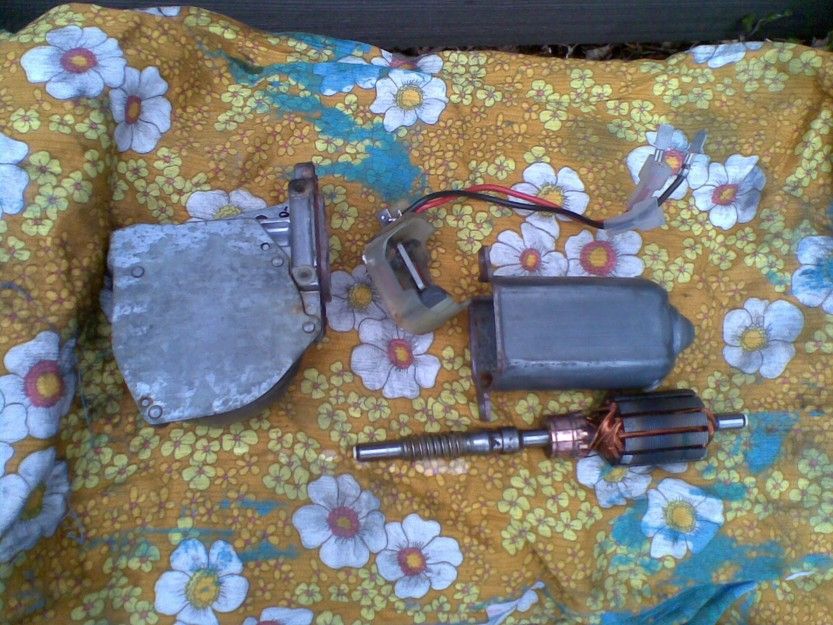
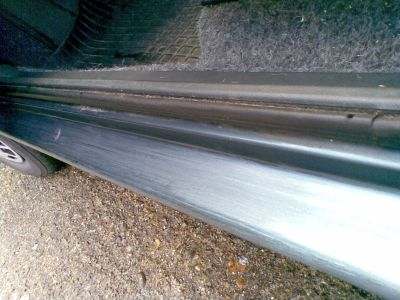
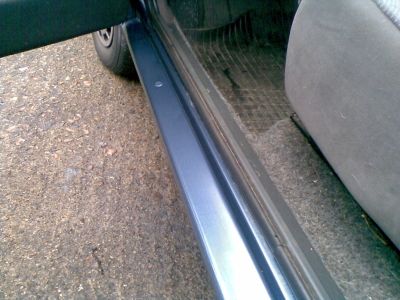
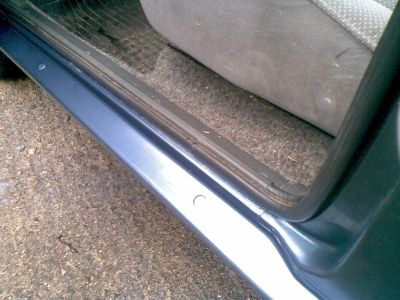
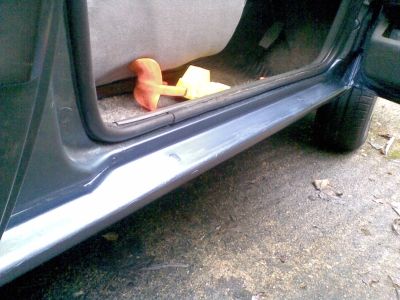
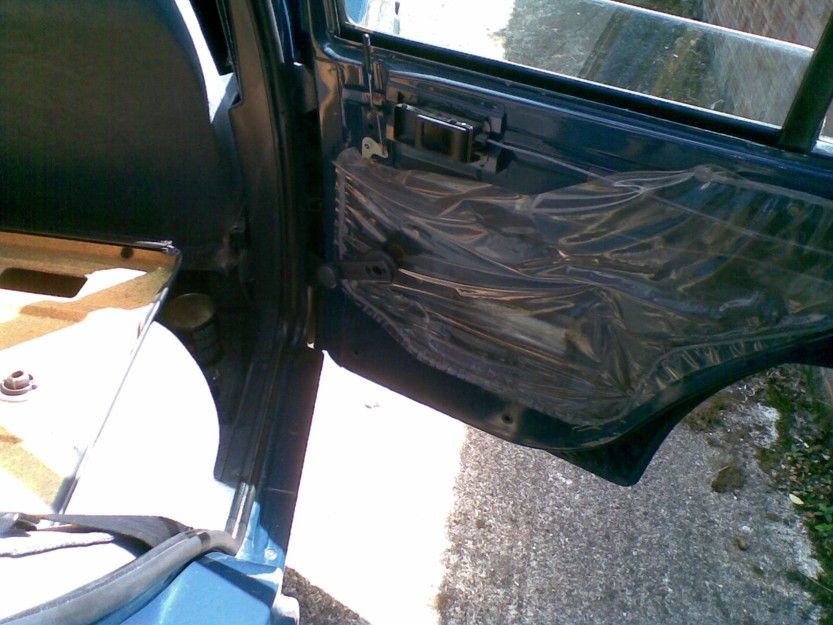
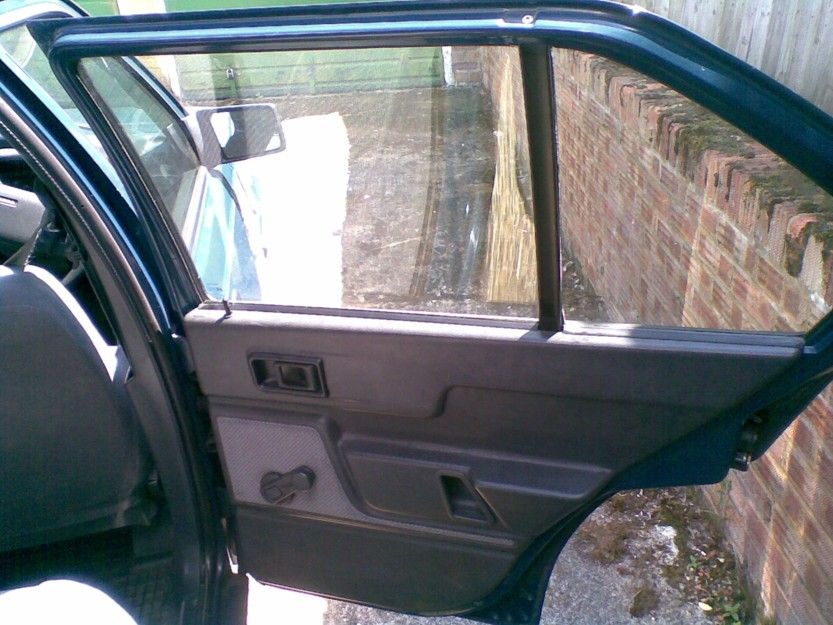
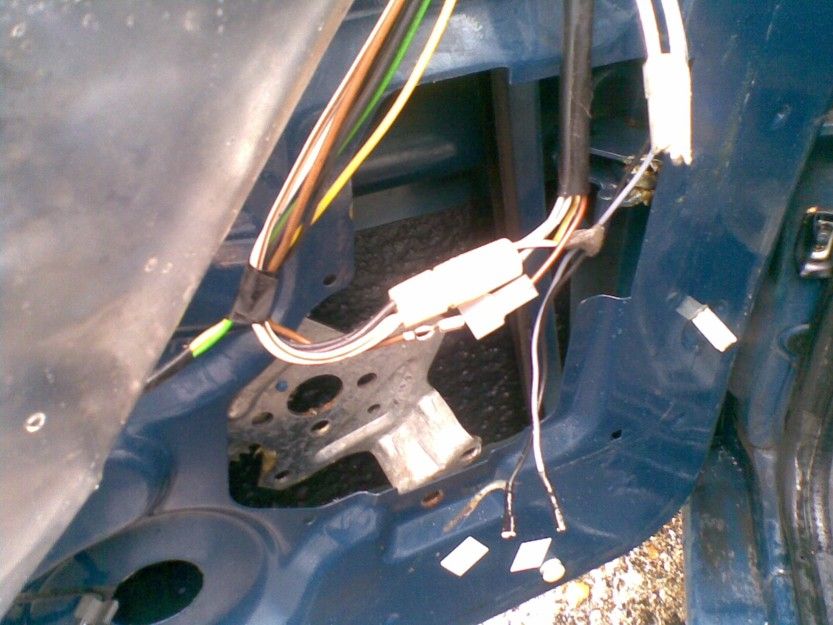
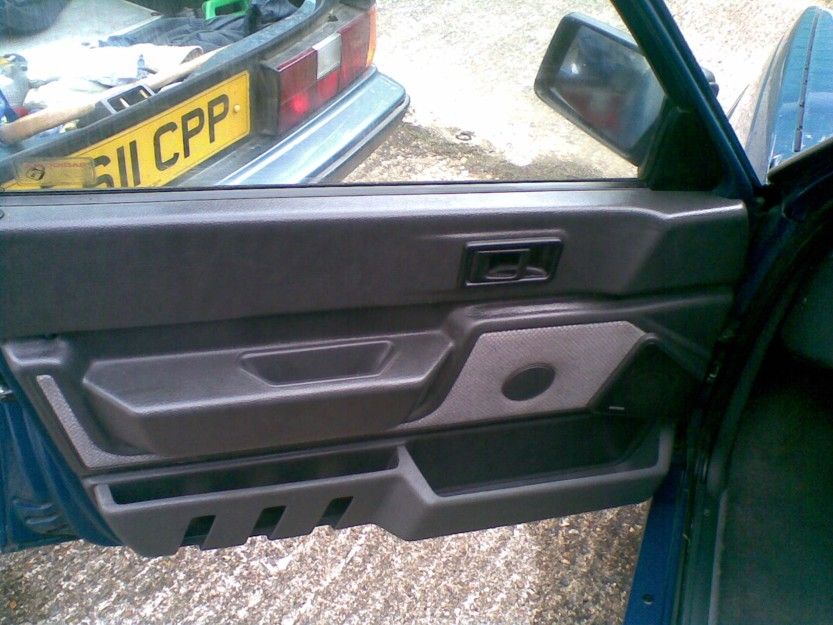
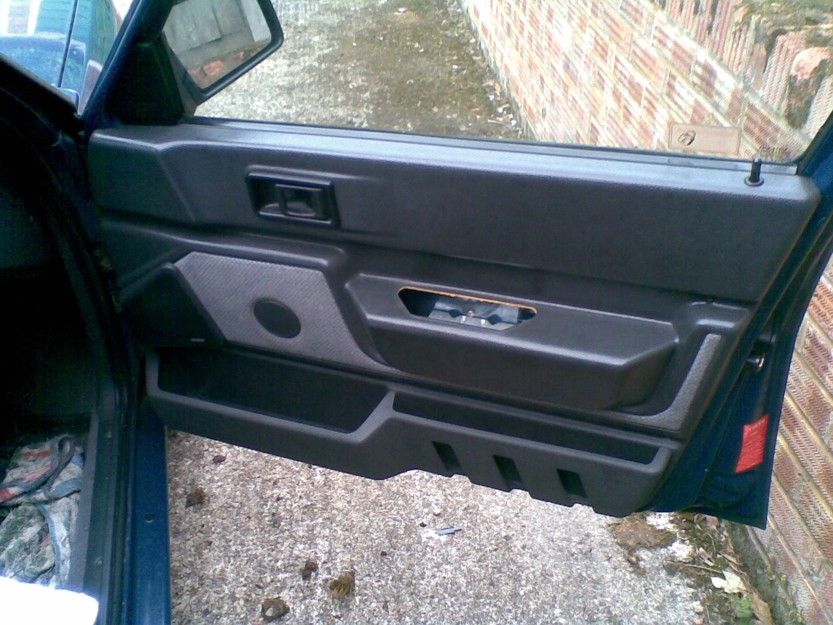
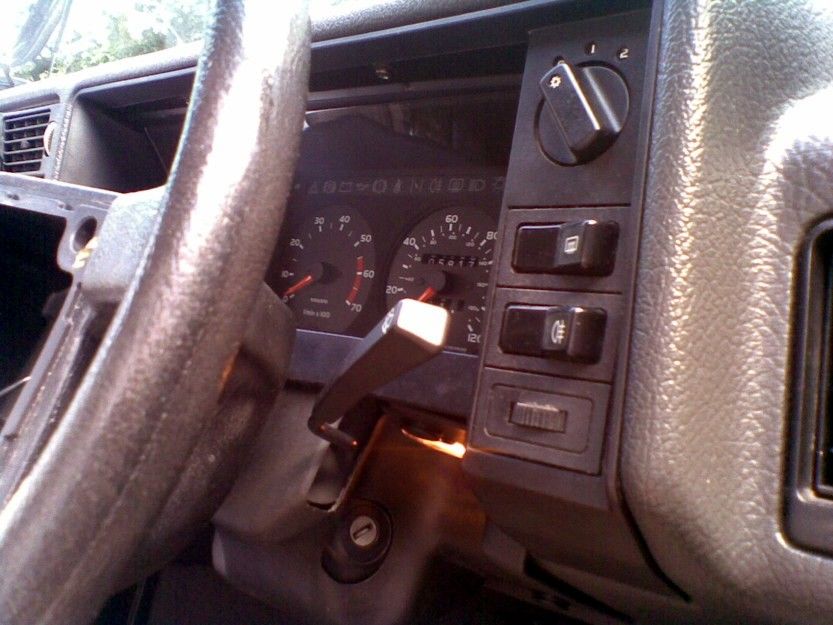
The inner plastic seal for this door was missing so a home-made one had to be cut to shape and stuck in place with white blu-tack! Not ideal but anything to keep the wet and drafts out should help! The reassembled door trim all looks fine as shown below where everything bar the door-pull can be seen gleaming.
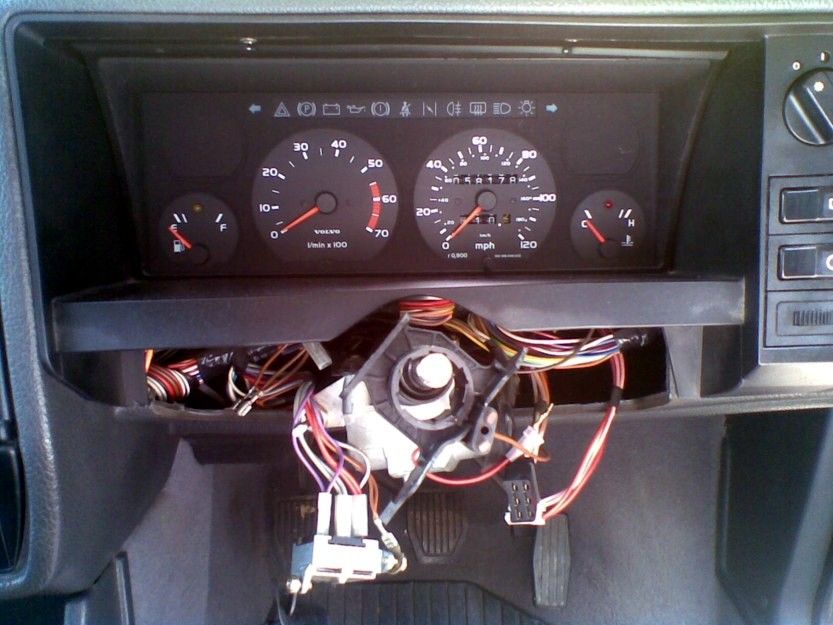
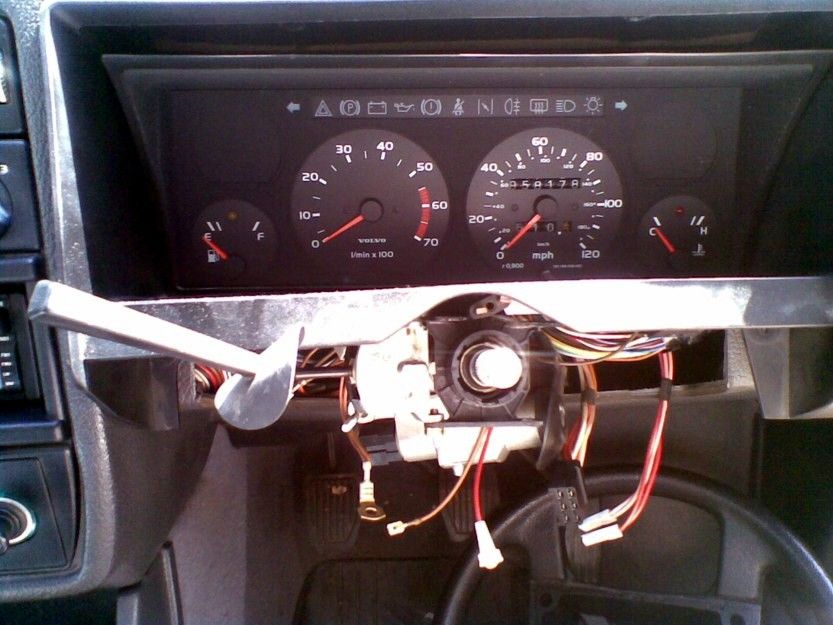
The weekend right at the very end of June 2013 was spent sorting out the broken mounting for the steering coloumn switches (wipers and indicators, etc). The old one was removed and one that I had repaired with Araldite (the godess of glue) a few years ago was slotted into place and the switches were fitted back onto it. The radio was decoded (for my own reference its 0347).

I'm going to have a go at changing the passenger side electric window motor again because it clearly judders too much when in use so I think a cleaned-up second hand jobbie will be better. Meanwhile, the Summer sunshine is picking up quite well.
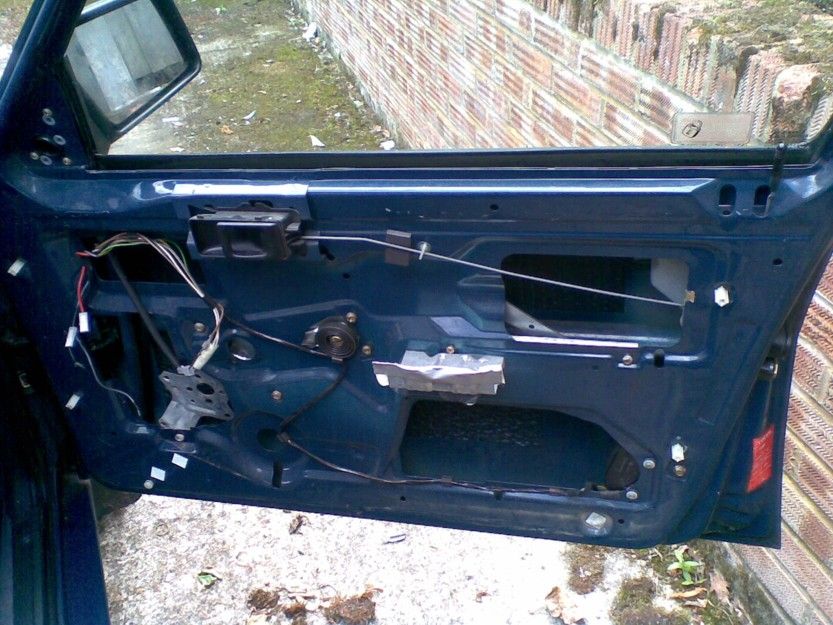
Its early July 2013 and the passenger side front door has been reassembled with a cleaned-out electric window motor from the original Blue Bess which works more quietly than the original one.
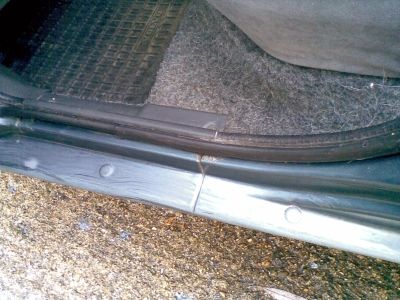
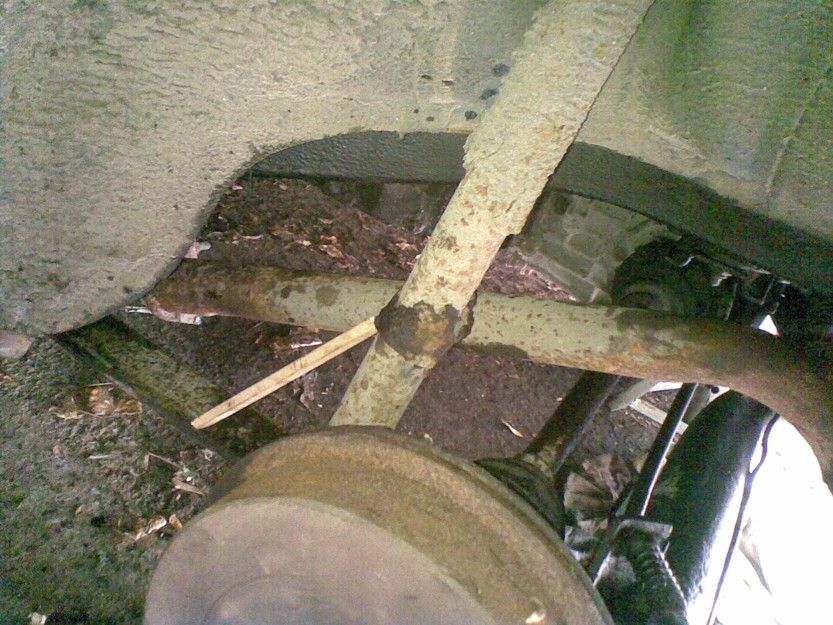
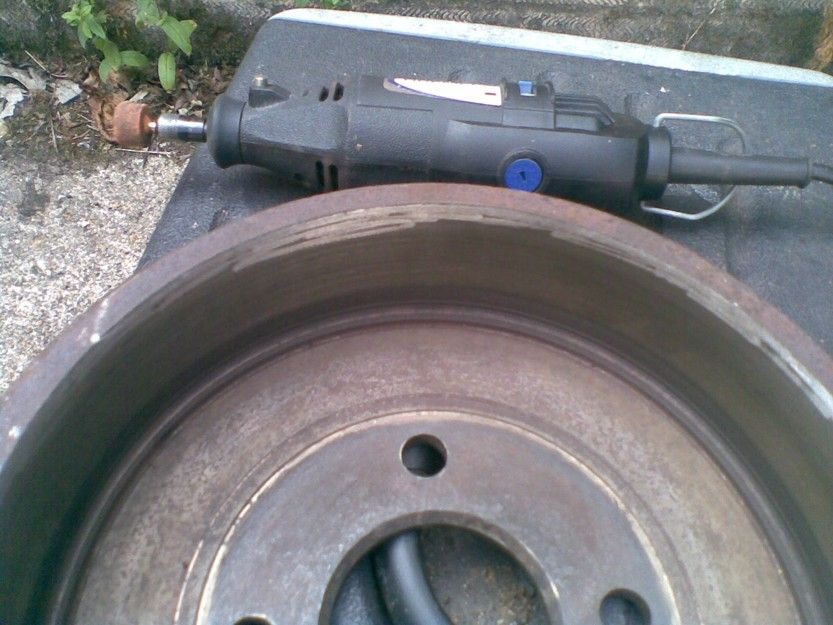
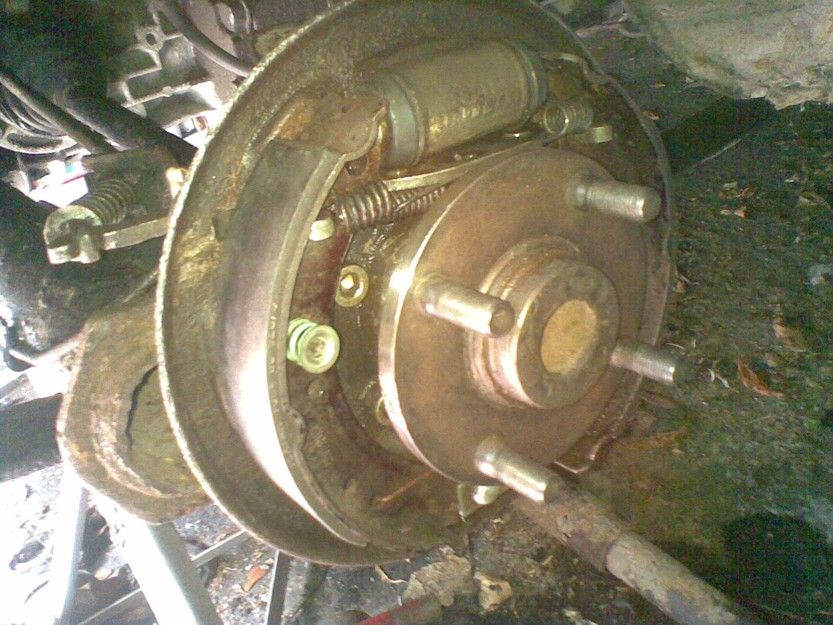
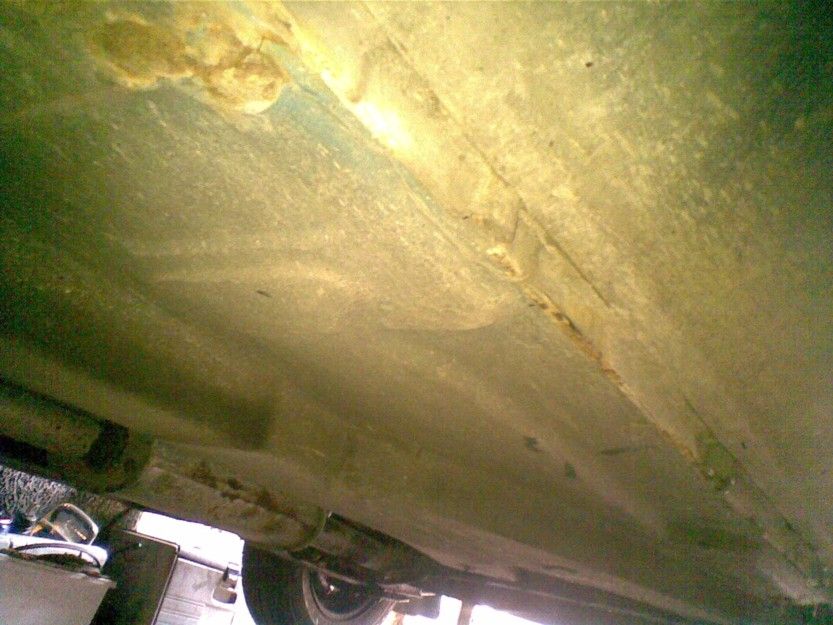
This just about wraps-up the work on the interior and so efforts move to the rear brakes which need some semi-major work on freeing off the drums, cleaning them out, greasing the back-plates and subsequent reassembly. This has been done for the driver's side rear wheel. There's not too much rust under the car in this area, although the rear shock absorbers look a bit dodgy and should be replaced.
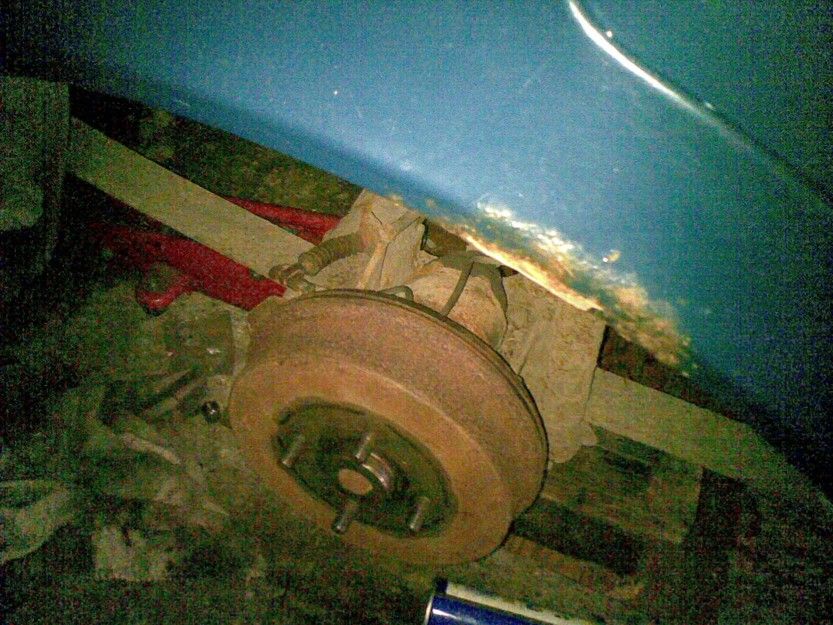
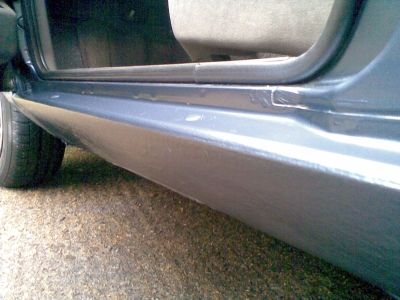
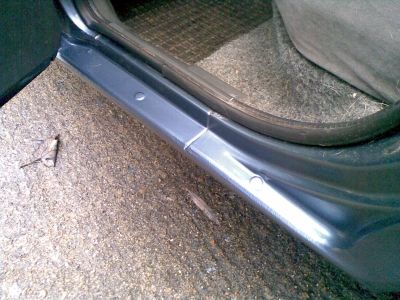
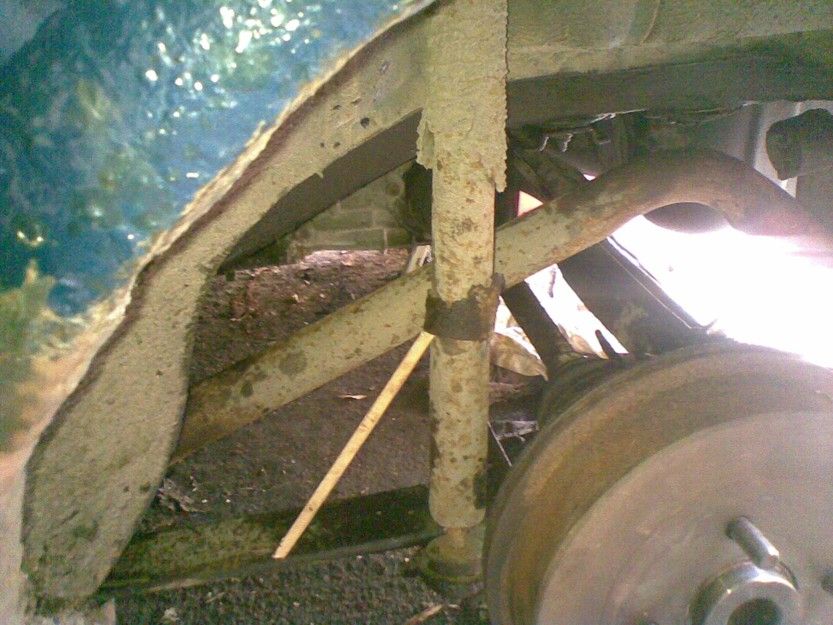
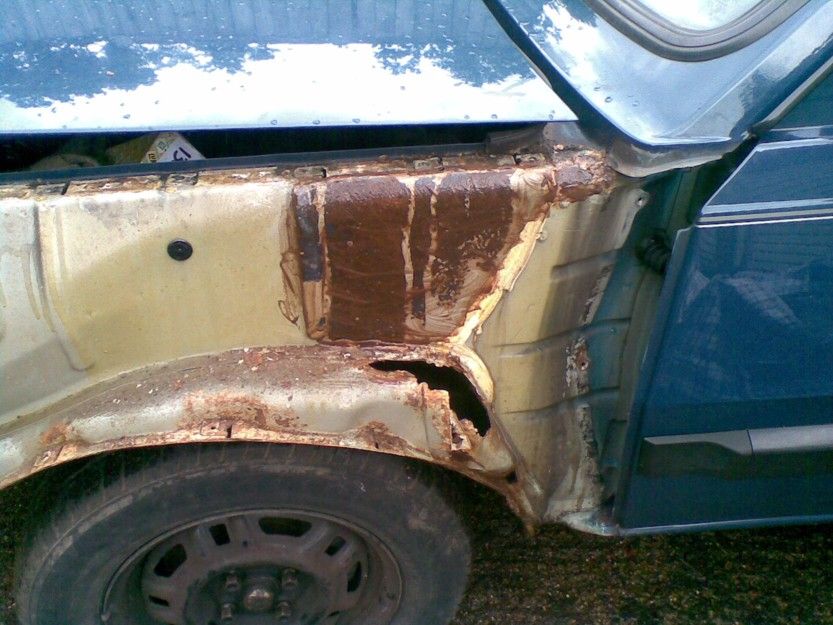
The left-hand piccy serves to demonstrate some of the rust around the wheel arches but its never as bad as it looks, honest.
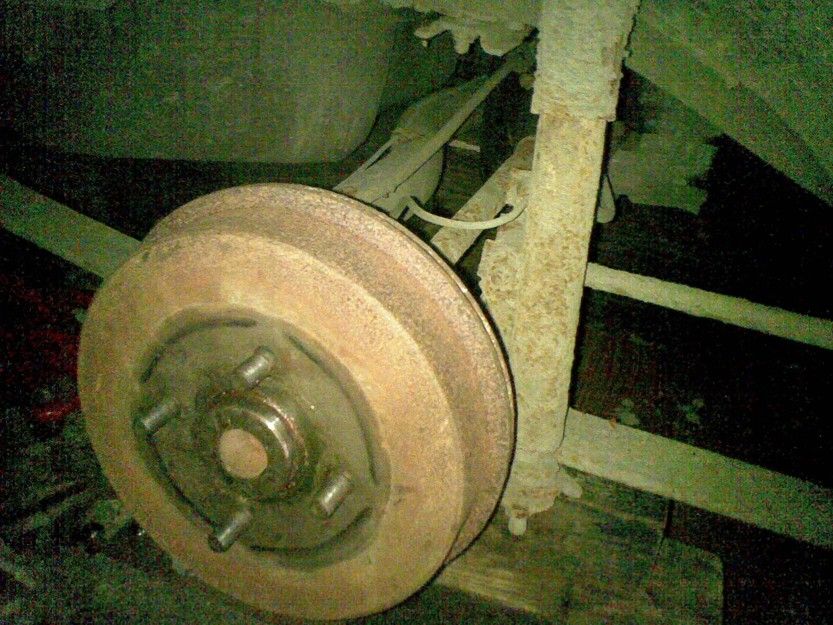
The weekend around the middle of July 2013 has seen the car turned around which established that the brakes are no longer binding. Nevertheless the rear of the car was jacked-up onto axle stands and the passenger side rear brakes cleaned out.
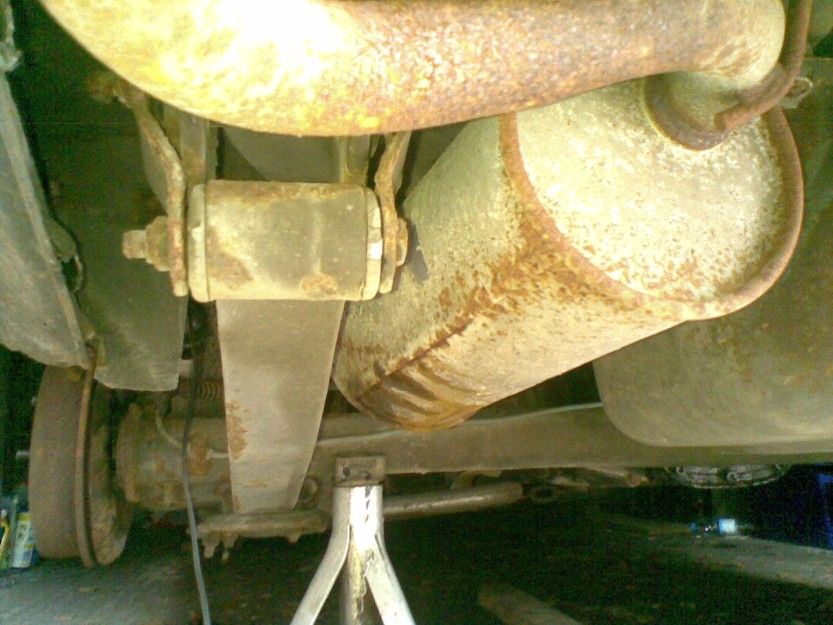
A bit of a look around the underside at the rear of the car shows some light rust here and there with the exhaust pipe probably being on its last legs, but I will leave it for the time being. The brake pipes look pretty OK - all of which is not bad given that this car is from a hard place up north, Hull!

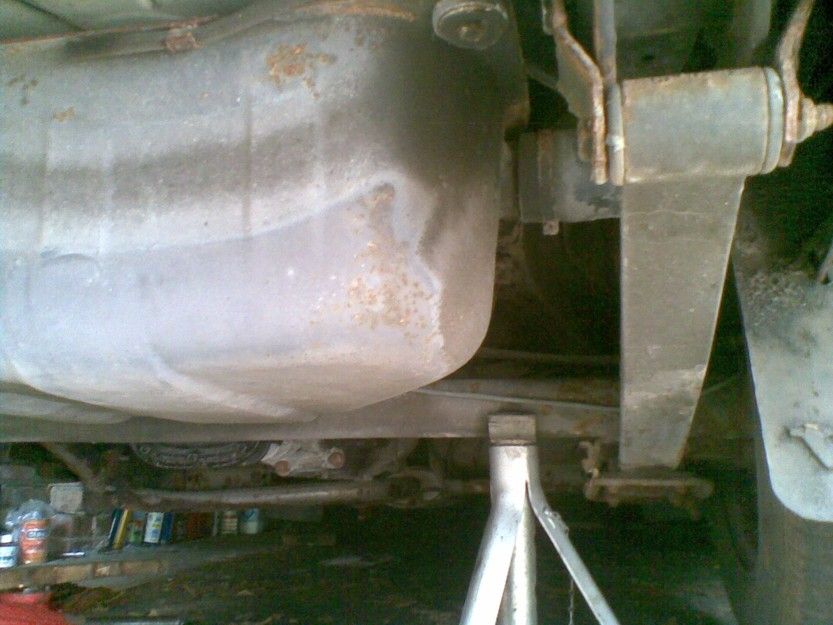
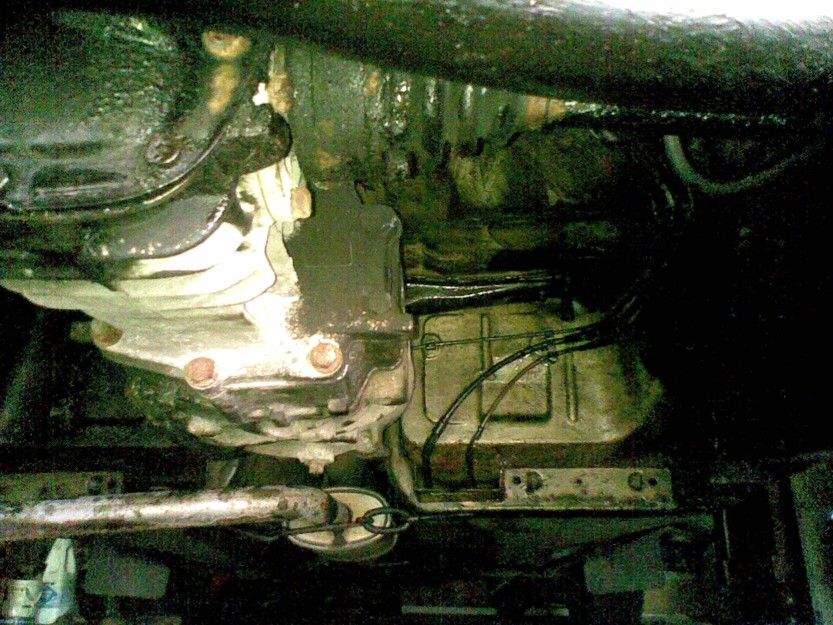
Anyhow, the rear underside is given a dose of waxoyl which makes it all look a bit slippery and greasy but hopefully it will help keep the tin worm at bay for a bit. The differential oil has also been topped up, too, and the cover plate bolts re-tightened to try to stop a slight leak.

Must get some new O-rings for the exhaust pipe! Indeed, this has been done.
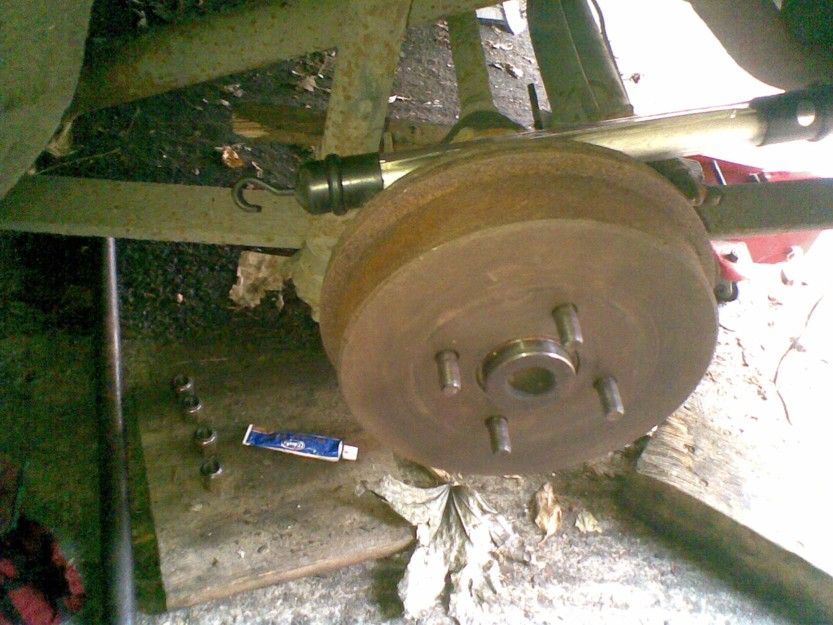
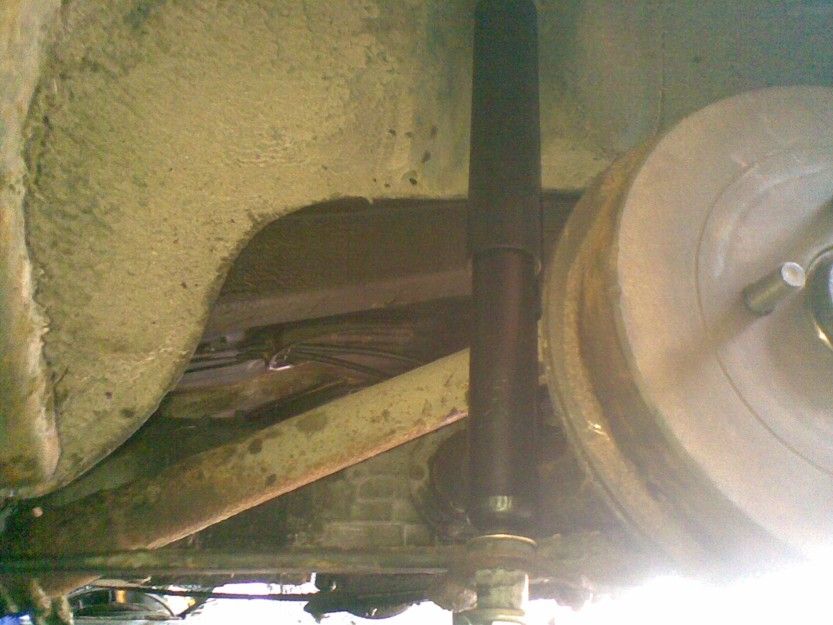
We soldier on into late July 2013 and the rear shock absorbers are almost removed, bar sawing away at the old rubber bushes. The new shocks arrive and a couple of nyloc nuts (of the right thread!) are sourced for these. The gearbox filler plug has been removed and the gearbox found to contain plenty of oil which is good news and things will be left as they are in this area (or volume) bar the filler plug which was majorly knackered upon its removal with an Irwin type of bolt-gripper! However, a new plug has been sourced from Skandix!
The weekends up to the end of July 2013 and early Aug have seen the new rear shock absorbers fitted and torqued up.
The gear box filler plug has been replaced and a general look-around underneath the rear shows most things to be OK.
Efforts to adjust the handbrake showed that one of the rear wheels (offside) was binding still so more effort will be required before the car is mobile again. I am thinking that it might be a ridge in the drum so I will try to smooth it off with a Dremel, asap and see.
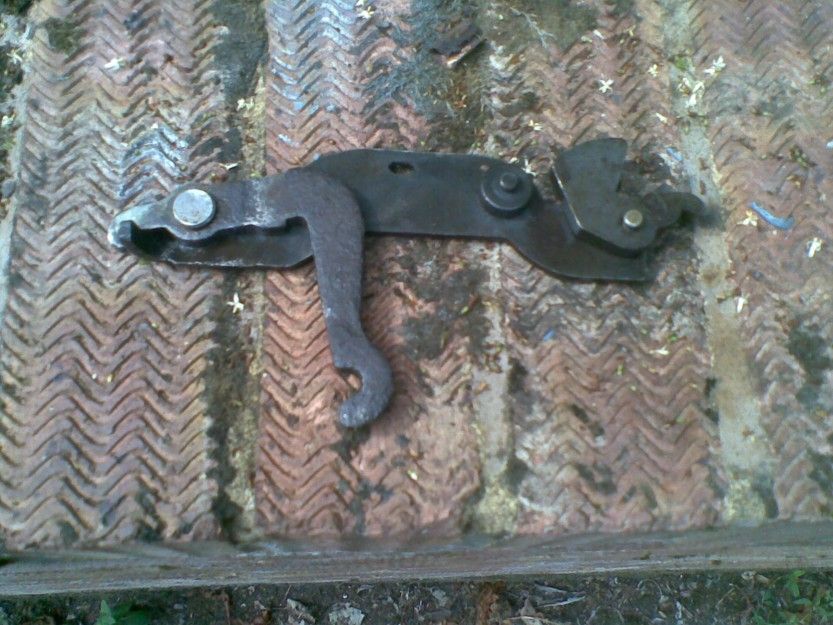
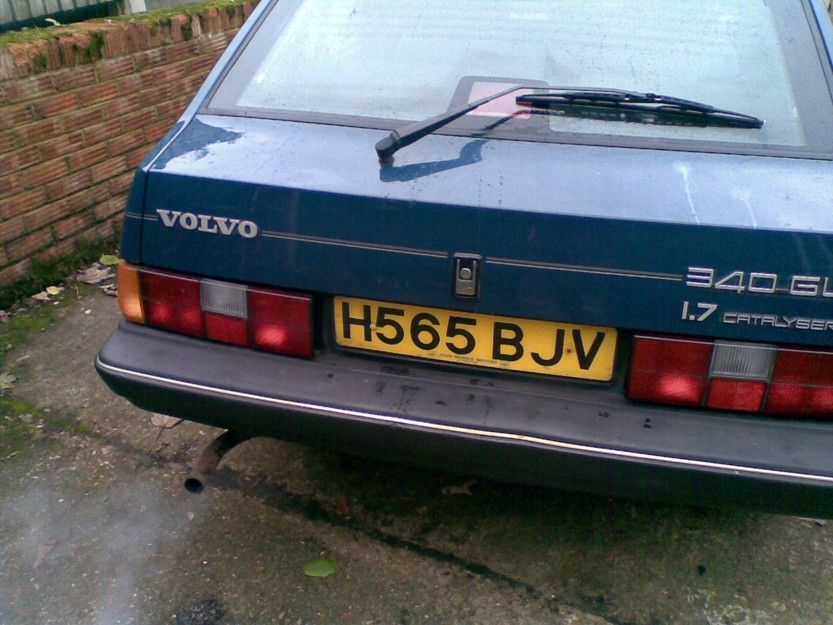
Inspired by the registration plate, I finally commit myself to calling this motor Blue Jess after many strenuous and rigorous efforts to decide on a decent and respectable name. Indeed, lively works are in progress to resolve the irremediable rear brake which jams and refuses to let go. Use of a Dremel to remove the small ridge that had developed on the outer rim did not lead to any satisfaction or indeed resolution of the problem. A closer look at the said brake and a bit of dismantling shows that that there is a lever type of mechanism behind the shoes which appears to have jammed so this issuette will have to be tackled asap.

The lever type-of-thing that was sticking was eventually hammered back into a flexible state and removed to allow a generous amount of oil and copper-grease to be applied. Everything was then re-assembled back on the car and it seems to be working fine now, so the handbrake was finally adjusted.
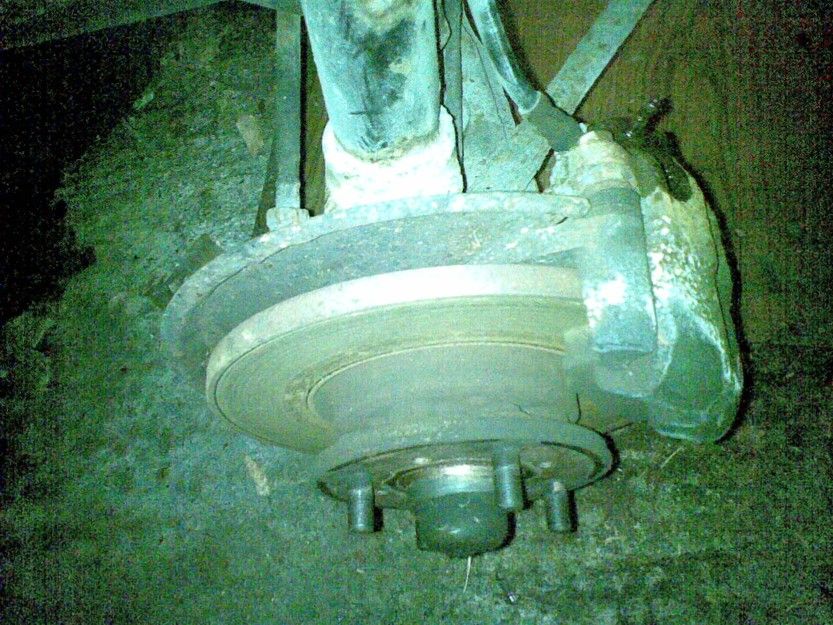
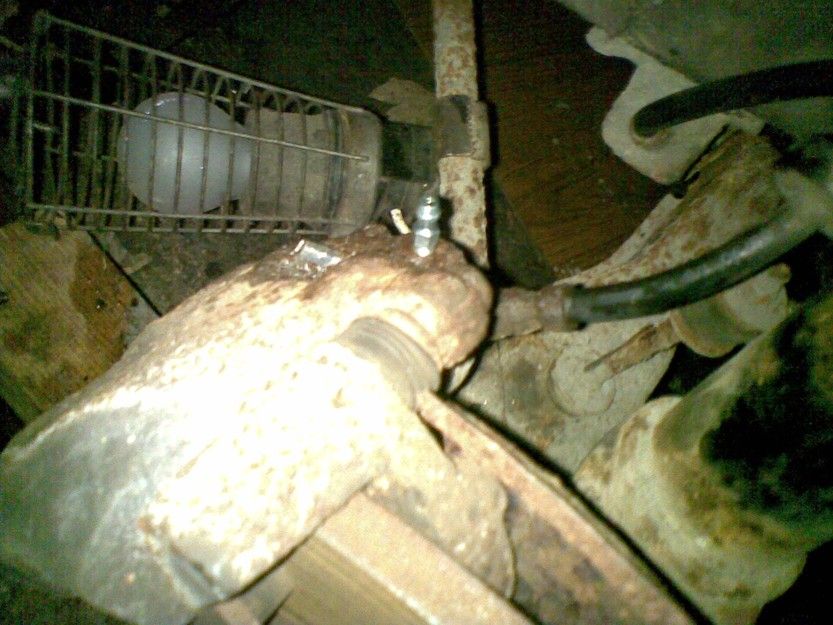
However, during the above efforts to free-up the rear brake mechanism, a lot of brake fluid leaked out of the system and so the brakes will have to be bled through. To try and do this all in one go, the front of the car was also raised up on blocks and efforts were made to remove the front bleed nipples, which is where, inevitably, things have stalled slightly due to difficulties in removing said items from the callipers. I am desperate to do it without breaking them.
Anyhow, what is clear is that the sills of the car are not too bad rust-wise, but there is a fair amount of surface rust on the suspension components which will have to be wire-brushed off and painted with waxoyl, while the efforts to remove the bleed nipples have stalled somewhat, although they have been given plenty of penetrating oil and a bash or two with a hammer to shake them up a bit.
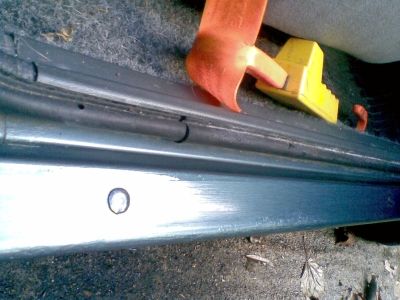
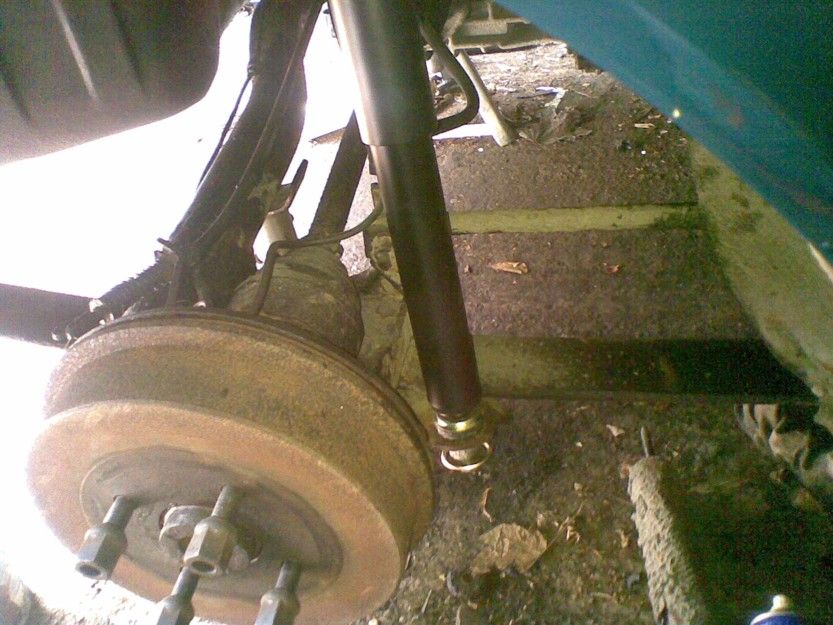
Work resumes on the brake bleed nipples by procurement of a set of small, long-reach sockets which allows one of the nipples to be removed. However the other refuses to budge and has to be sawn-off at the top and its hexagonal part filed back to give it a neat cross-section. Hammering on a smaller socket as tightly as possible finally allows it to be removed so that two new nipples can now be fitted, proud and erect, in their rightful places, as shown for the off-side front. This finally allows the whole braking system to be bled with new fluid.
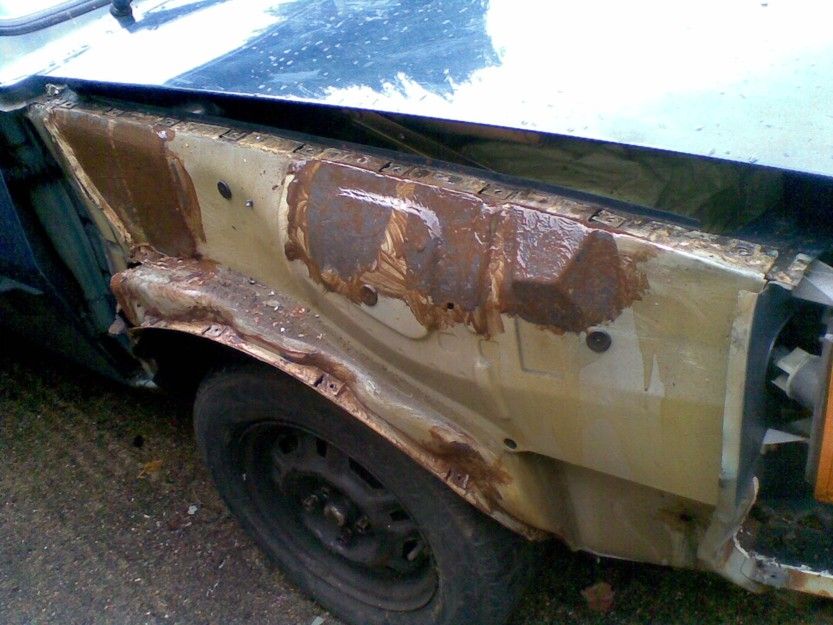
Towards the end of August 2013 efforts are made to paint up the middle section of the underside and the front suspension components with a mixtures of waxoyl and black underseal which seems to go OK, apart from the fact that it shows up some scary rust under both of the front wheel arches.
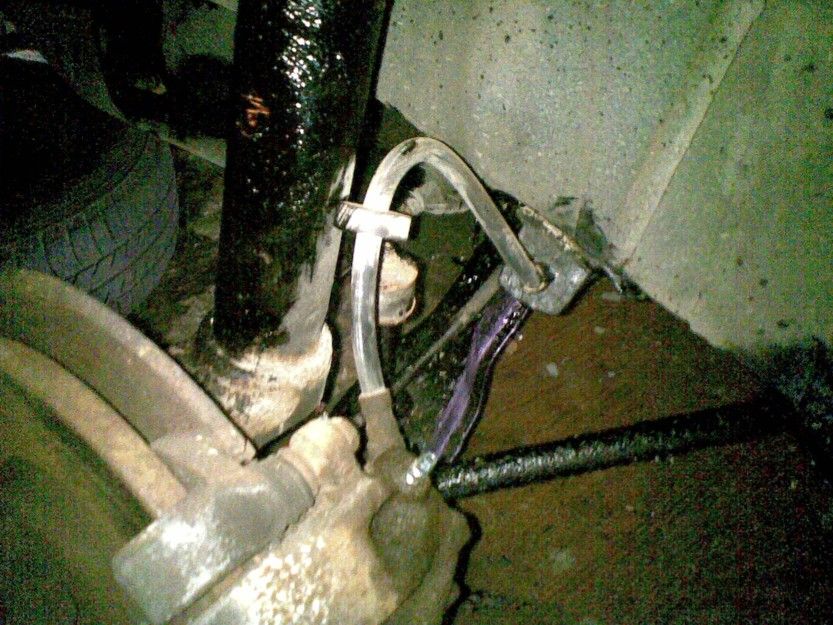
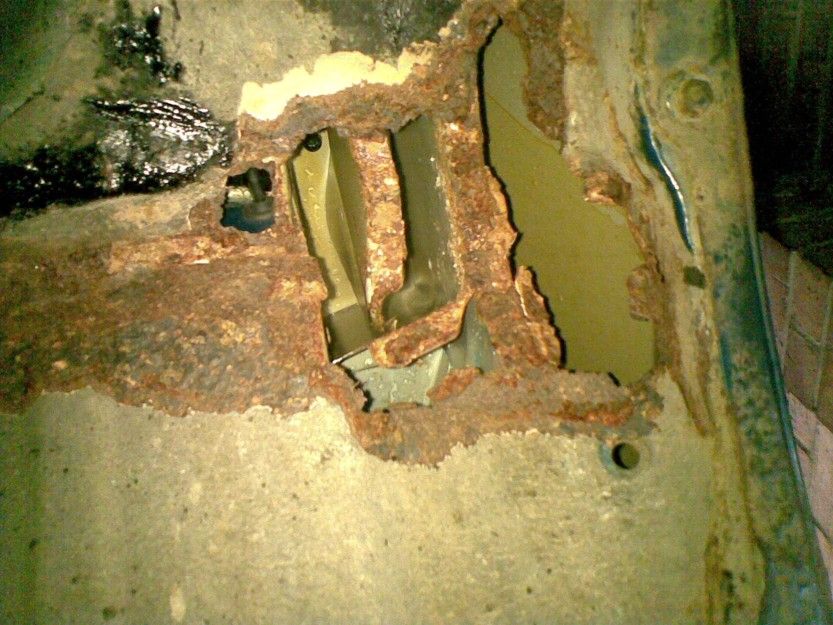

This rust seems to go right through to the under-wing area and box section, as well as the bonnet and bulkhead. All wicked work for a welder at some stage in the future.
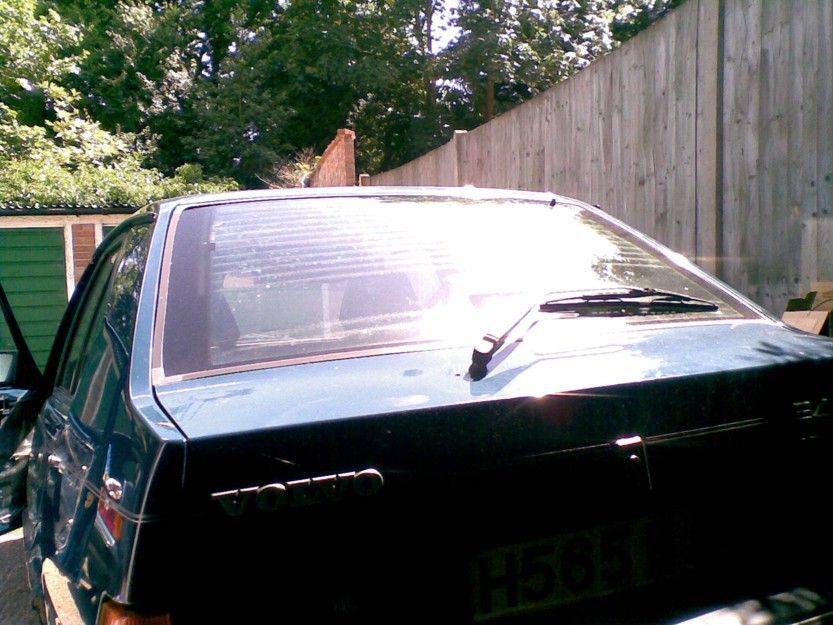
Late August / early Sept 2013 and with the majority of the easy stuff done to the underside its time to get the car back on its wheels and scope out the future plans. Remember this is a car that looks nice from some directions but not others.
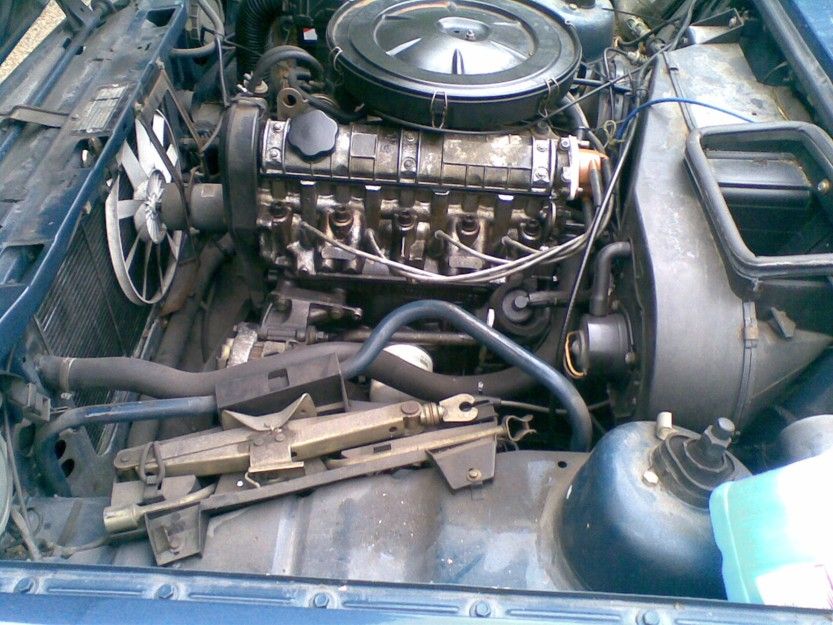
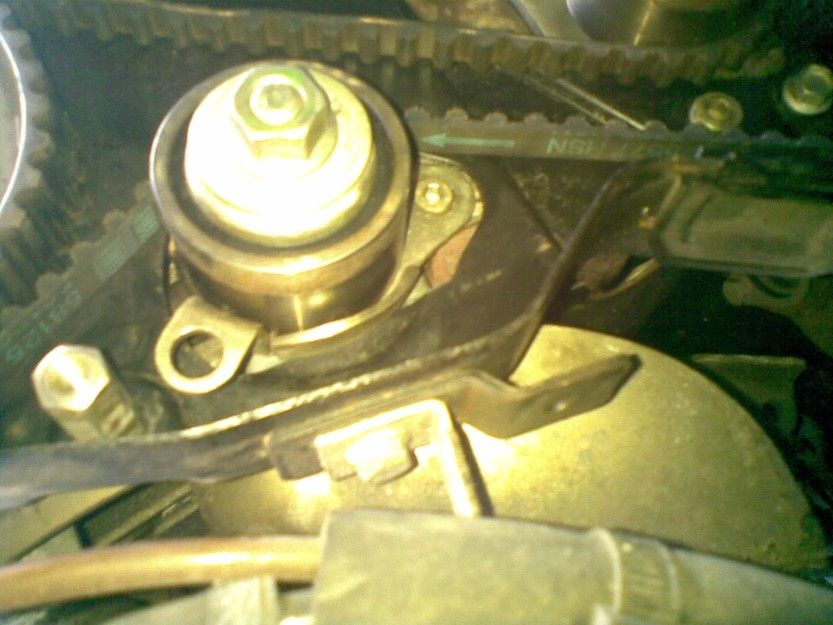
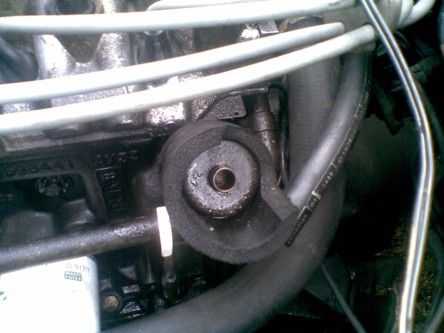
Nedless to say, it will all be sorted out one day. In the meantime its time to get on with some minimal servicing-type of jobs under the bonnet and hence the plugs are given a clean-up which revealed a fairly significant oil leak from the rocker cover gasket. A new gasket was ordered and the dizzy cap was given a clean-out after much-time was spent trying to remove it. To avoid that particular problem again, the inaccessible round-topped screws on the cap have been replaced with hexagonal-headed bolts.
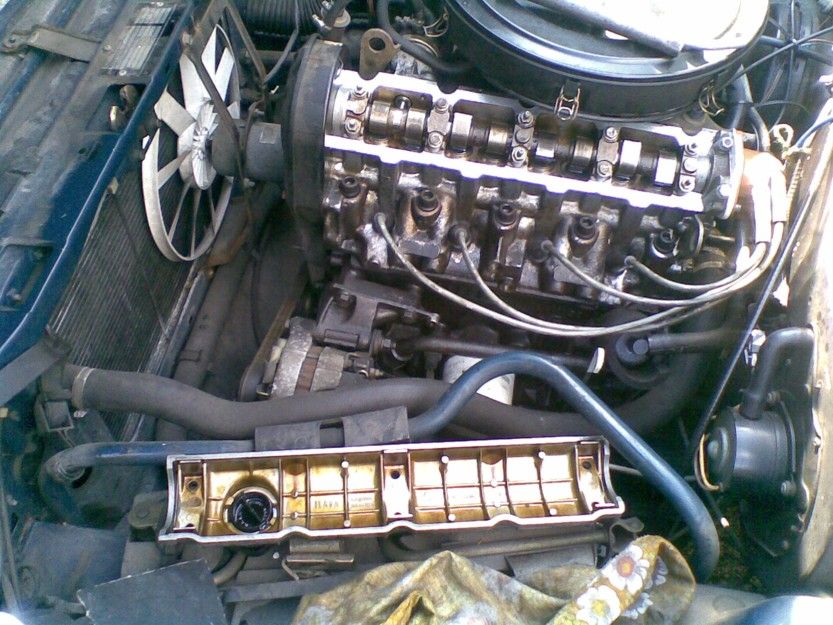
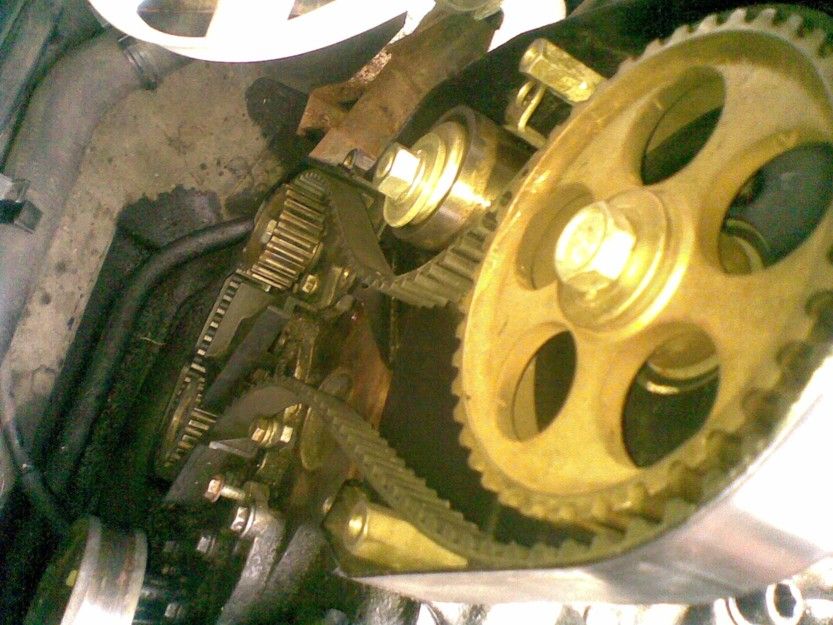
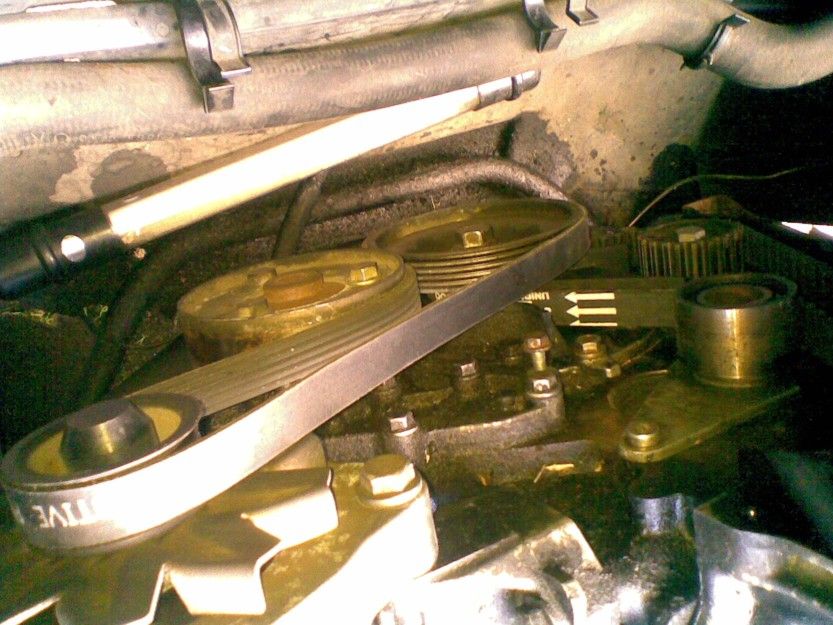
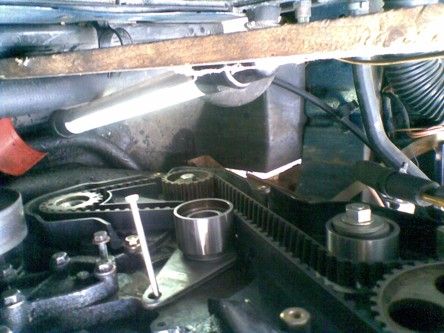
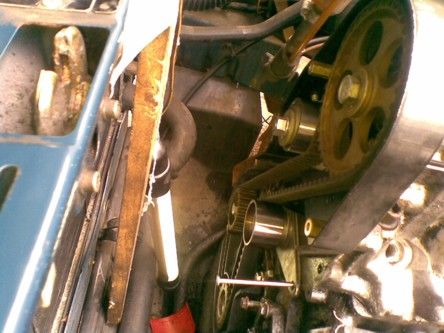
Efforts are then made to replace the cam-belt using the wicked trick of slitting the old one around the perimeter and pulling the outer part off while leaving the inner bit in place to keep the setup correct. So far so good till my foolishly bad attempts at fitting a new belt result in it being damaged so yet another new one has to be ordered. My mistake was to not loosen off the top tensioner (the one with the very big nut on it, trying to say something) while winding the new belt on by moving the car in gear. The alternator belt will also be replaced since it was pretty well cracked on the underside.
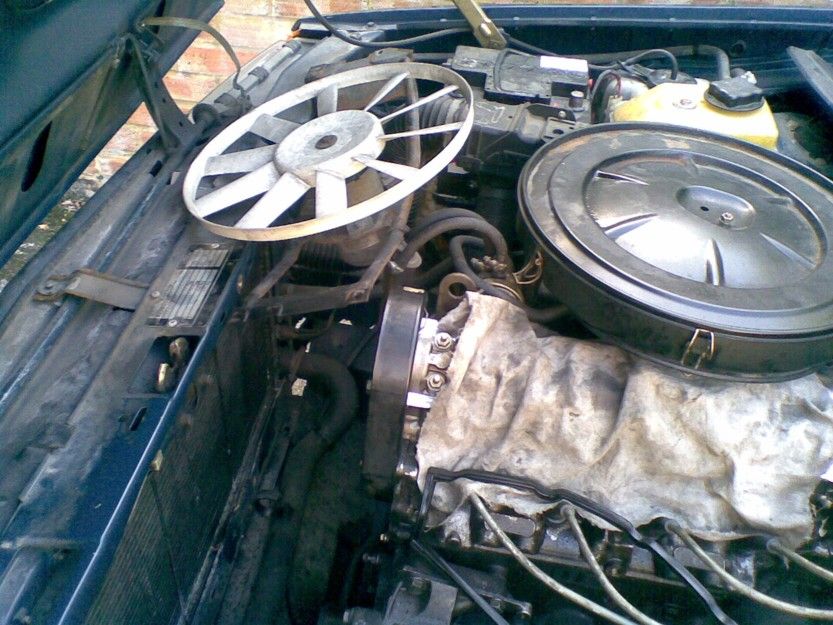
After all this, I must remember to fit the new belt with the arrow pointing the right way (as shown from the top, driver's side), when it arrives. All the hoses and the radiator look pretty good, as one might hope for a 58k car, indeed almost the same mileage as the dreadful Escort, purchased in 1988, when this whole story began (see main page).
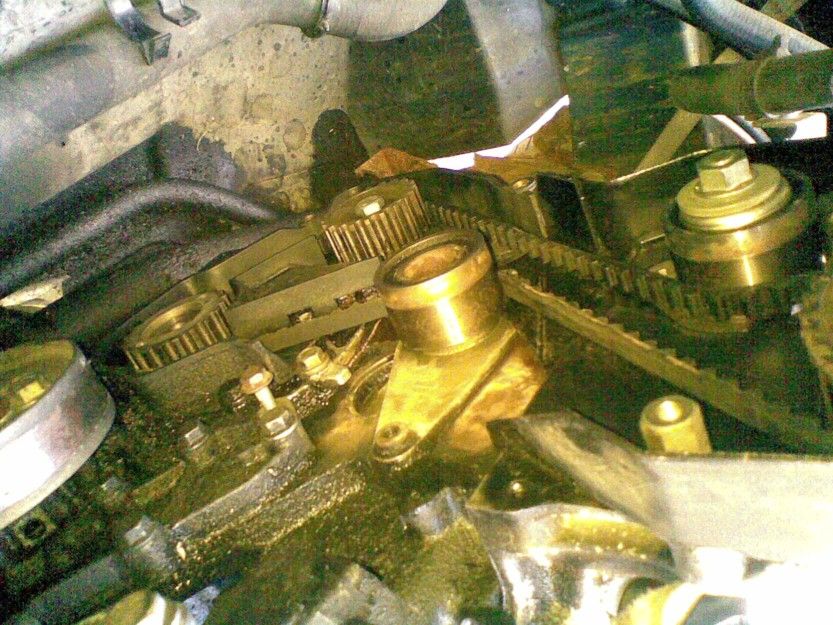
After much fiddling about with the tensioners during a few days in early Sept 2013 when my head was under a permanent storm cloud, the new belt still defies my efforts to fit it. However in mid Sept when everything is lined up as per Haynes manual - sprocket marks are pointing the right way and aligned with white marks on the belt, arrows are pointing the right way and the number one cylinder at TDC, finally the belt slips over the idler with the help of a plastic aerosal can lid, cut in half. Perhaps now we can get on with the rest of this job and put everything back together again.
Cursed are they who live in interesting times because on getting it all back together and running the engine it all sounded a bit like one of the pulleys (which I had not replaced) was graunching a bit. Hence it all had to come off again and a new pair of tensioners fitted.
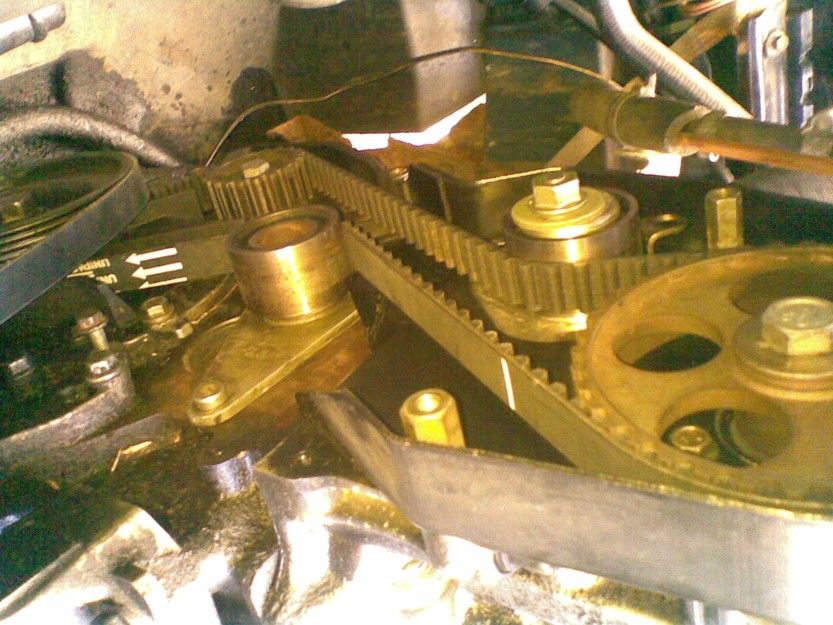
Anyhow, finally getting it all back together with new tensioners at the end of September 2013 revealed that there was only a slight reduction in the graunching sound so I convince myself that it is perfectly normal and that everything will be OK. I think it will!
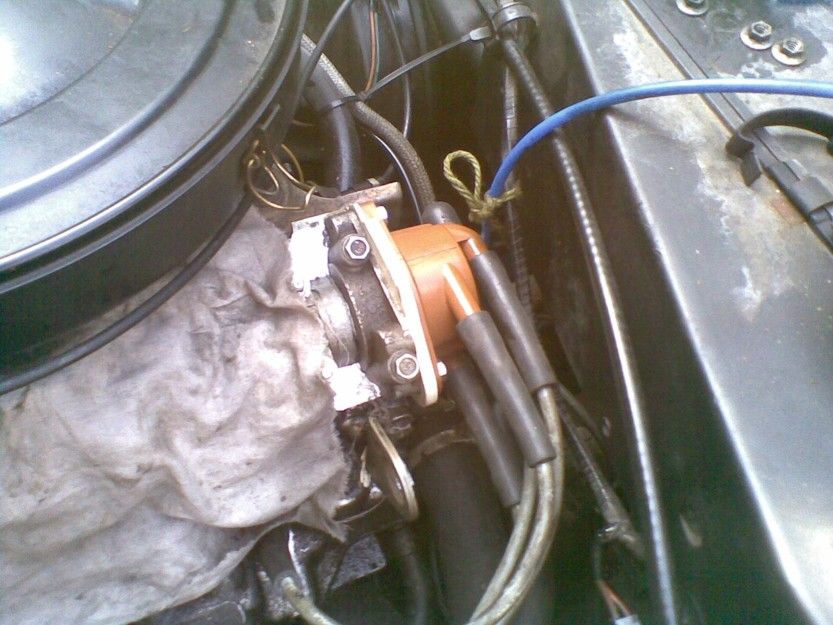
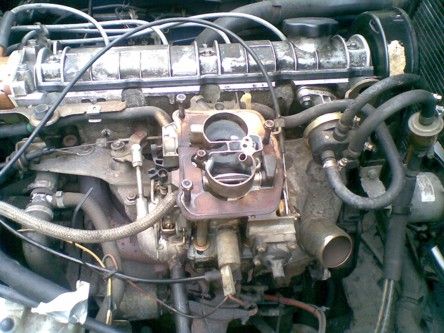
Hence, attention moves on to cleaning out the carburettor and generally re-connecting all of the vacuum hoses around the carb and dizzy correctly so that the heater does not blow vaporised engine oil into the passenger compartment.
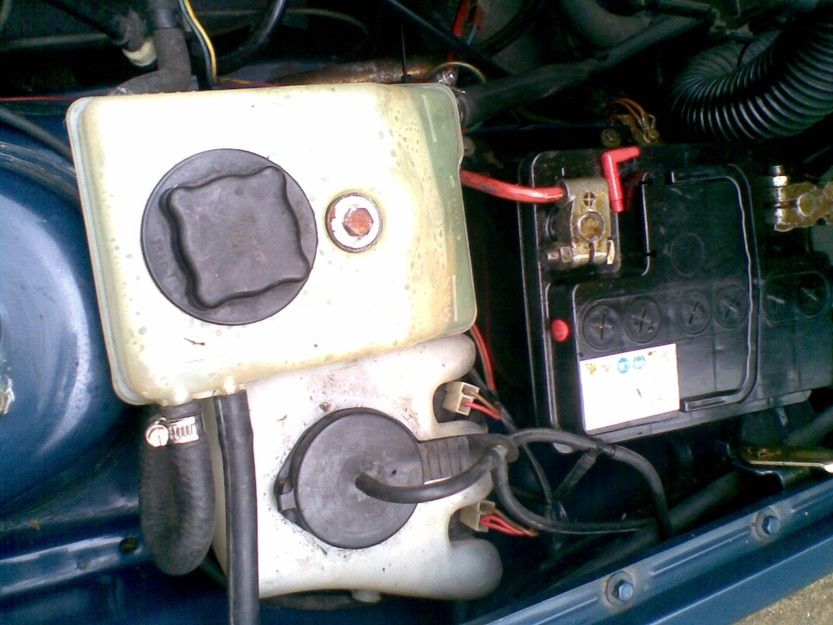
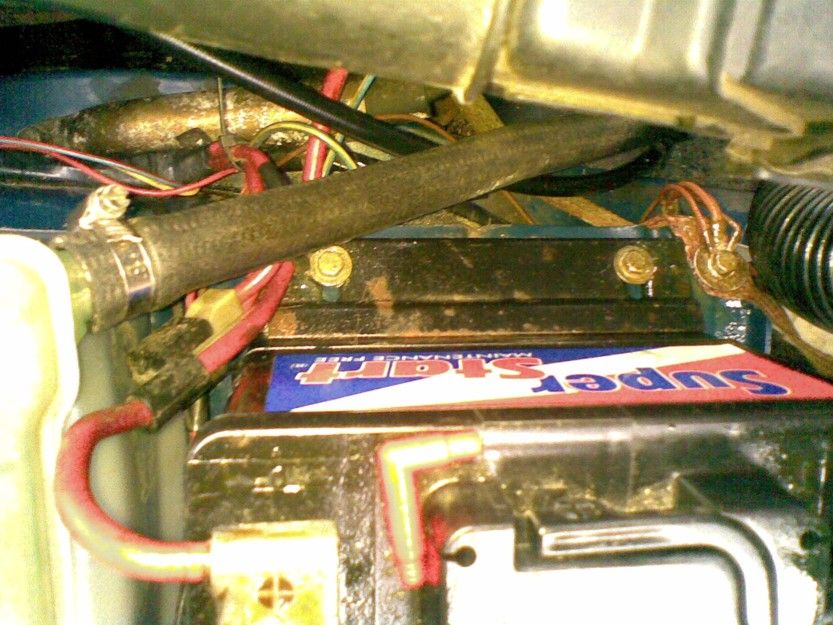
Early October 2013 and attention turns to the leaky expansion tank and associated bits and bobs around the battery compartment where there is some rust that will be removed with a few doses of pink jelly and eventually painted over.
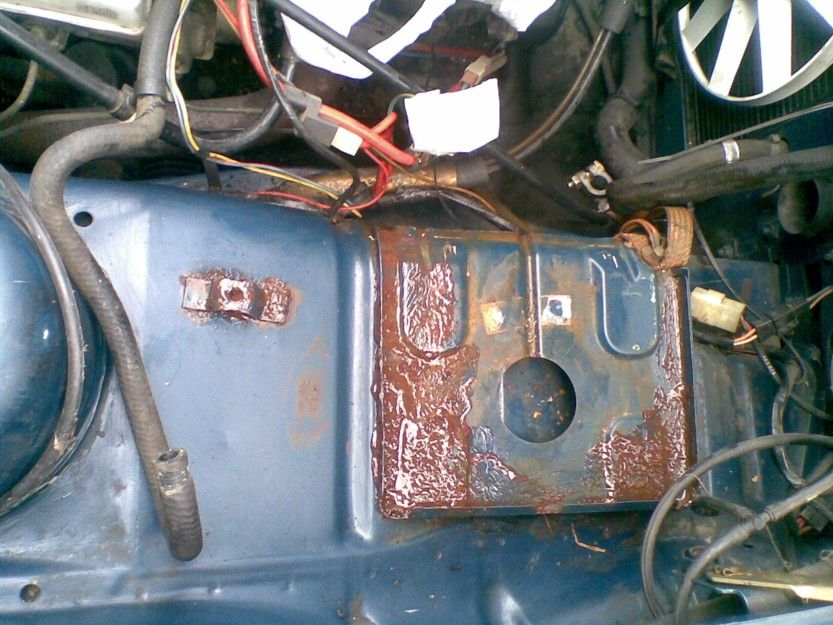
Plenty of cleaning-out work on the expansion tank and the very olefactory screen-wash tank seems to have brought them up nicely and, after a few scrapings around the battery shelf, a dose of zinc primer was brushed on. Hoping to get the right paint for this car (paint code 232-6) or a very close match. The carby was given a few more doses of spray-on cleaner, inside and out.

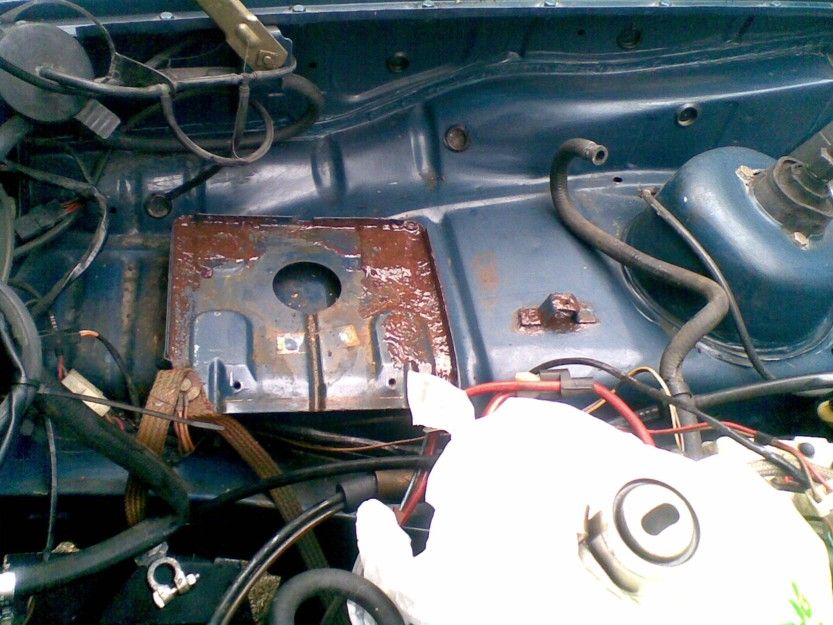
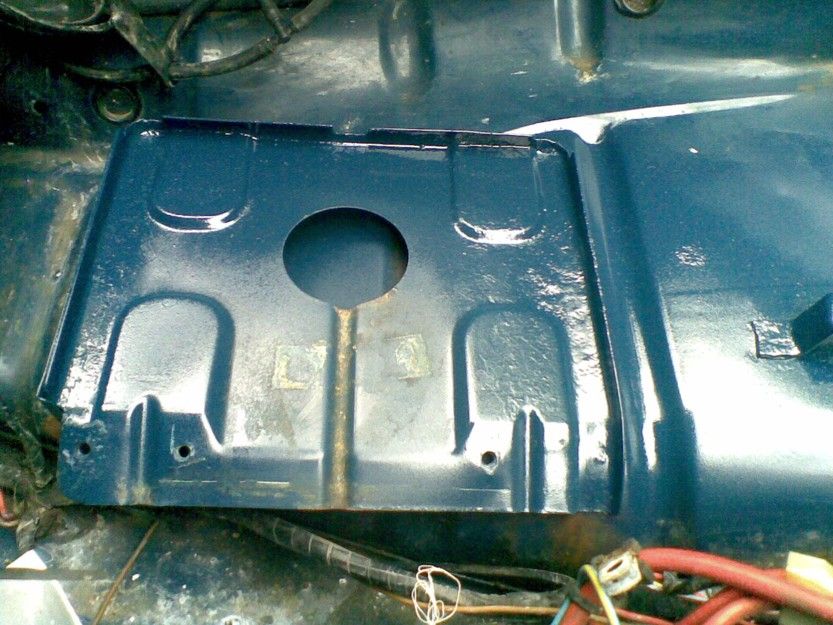
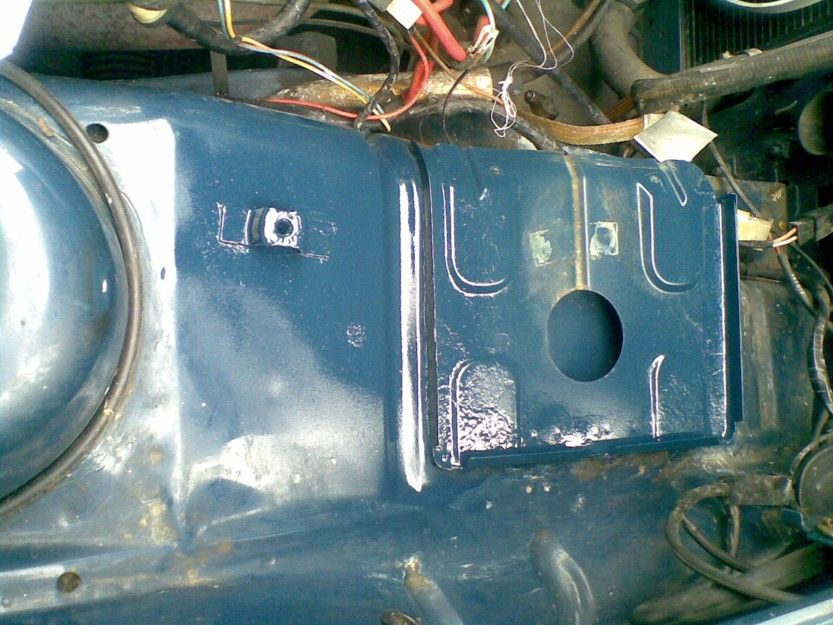
Mid-October 2013 has seen the battery tray sprayed-up reasonably sadisfactorily with a colour-matched aerosol and given a bit of a colour-cut blue-type of polish. The plastic water tanks have been cleaned-out and/or replaced, etc, so its all looking pretty groovy on the battery-side of the engine bay and everything seems to work, too.
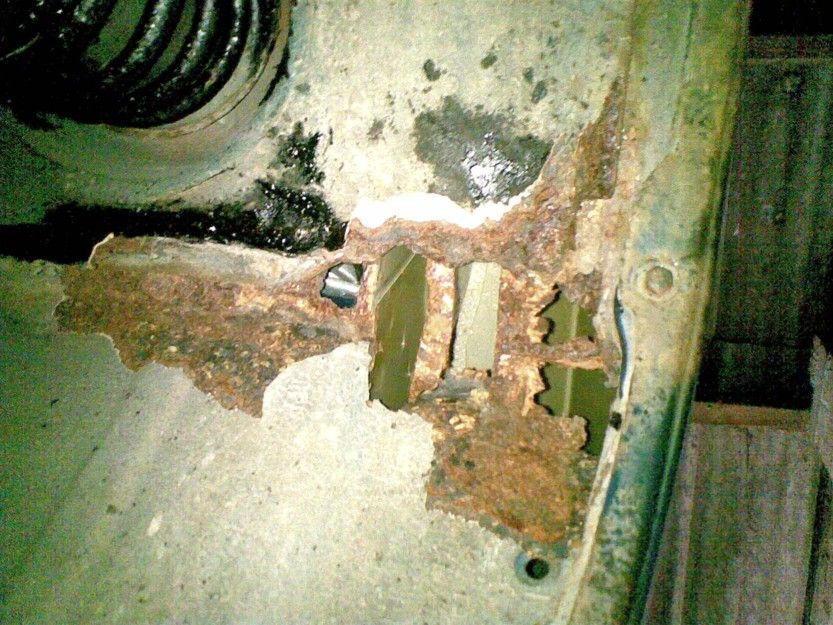
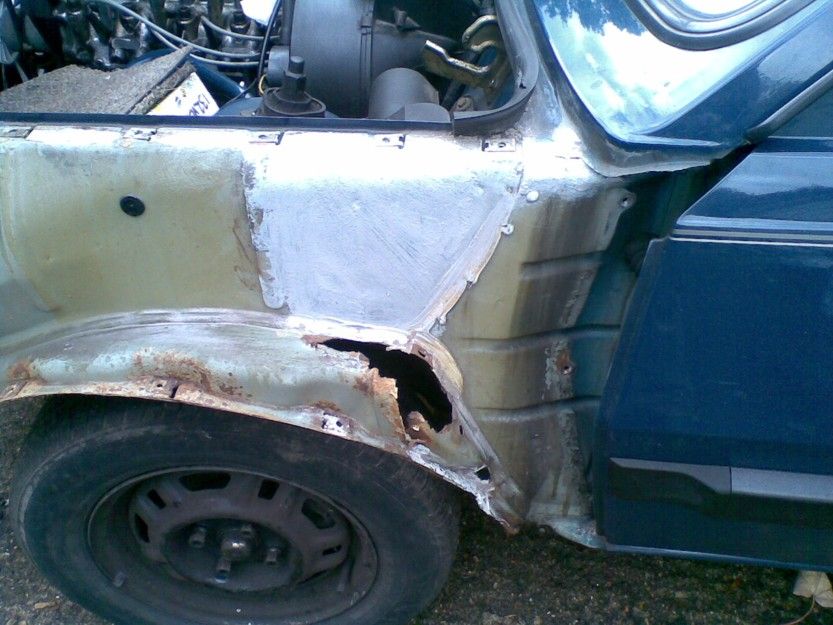
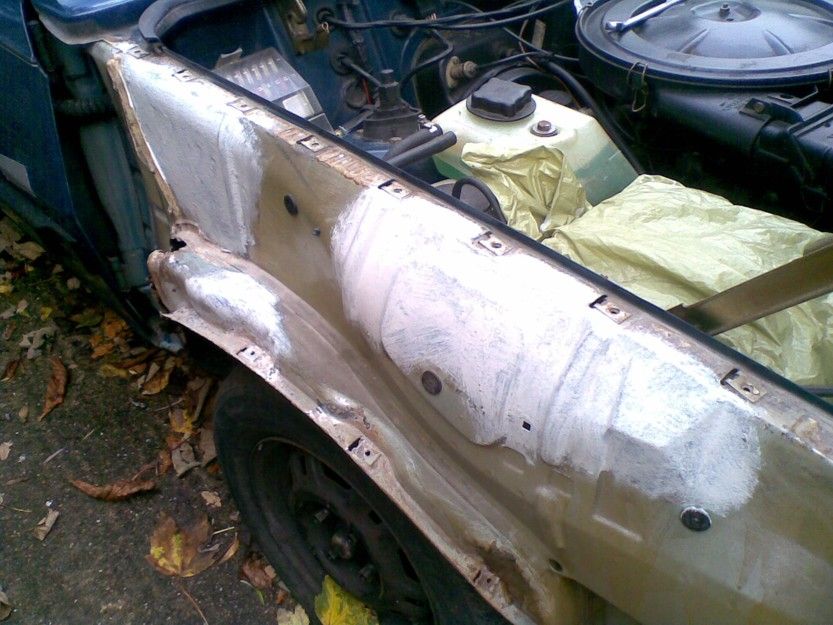
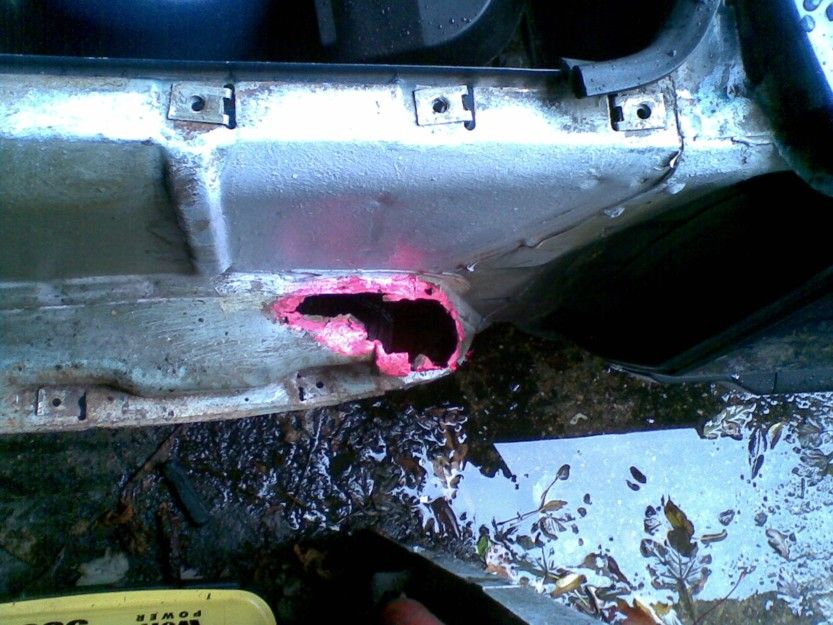
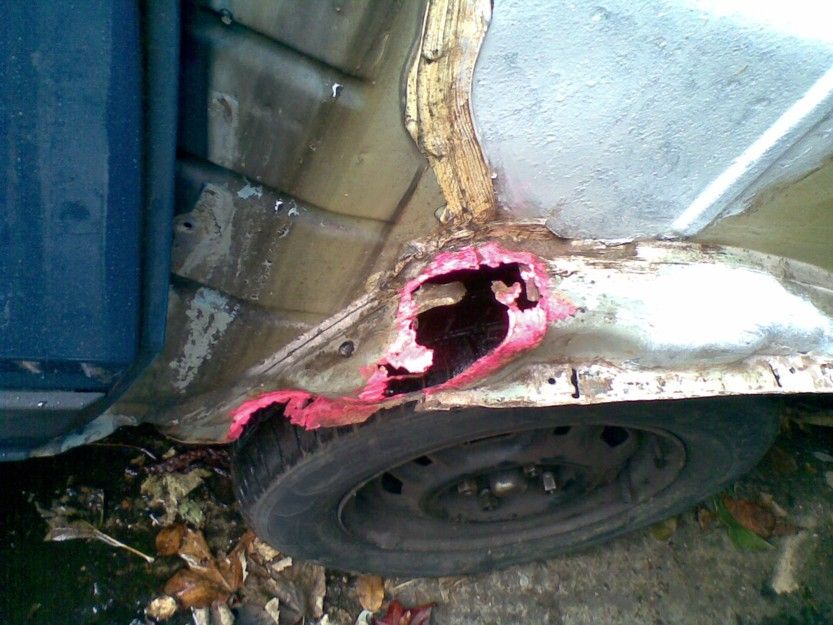
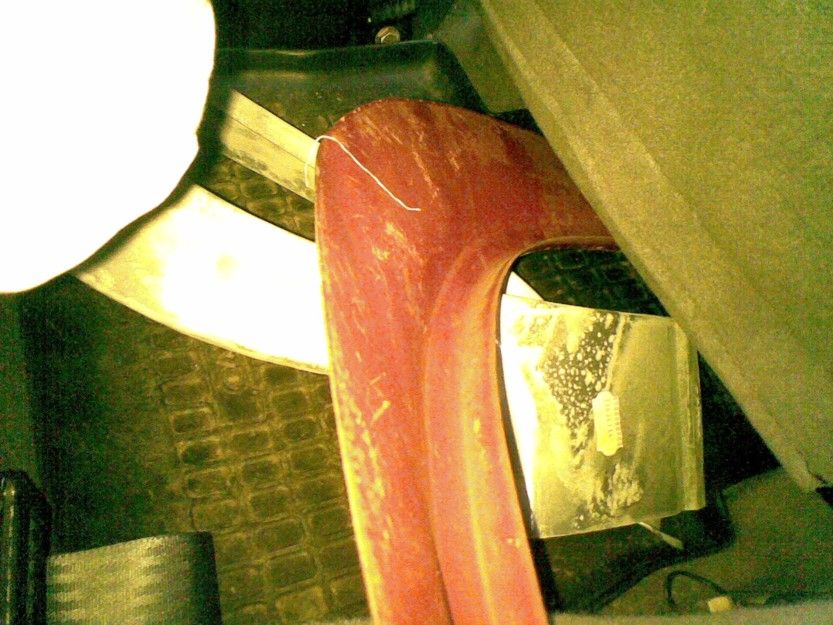
A quick update on events up to late'ish October 2013 which have seen the front wings removed, revealing a fair old dose of rust.
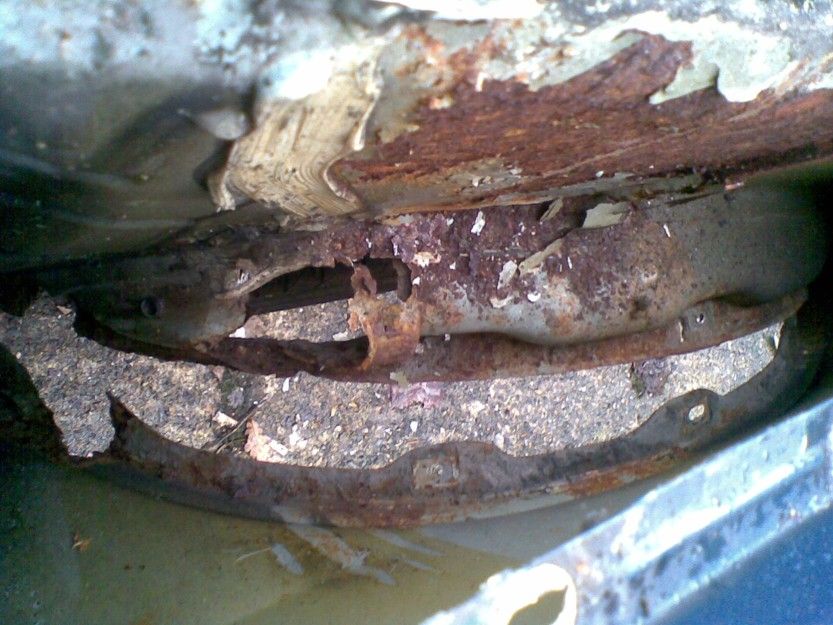

The rust on the inner wings is relatively light and has been given a dose of pink jelly to nibble away at it. Meanwhile, the wings themselves, which are pretty dodgy around the arch and lower-regions, have been taken to a welder who says they are irrepairable but if I can get some wings with decent bottoms, he will cut them off and use them to repair the ones off from my car. This might just work out since I want to keep as much of the original paint!
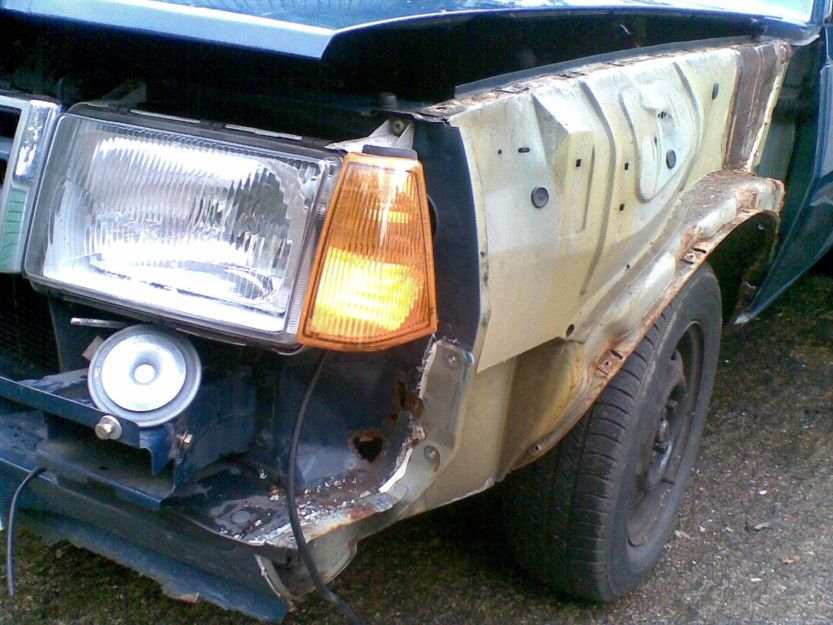
The front panel turns out to have some holes in it, too, which will need a bit of repairing on both sides.
I am cautiously optimistic that it is all relatively not too bad, although it is pretty terrible.
Late Oct 13 and a Saturday morning is spent travelling around deepest south-London to track down someone who has a decent collection of Volvo 340 wings. Eventually the place is found and it transpires the said collection resides in a railway arch. This surely is an awesome and wicked cave of parts and the bloke has even installed a wooden second-floor (which I was not allowed to see) using scaffolding poles. After much rummaging around upstairs, he produced two silver-grey wings with decent bottoms and pretty decent everything else. These will be used as donors for the wheel arch and lower sections, unless I change my mind.
The rest of my spare time that weekend is spent rubbing down and undercoating the front inner wing rust, and a start is made at removing the rear bumper.

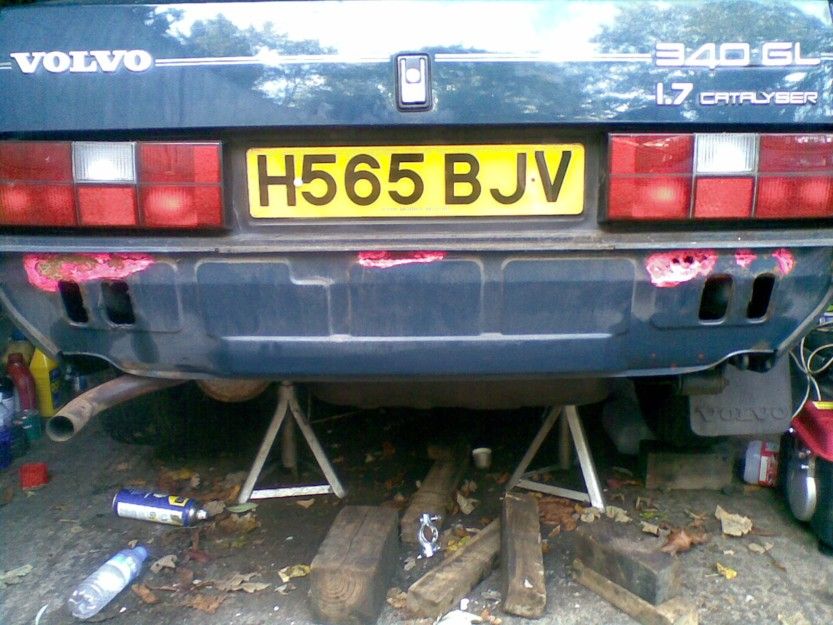
A bit of time in late Oct / early Nov 2013 is spent removing the rear bumper - as I found with Blue Bess, this particular process is quite a trial of endurance since the bolts seem have really tight-fitting threads and just turning the nut, even when it is loose, is a fairly big effort. One of them had to be Dremelled-off, but the others were not too bad.
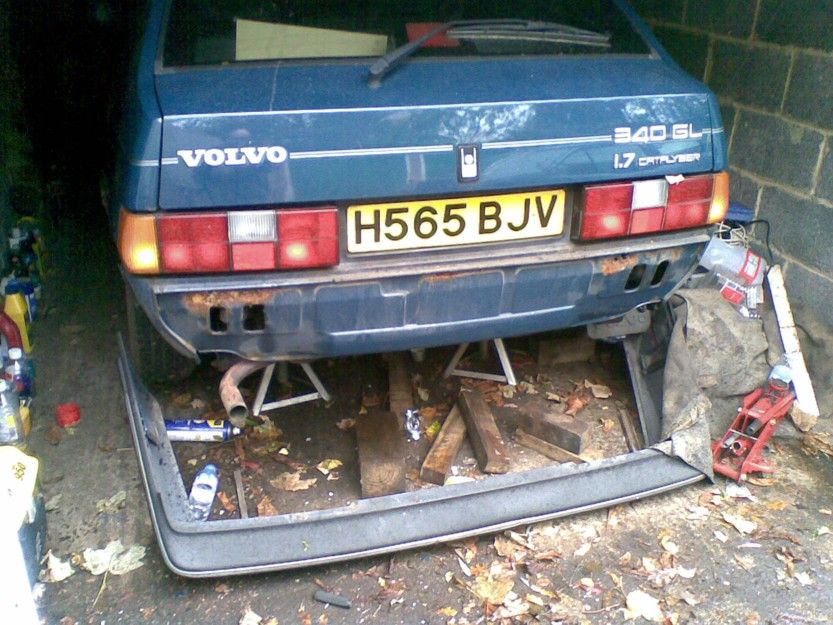
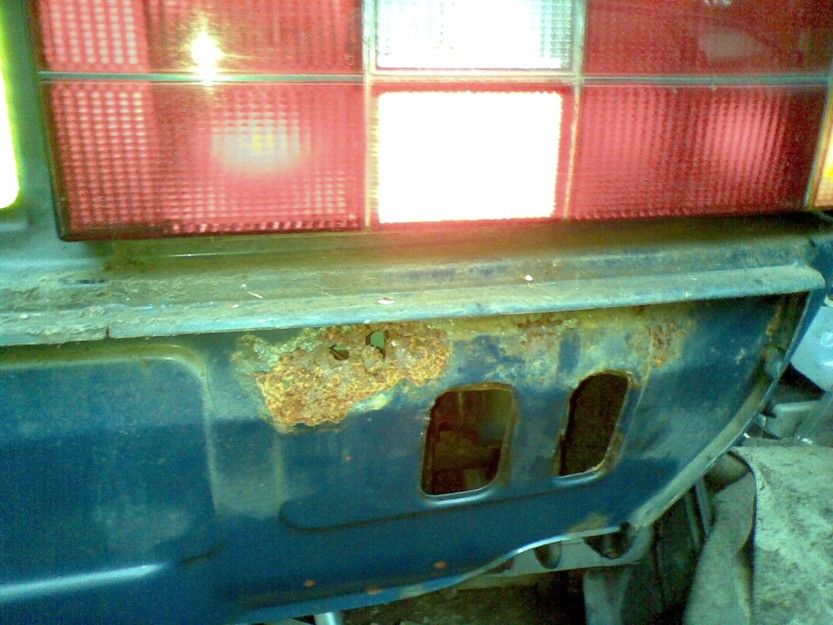
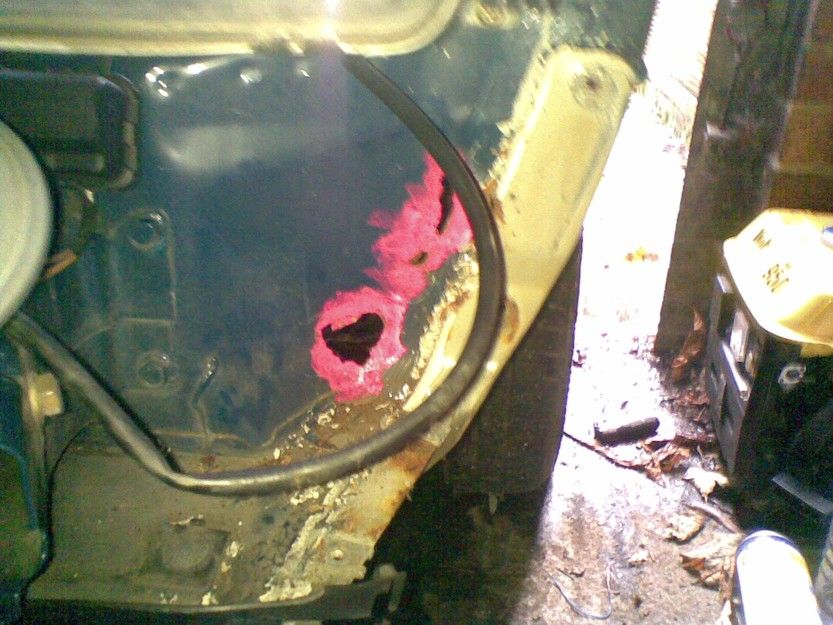
Anyhow, as can be seen this reveals that the rear valance is relatively wonky with rust which has gone right through to the side-light cavity one one side, but then again it is not too bad.
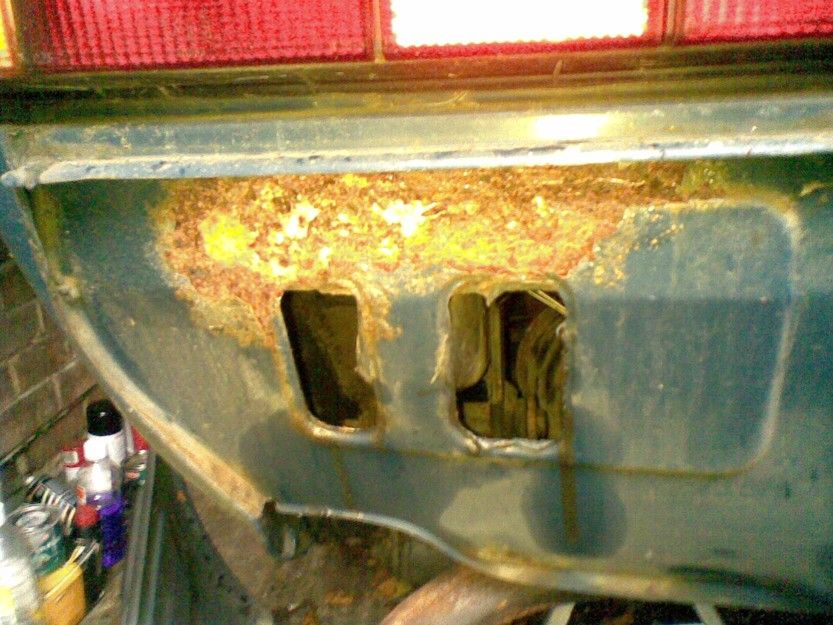
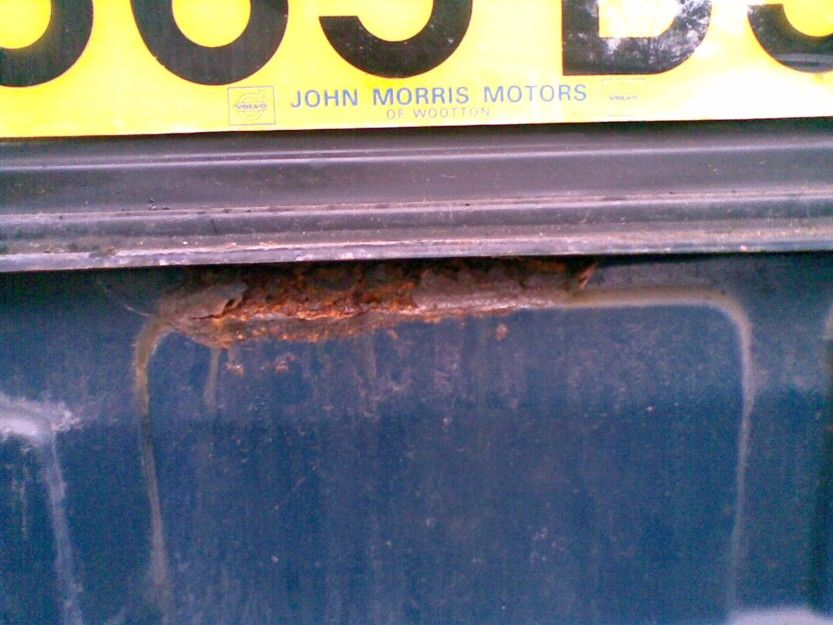
So what are we going to do? Well, how's about giving it a wire-brushing and then painting it bright pink so the welder won't miss any of it?? It'll cheer him up.
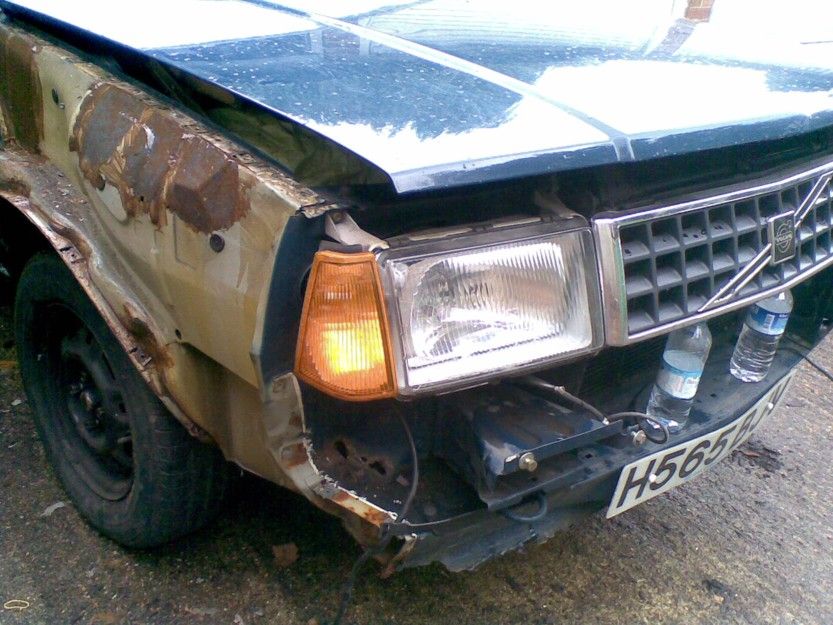
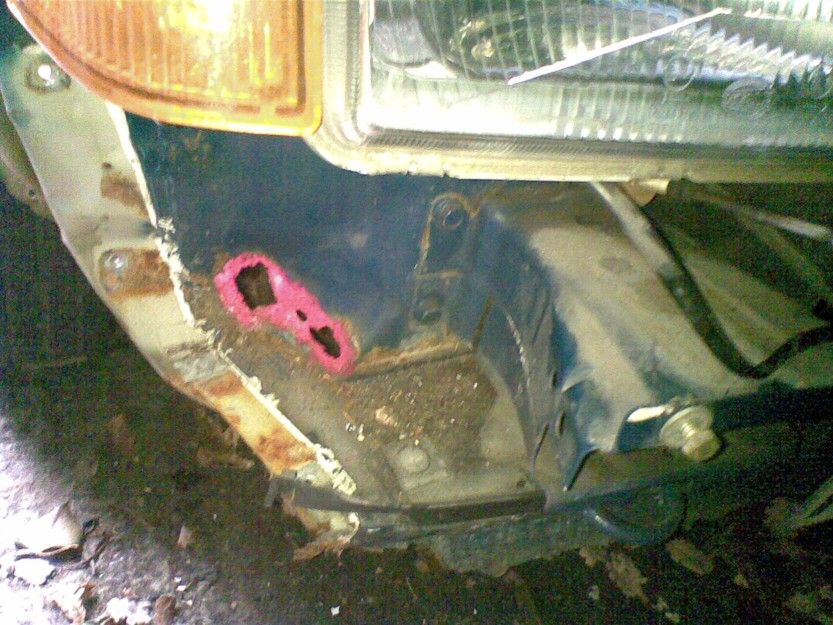
Another mid-November weekend is spent fitting the front wings back on after giving the wicked and evil rusty patches in the wheel-arches a dose of pink paint to highlight them nicely for the welder.
Finally, the front bumper was fitted again after a bit more highlighting around the front panel area.
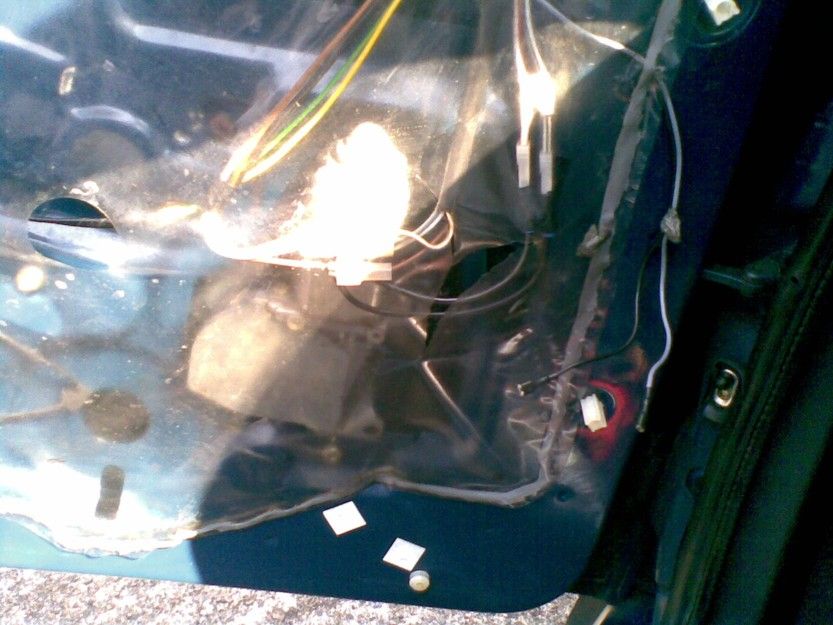
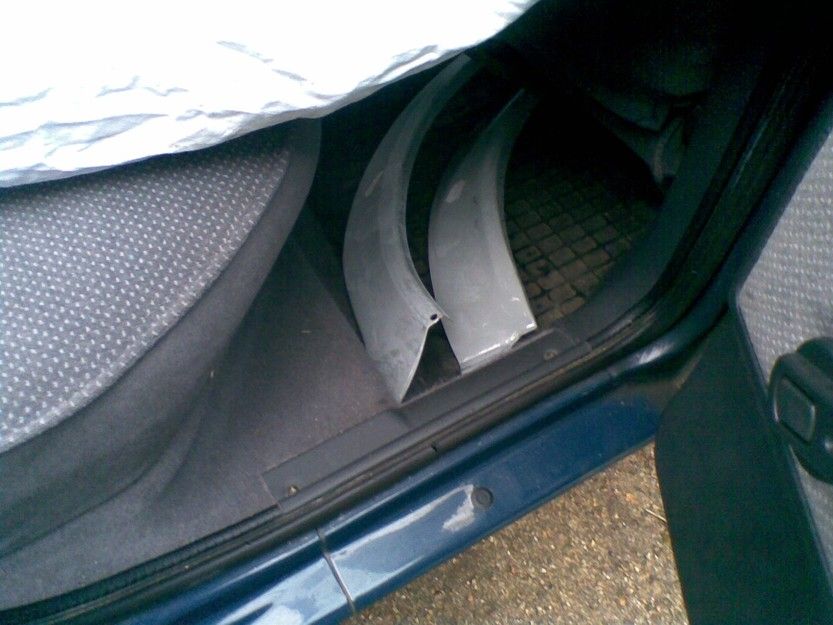
All that's left to be done is to refit the steering wheel and remove some of the interior trim close to the bulkhead so that the welder can (hopefully) repair some of the many holes in that area.
Yet another mid-November weekend is spent re-fitting the steering wheel and generally removing trim bits under the dashboard so that the welder can give it all a thorough bash around there.

As can be seen, its all clicking- and hanging-together pretty well and the engine runs relatively reliably so I am hoping the welder does not say "bin it" as so many have done before. A few repair panels were put on the back seat together with the 'new' front wings so he can use them around the wheel arches, etc.
Anyhow, the car is booked in for an early December trip to the welding/MOT type of place. Awesome.
Meanwhile, getting towards late Nov 2013, work continues on the plastic under-engine tray which is quite badly cracked. This has been a lesson in what not to do because an attempt to repair it with fibre-glass has been a complete flop - the fibreglass just won't stick, even after a pretty thorugh de-greasing job on the tray itself. I think it'll have to be fixed with re-inforced duct tape, which shouldn't be too bad. Tres bien.
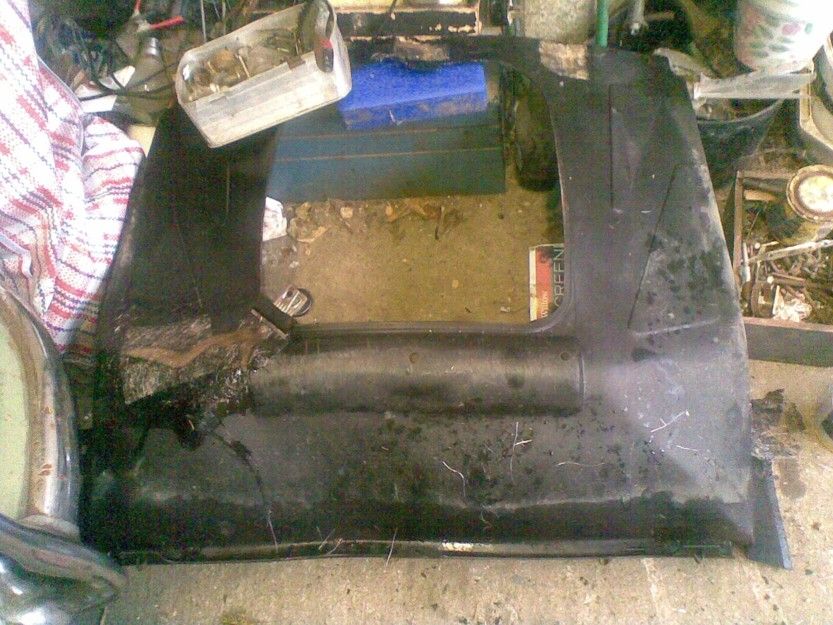
In the end I managed to get an OK repair to the tray by using bumper-repair filler mixed with fibreglass which stuck much better!
So what's next? top