January - December 2016
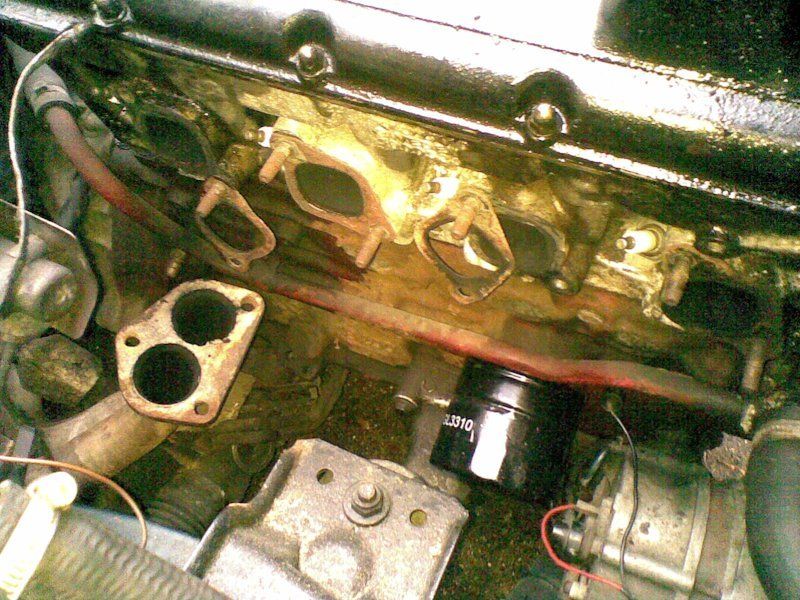
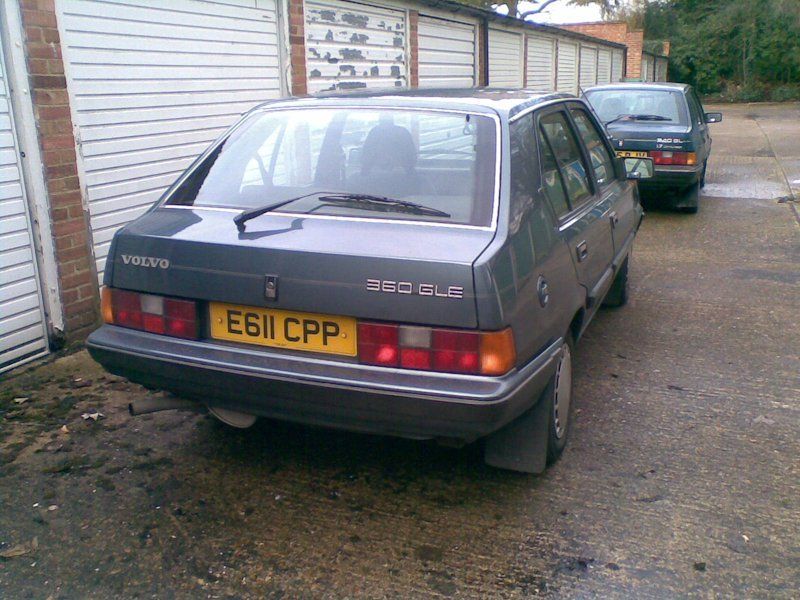
The original Blue Bess 360 has had an oil change and a change
of leads. So it all looks ready to go although a quick check did
inevitably show that there was another problem - a leak from the
exhaust gasket where the front downpipe joins the manifold.
Hence a couple of trips to the car are spent dismantling the
front exhaust by removing the bolts at the offending junction,
removing the manifold bolts and the various bolts that hold the
front downpipe onto the bell-housing and the racket on the
rear-side of the engine. Finally it all comes apart and a trip
to the nearest motor spares shop allowed a new exhaust gasket to
be procured. Indeed the shopkeeper said 'Pay next time you're in
the shop' which is even more awesome than usual. The gasket will
soon be fitted.
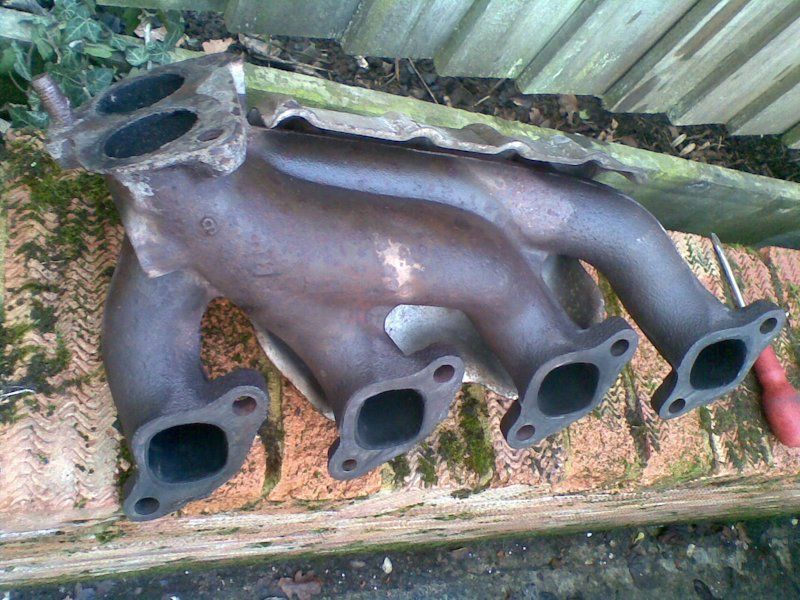
A bit of time has been spent cleaning-up all the mating faces
and 'copper-easing' the threads everywhere so it will hopefully
go back together a bit more easily than it otherwise
would.
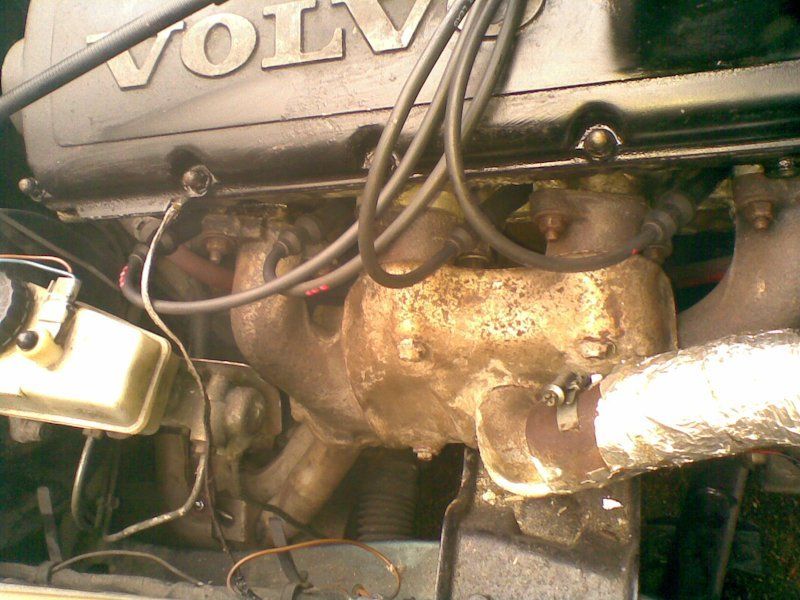
Mid-January 2016 has seen the exhaust manifold refitted with a
fairly generous dose of exhaust pipe putty at the junction, amid
great arguments among neighbouring garage tenants over parking
and other such tifles. A quick test shows that the seal seems to
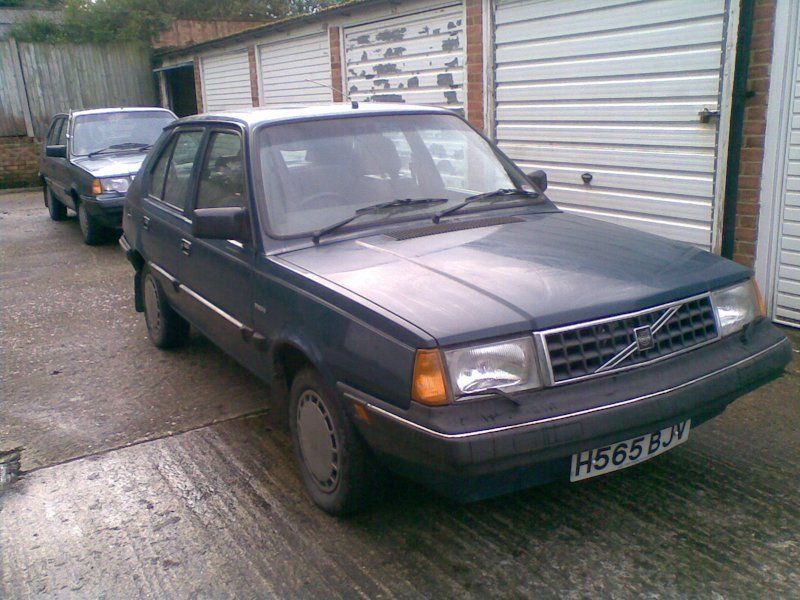
be holding and a drive-around shows that everything else to do
with the car seems to be pretty-much OK, so it may be time to
put this one back into action as the main form of transport for
the foreseable future to give the dark blue 1.7 a bit of a rest
in the worst of the winter.

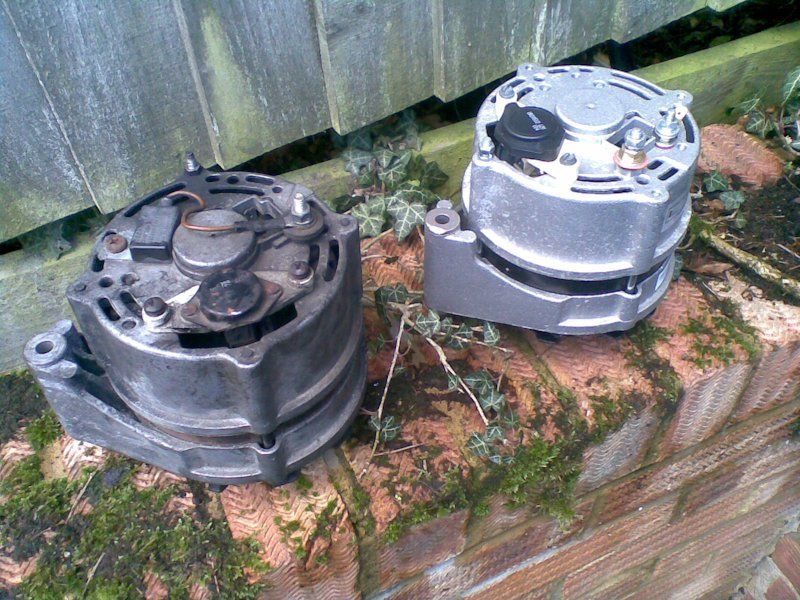
Mid-Feb 2016 and the 360 develops an annoying screech which I initially attribute to loose belts on the power-steering pump and the alternator. However, various checks on the belts and efforts to stop them squealing with a spray-on sticky type of substance do not make any difference. I then notice that the headlights are getting dim to the point where I can hardly see where I am driving at night and the rear windscreen wiper is painfully slow, not to mention that fact that the battery seems to die after every trip. It is all pointing to a failure of the alternator brushes so the car is returned to storage again whilst I wait for a refurbished alternator to arrive in the post. Meanwhile the 1.7 is given a hasty clean-out, wash and polish and is pressed back into everyday use and it seems to be a better car all-round really. The 360 has had various half-hearted efforts to stop the exhaust banging, etc, which have almost worked, but its not as well hung-together as the newer 1.7, although the latter is a damned-sight colder since I still haven't replaced the thermostat (shame, but many efforts to keep another of my wrecks on the road have taken up too much time). So lets 1.7 it up for now while the 360 gets a bit of electro-mechanical attention.
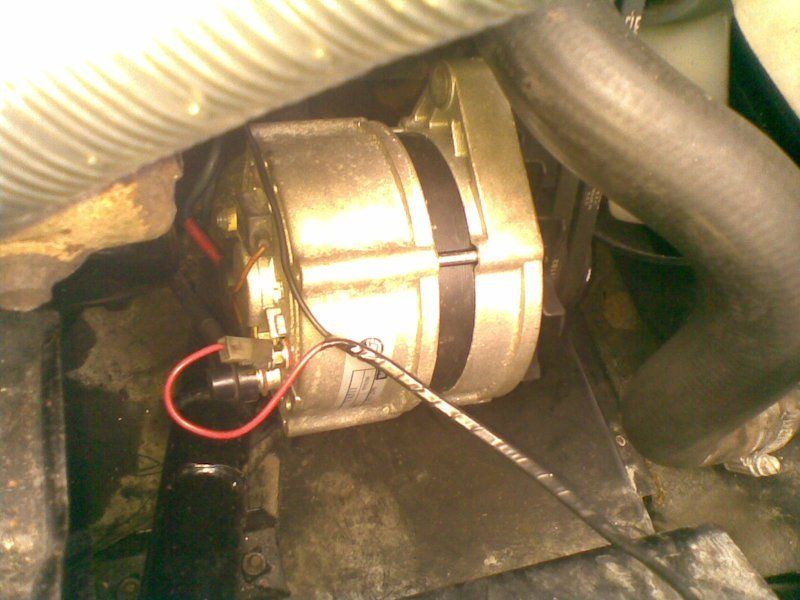
The old alternator on the 360 is removed and replaced anew which cures the poor charging and screeching problems that I reported above.

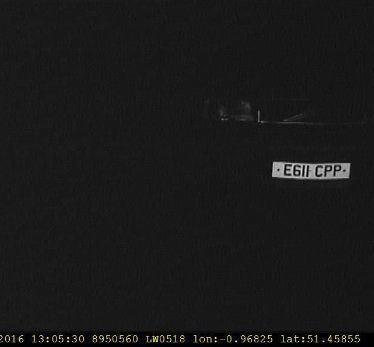
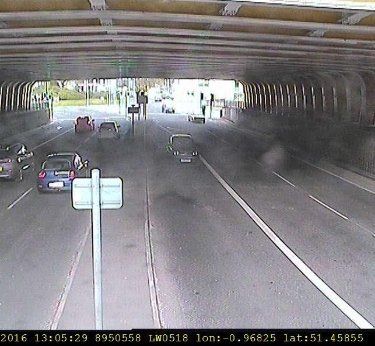
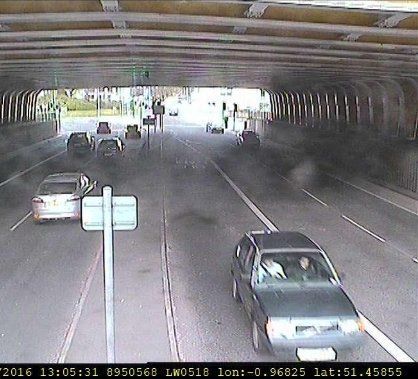
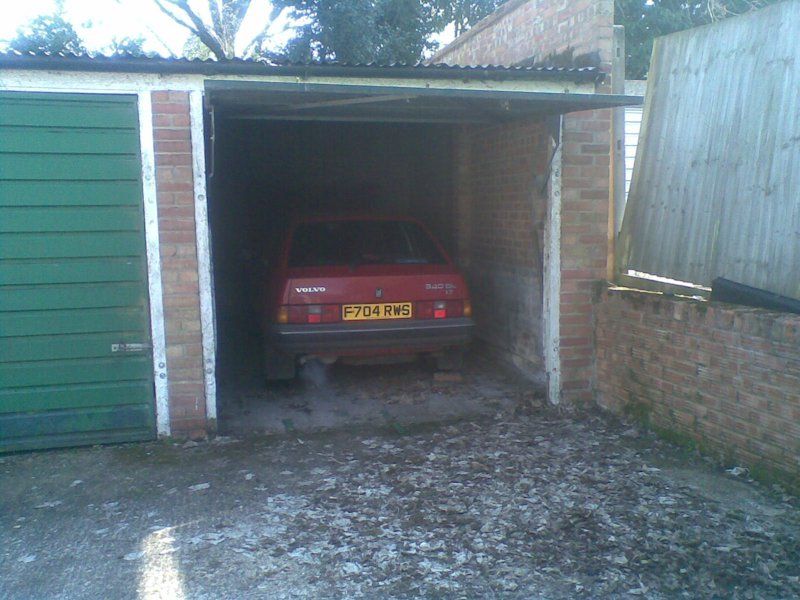
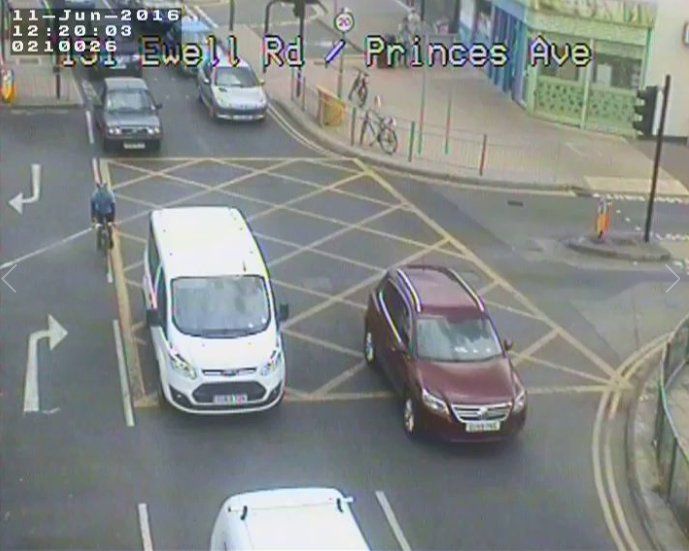
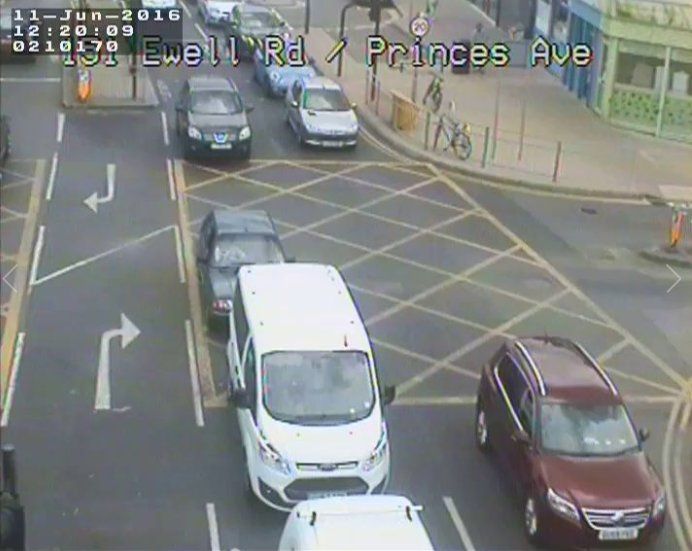
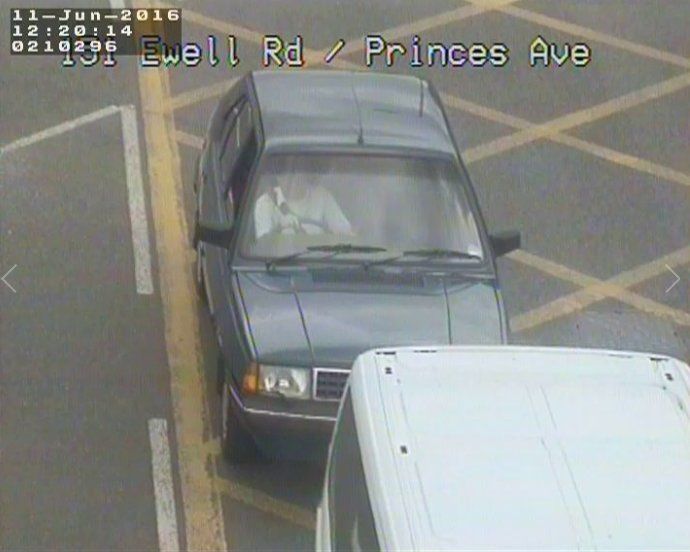
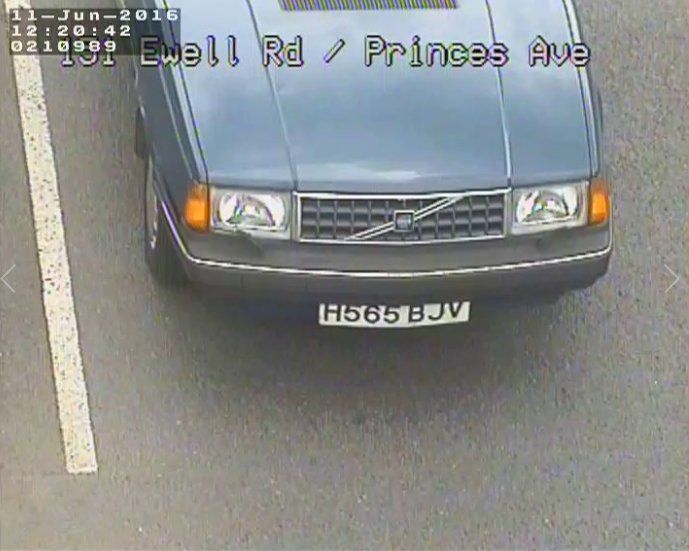
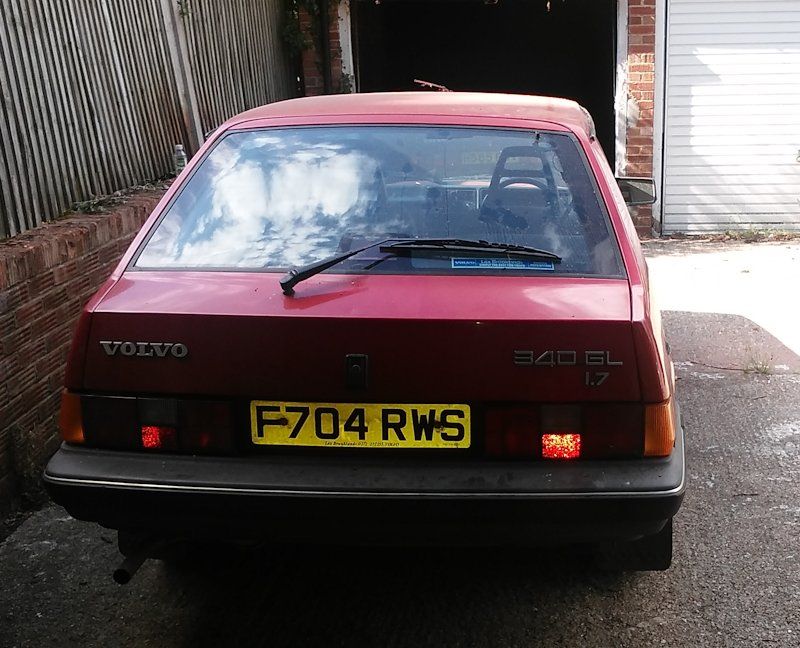
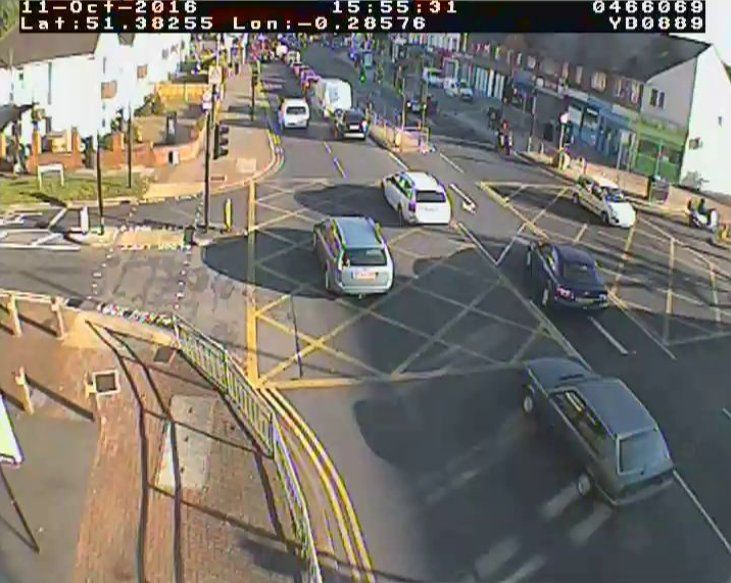
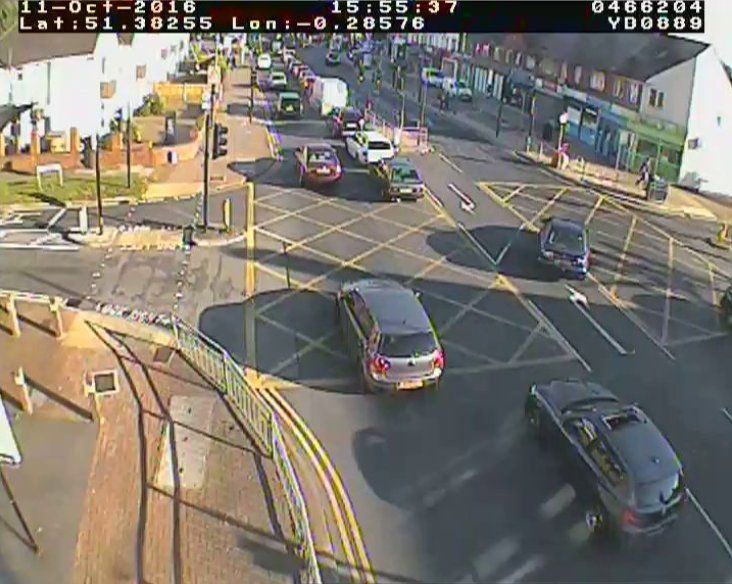
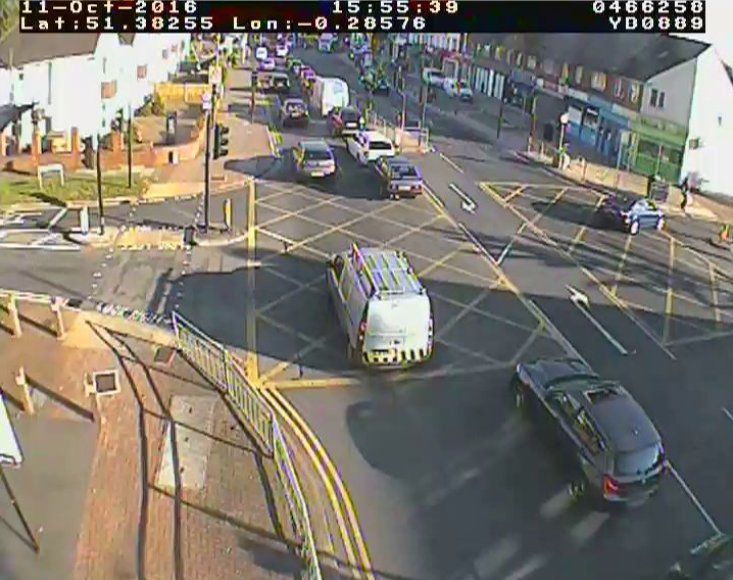
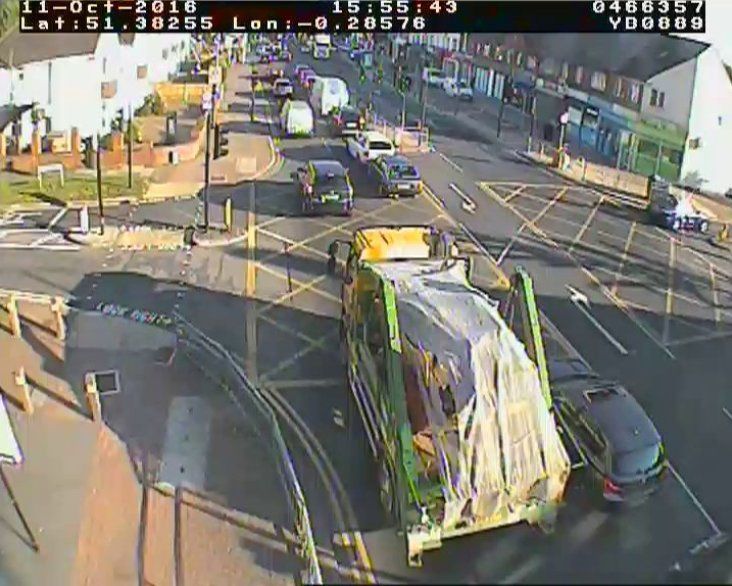
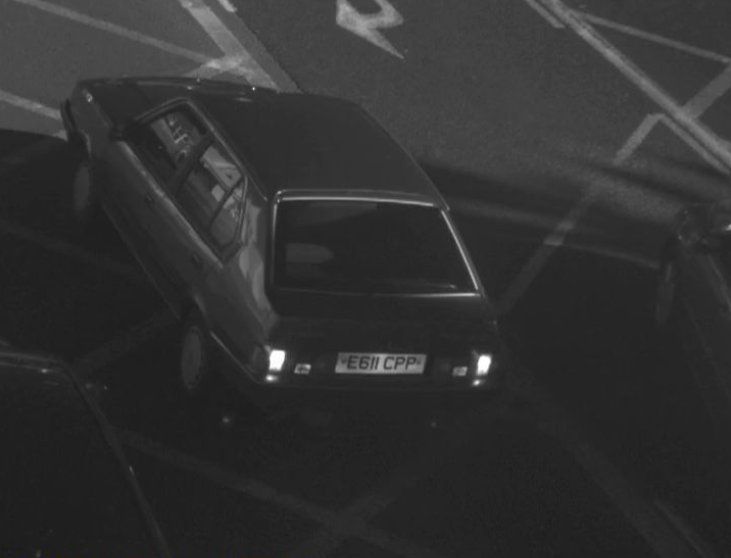
The 360 is returned to everyday use and gets to go on quite a long run in late Feb 16. Fully independent and verifiable confirmation of this can be found in the following photos, kindly taken by Reading Council, which show her passing underneath the arches of the Great Western Railway, while completely lost and giving a lift to someone. OK, I didn't expect the fast lane to be for buses only, but the fine isn't as bad as the last one and, fortunately, they didn't catch me making an even bigger mistake later on - I was tipped-off by someone who kindly waved frantically at me, just in time.
However, now in early-mid March 2016, the car does not sound like it is idling very smoothly and a few tweaks to the mixture give only a temporary cure to the poor idle. I take the car to the garage for a bit of wheel-balancing and tracking and I mention the poor idle. They say they will give it a tune but a day or so later I find out that it is refusing to start at all in their hands due to no spark and, having replaced the flywheel sensor, they think it is the electronic ignition unit. Hence a couple of spare Renix's and a new coil are found in the roof and taken to the garage for them to play with. A day or so later, still no spark at all with any of the renixes so I suggest that it may be the connections on the back of the fuse box, but they do not believe me - its such a hard life. I think the fuse box connections have gone wobbly when they jacked the car up. How's that for a theory? So the current plan is to retrieve the car and have a fiddle with it myself. Should be fun - indeed they seem keen to get rid of it, too!!
The car is recovered by the garage blokey towing it with me at the steering wheel and on making a right-turn, the tow-bar folds on itself and quite badly clonks the front valance - which is not fun. Thus trying to rescue this car from the clutches of those who, whilst being very well-meaning, probably don't have the time to give this old banger all the care it deserves, the poor beastie is damaged (thankfully only slightly). Anyhow this should be a bang-out-able dent so I am hoping that with the benefits of more time on my side, the better weather and the driving force of guilt and despair, I will get a move-on with sorting it out and will probably be canonised in the process. Amen.
A weekend is spent un-doing what the garage have done. I cleaned-up the connections at the back and front of the fuse-box - they were all pretty good, but an extra clean-up should do no harm, although in the end, it actually made no difference at all to the ignition trouble. I then fitted the original renix unit with the new coil which the garage had used which again made no difference. I then found that the problem definitely lay in the new flywheel sensor which the garage had fitted - it simply didn't work and the car's ability to make sparks could be regenerated by cleaning-up and re-fitting the old flywheel sensor. Its a bit stally so there may still be some weakness in the spark or some carburretor gasket leaks, but its better than not working at all.
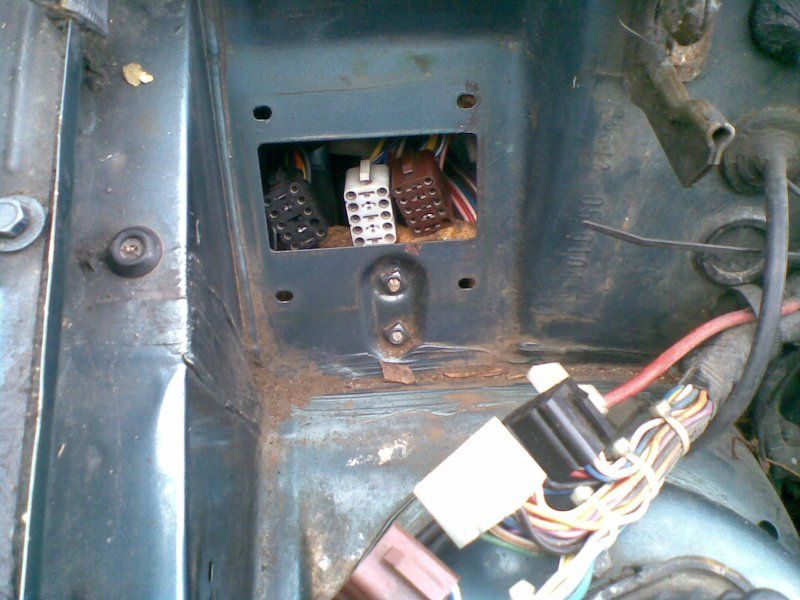
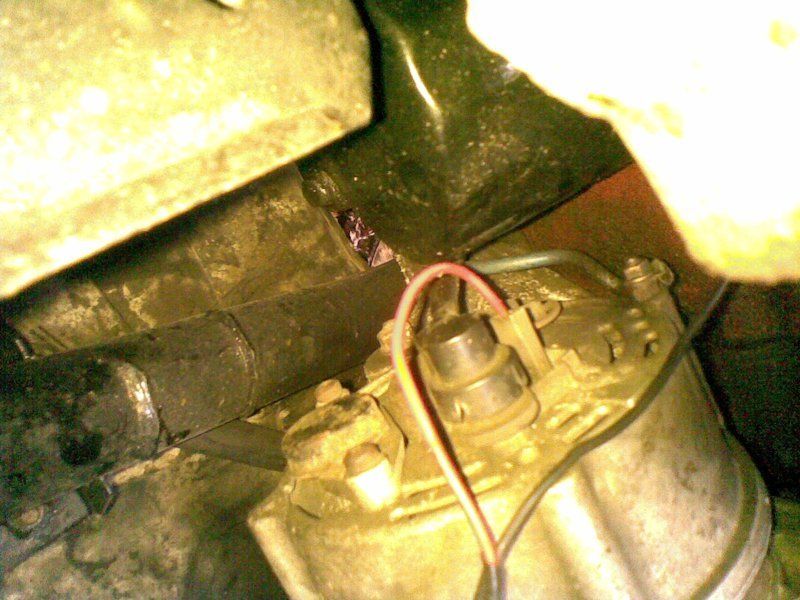
Anyhow, since most of the work involves lying in the driver's footwell in the dark, the photos aren't so good, but I did manage to get a decent one of the fuse box connections (above) which shows the hole that always goes dodgy. Its in the brown connector on the right-hand side of the hole in the bulkhead, right-hand column of holes, middle hole. So the plan is now the repair the front valance, which will involve finding a reasonably large hammer.
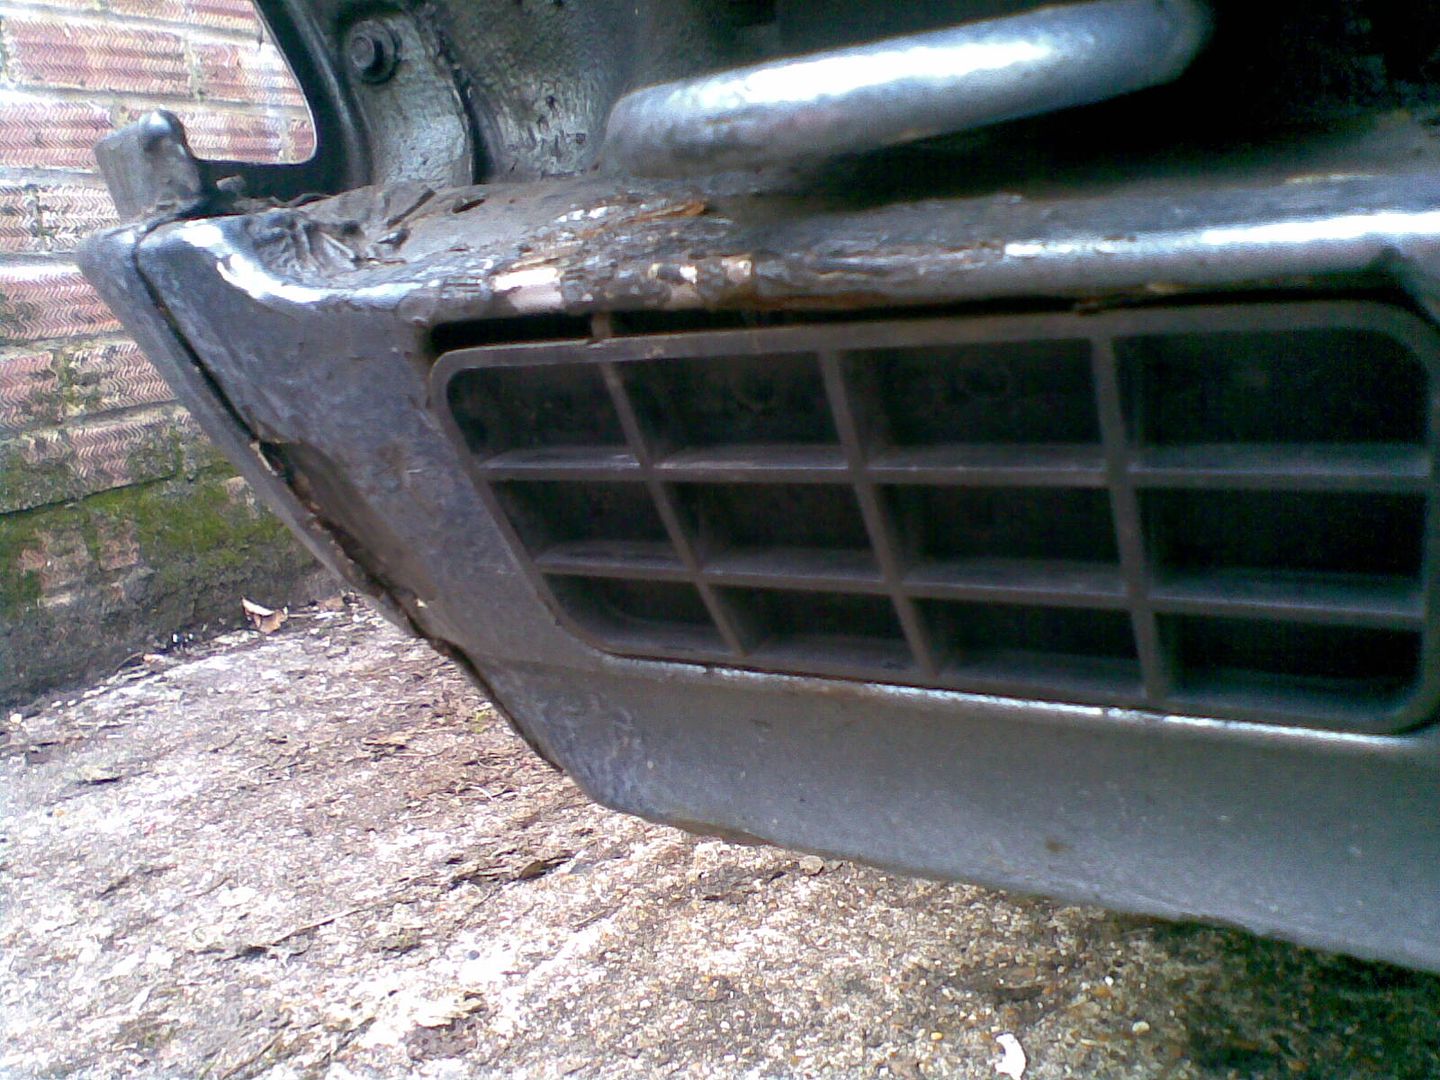
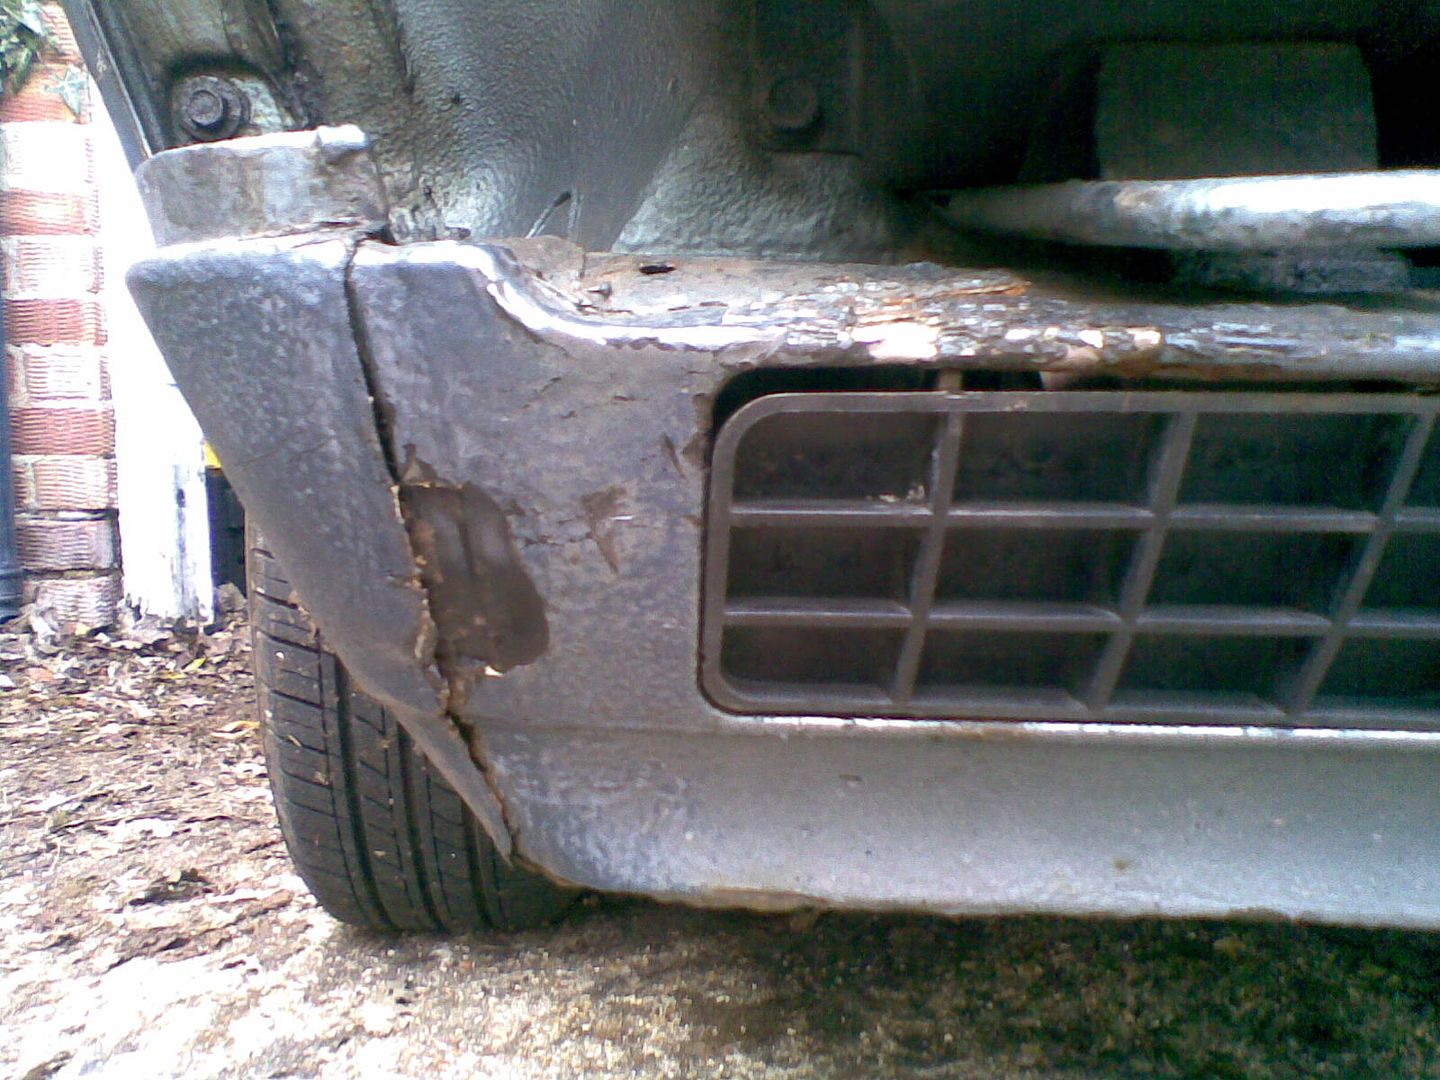
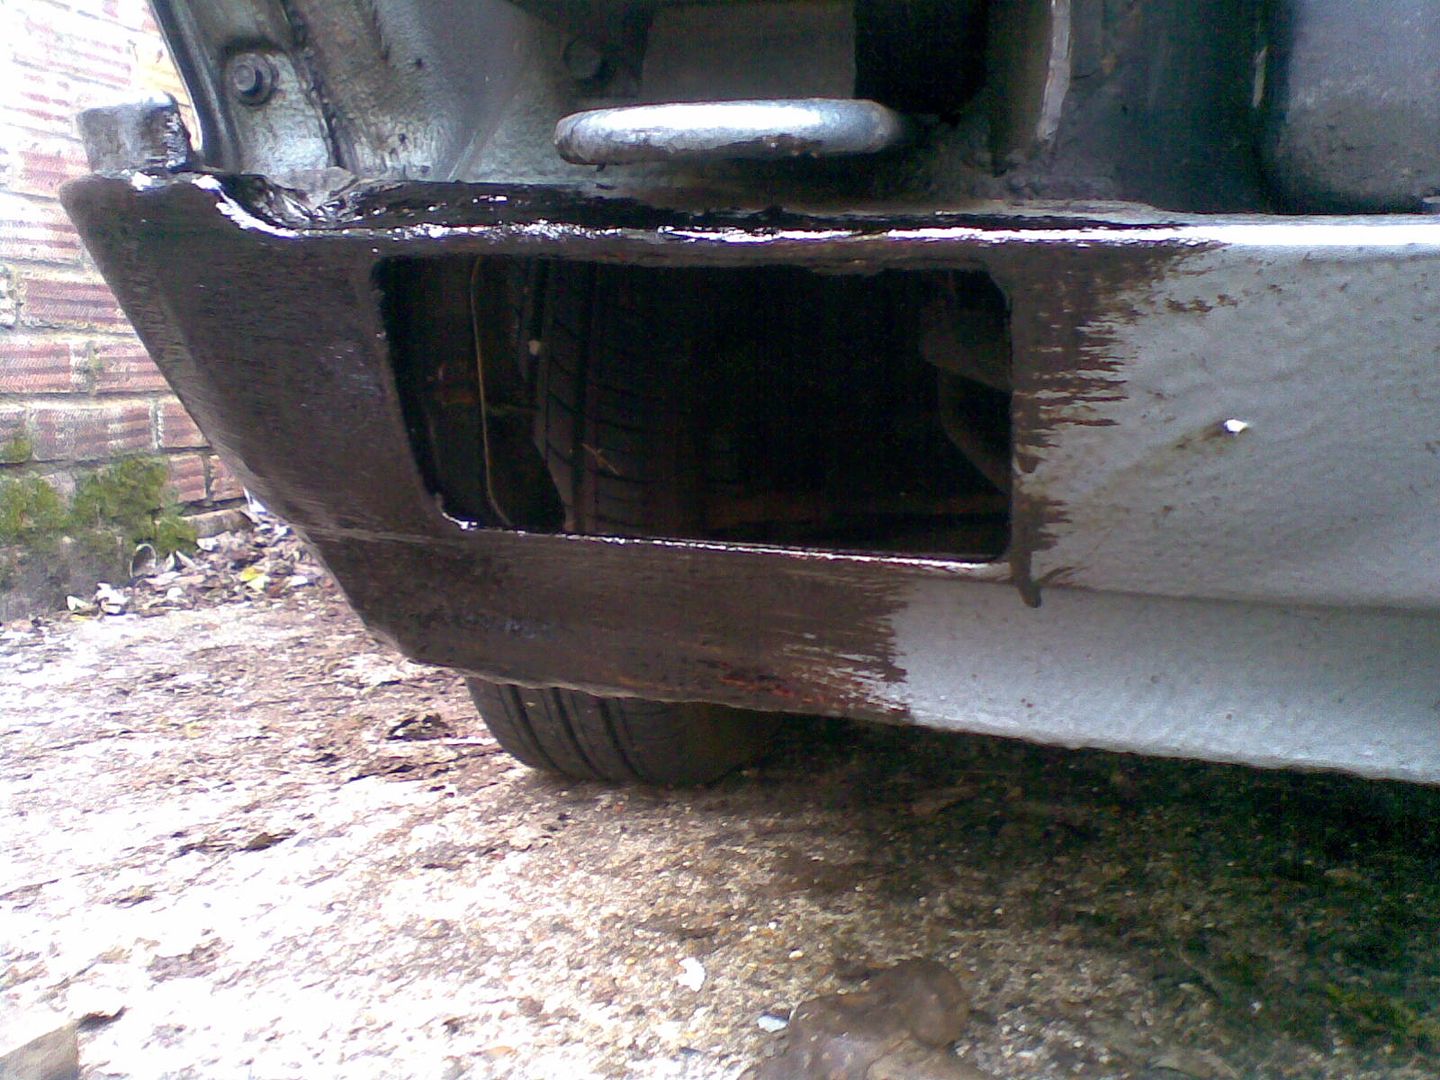
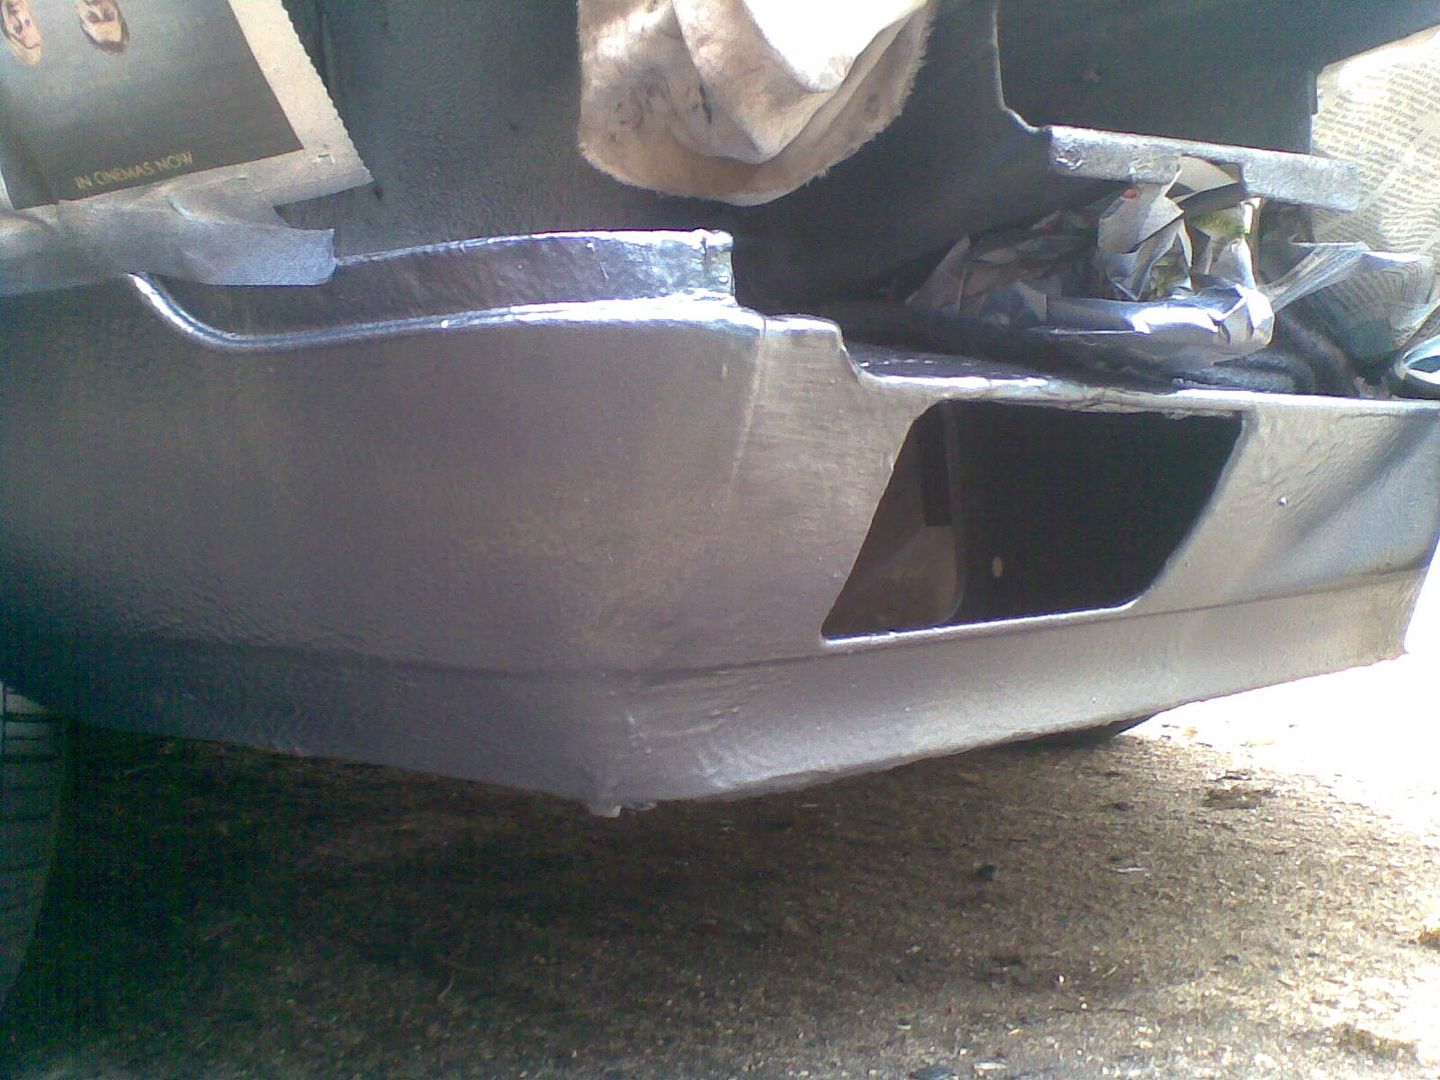
Firmly in the middle of March 2016 and the photos below clearly show the dent in the front valance caused by the dodgy old tow-bar. The good news is that some progress has been made in hammering it out by removing the front bumper (again) and use of a wooden dolly with a fairly large hammer. The final stages will need a G-clamp, or two, to bend back some of the stretched metal at the edge of the valance, although none of this is too bad really. I could just paint it all over with underseal but the perfectionist in me says I have to try to straighten the metal first. A crowbar might also help to push the top flat part down a bit so mental note to self to remember to take that crowbar is made.
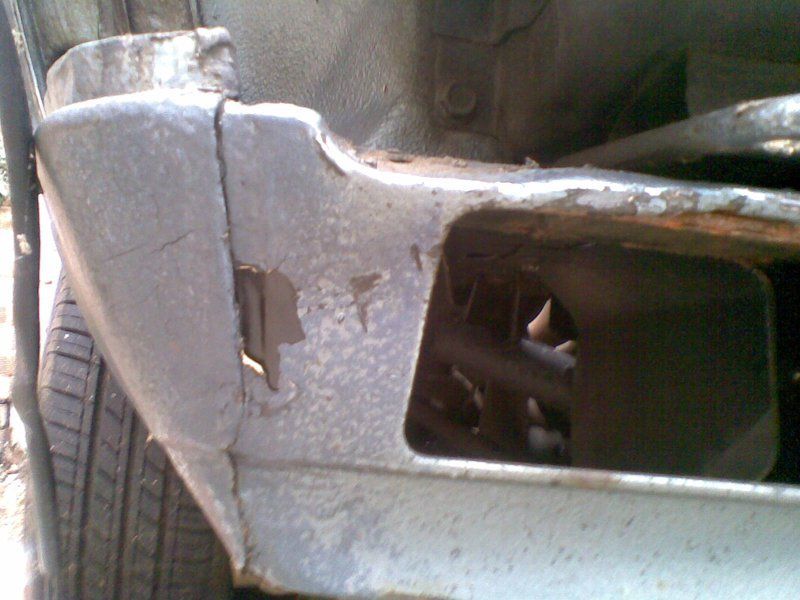
Its now the end of March 2016 and the work to complete the repairs to the front valance has been, err, completed, as I hope the photos show. First of all, here's how it looked after a bit of hammering-out from the inside with a custom-made wooden dolly. Well, not too great, but its OK.
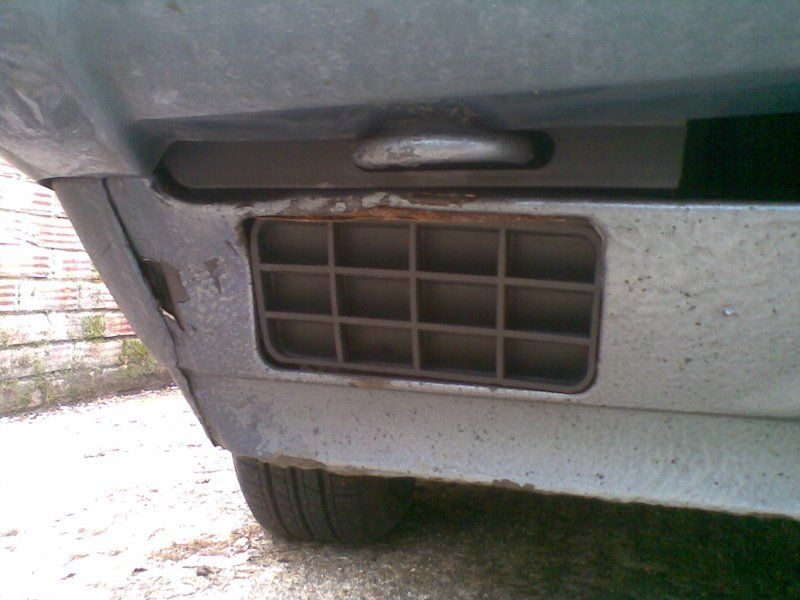
So now its time for a paint-up with underseal to try to make-up for the shortfall in the shortfall in the metal-strightening efforts. This is followed by some painting with grey-primer.
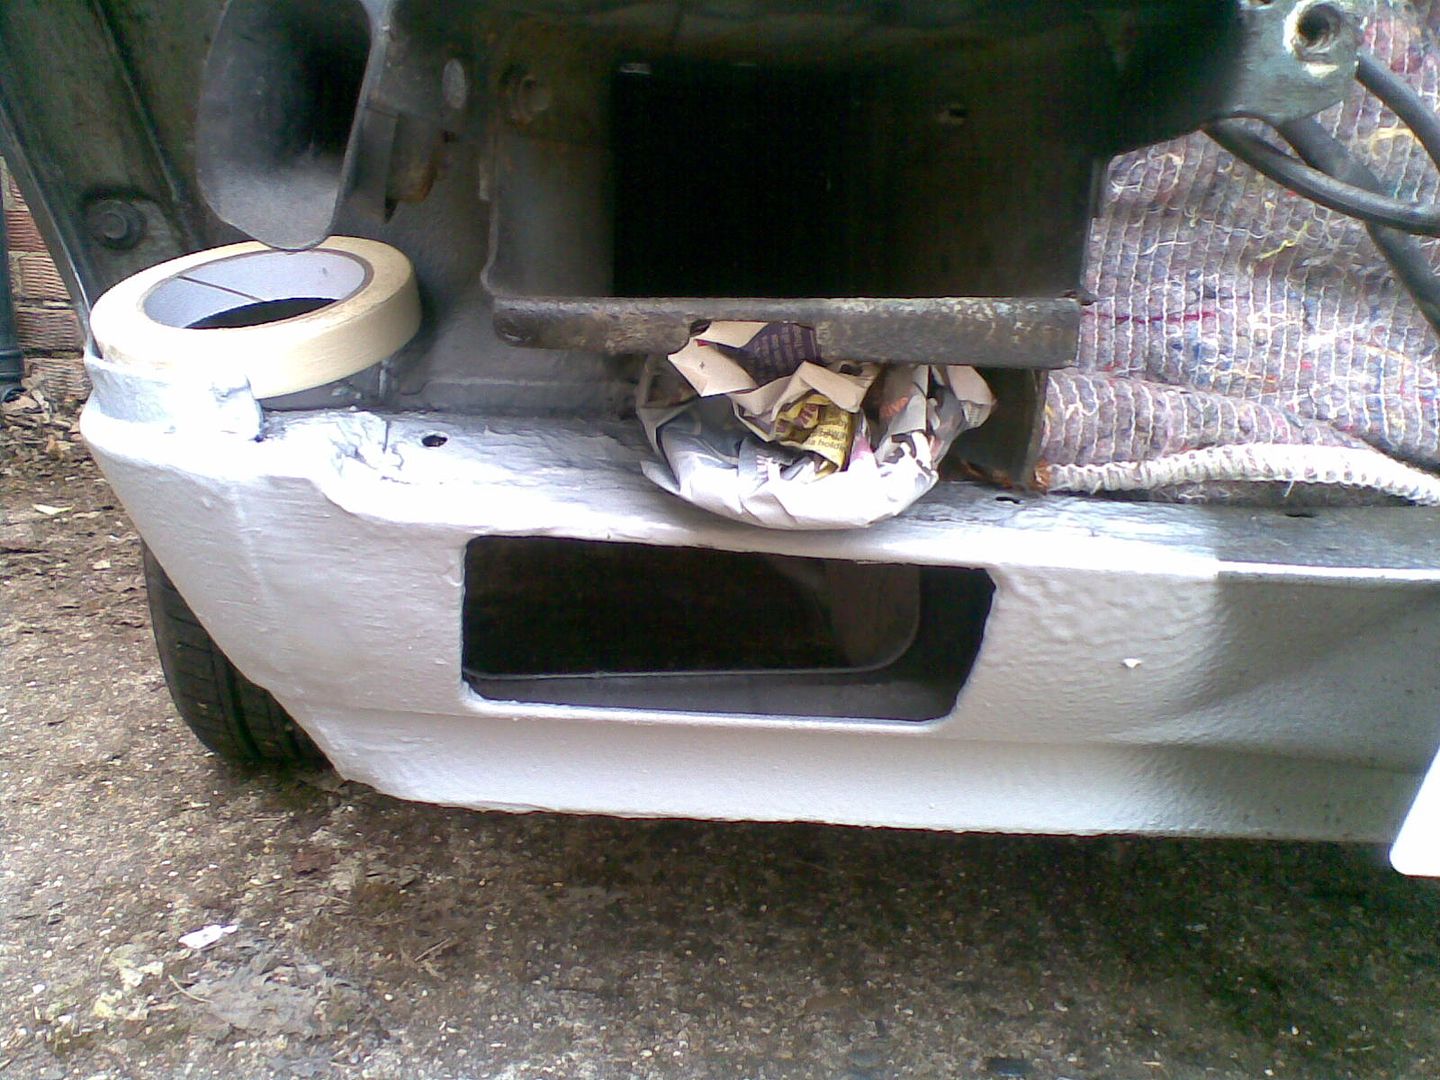
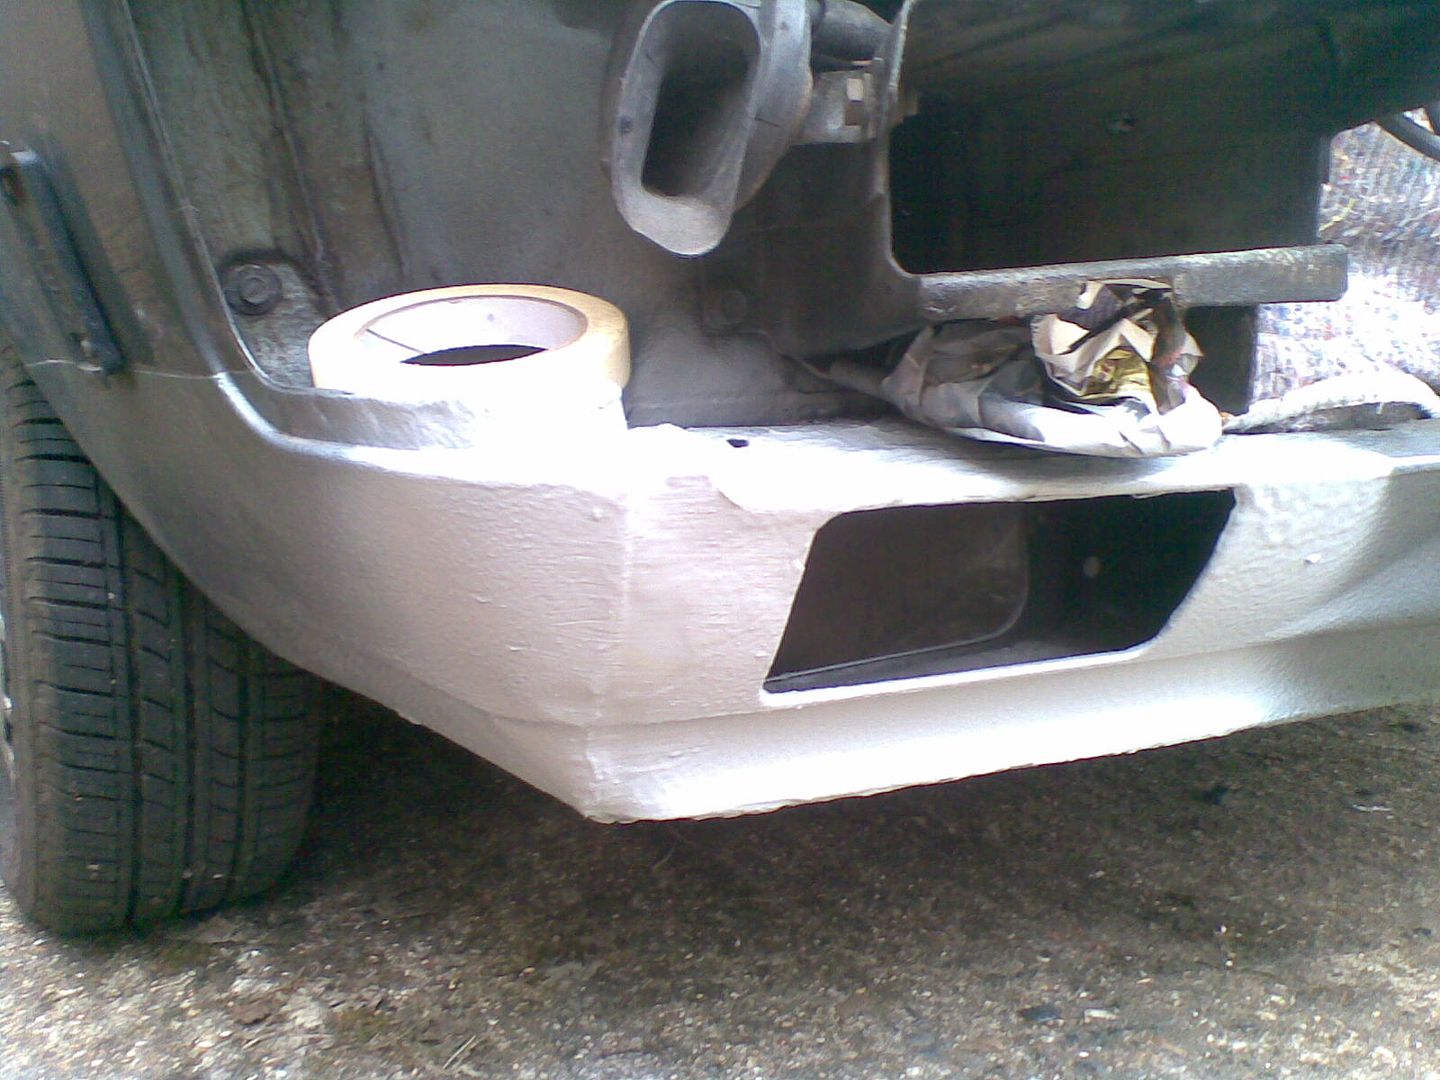
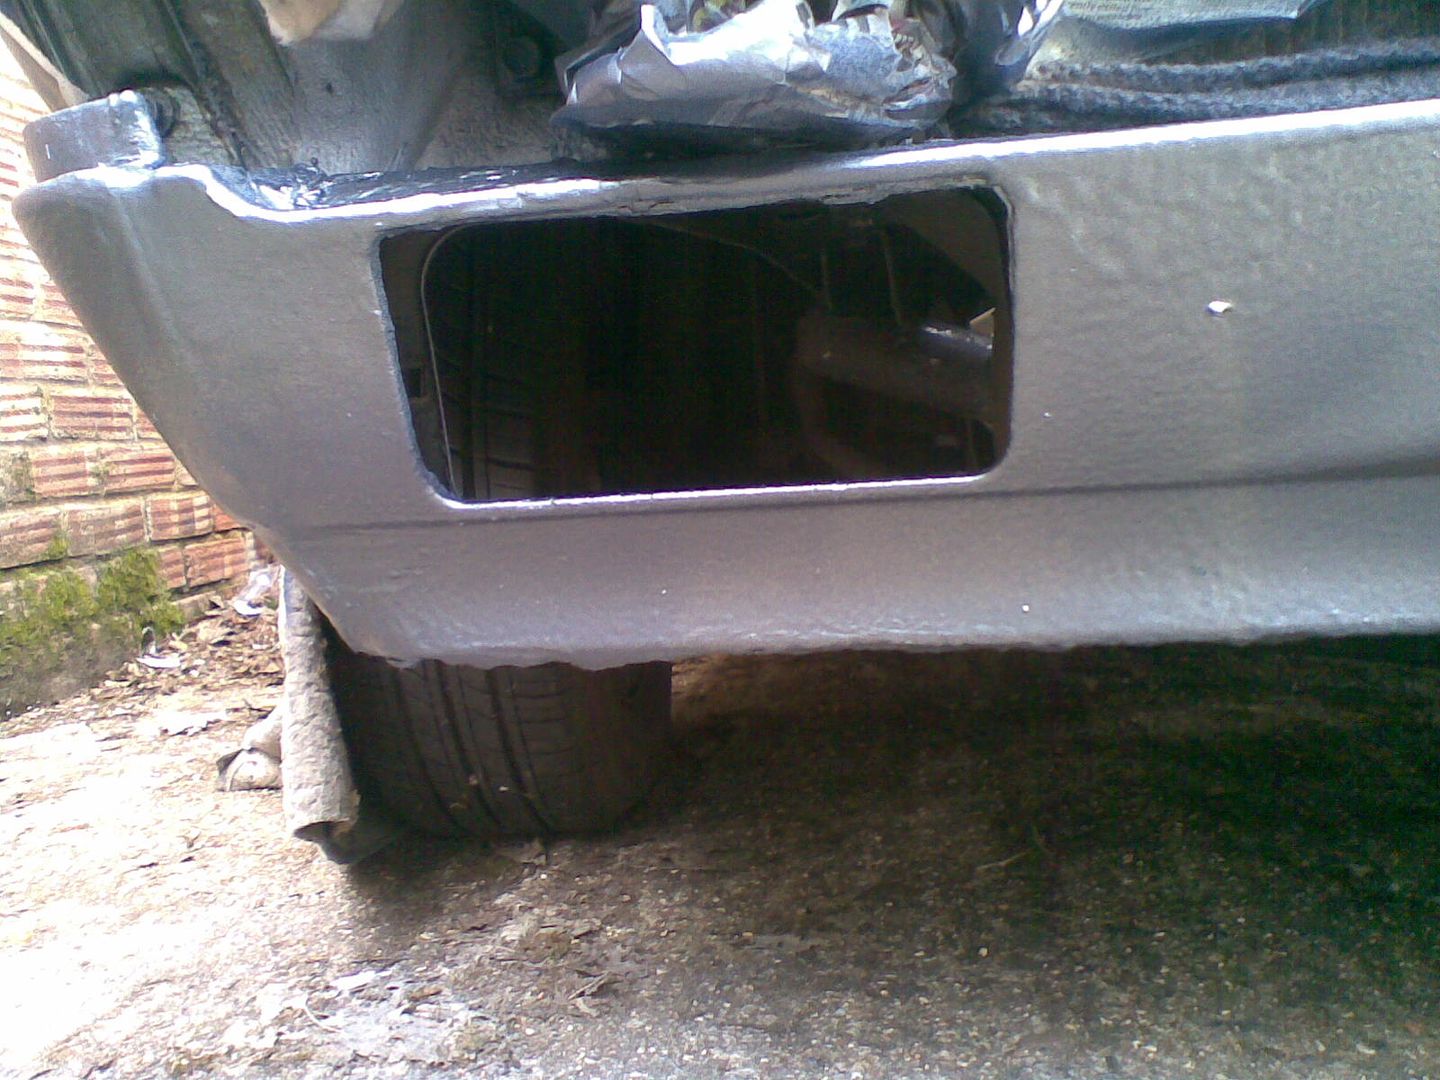
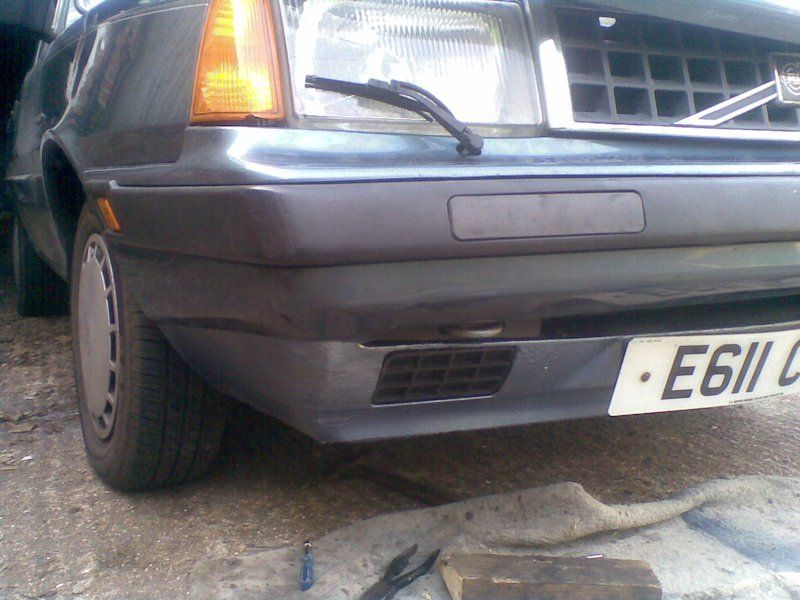
Its not looking too bad, so a bit of blue paint by Halfords aerosol, brush and finally aerosol, again, brings it back to almost the right colour (Volvo paint code 219-5). Some waxoyling around the underside for good measure adds a bit of confidence, too.
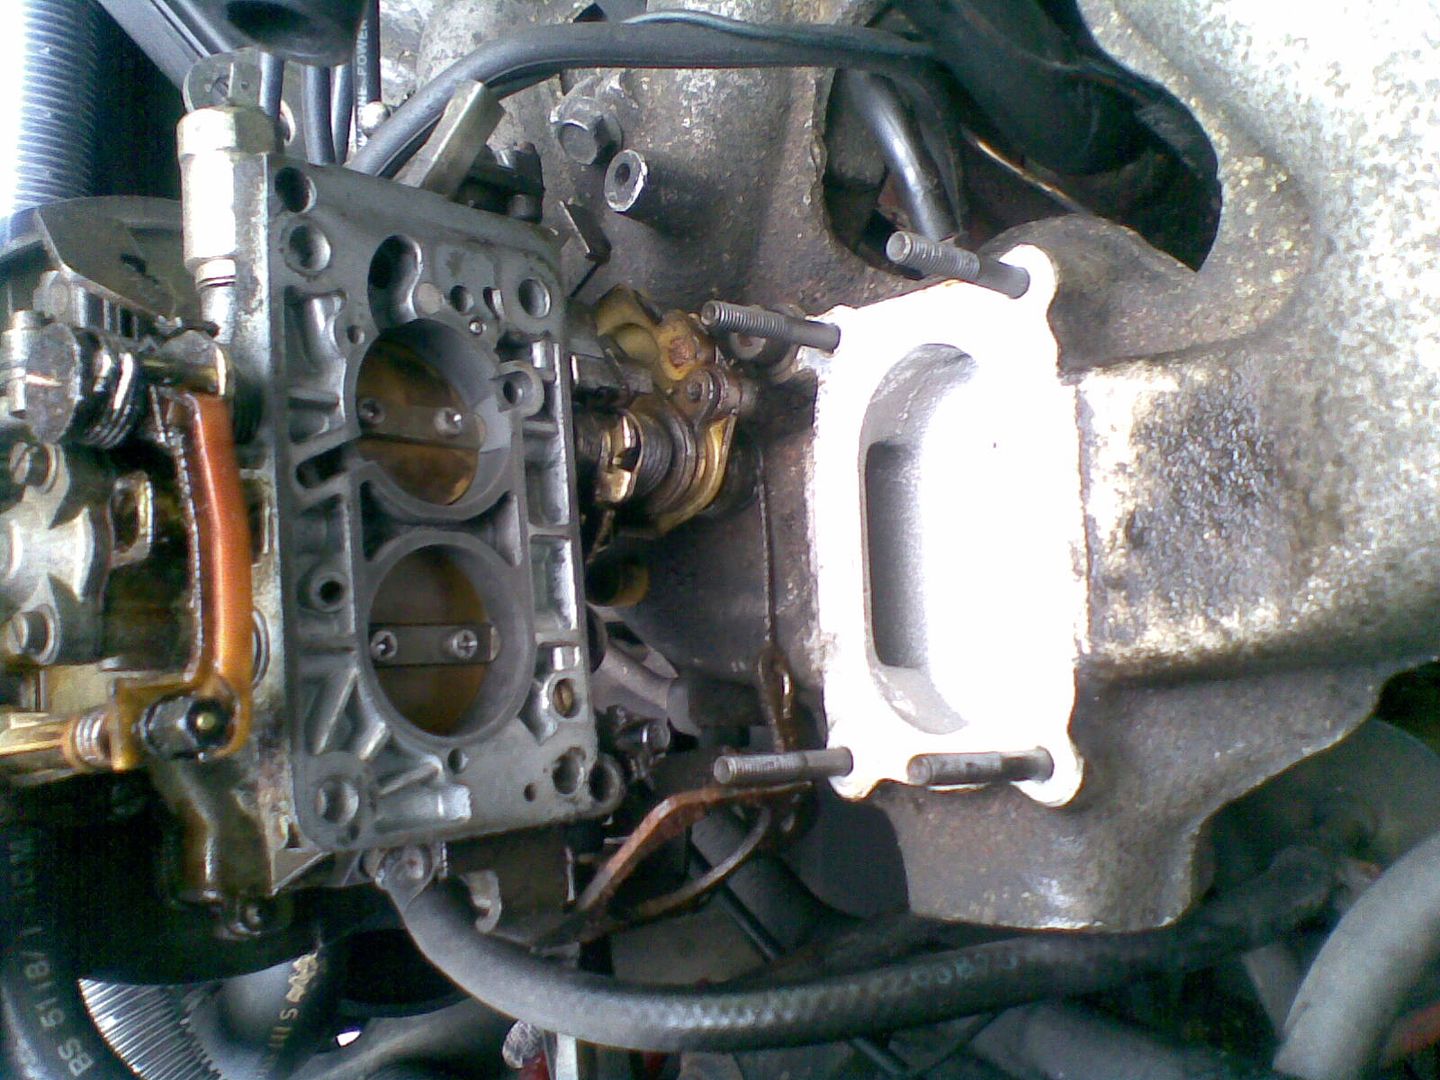
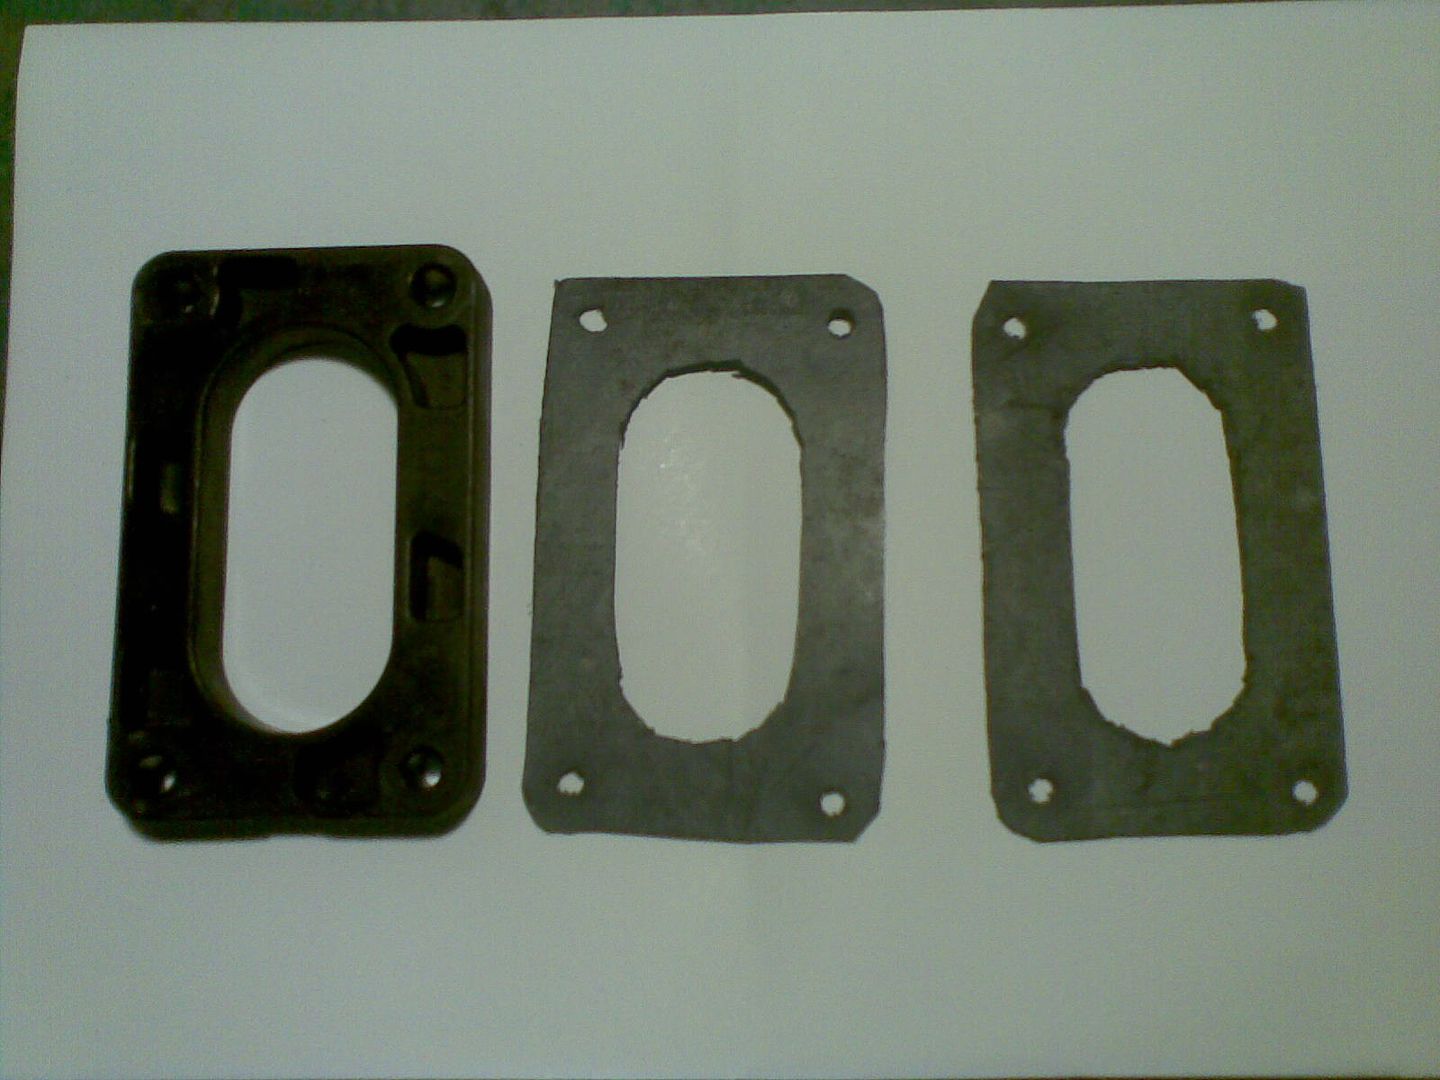
Combine all of this with a mega-triumph in discovering that the carburettor gaskets were in a completely wrecked state, a bit of home-made gasket-making sees everything going pretty-much in the right direction in terms of repair and reassembly. Indeed the carby gasket leaks must have been the root-cause of the poor-idling which caused all of this trouble in the first place.
With perfect timing, the dark blue 1.7 suffers an exhaust centre-section failure, so the, now almost fully-repaired, metallic blue 360 is itself given a new rear exhaust hanger and then pressed back into everyday action. It now idles happily at 500 rpm and does not stall at all on pulling-away. Epic inebriated awesomeness abounds and emanates everywhere. Meanwhile, amongst all of this chaos, the red 1.7 3-door still starts and runs fine after some 3 months of waiting patiently for me to begin some cosmetic improvements - still on the cards, but they will happen.
Ok, so I've been a bit slow to keep this up-to-date, again, but April 2016 has seen the middle section of the dark blue 340's exhaust replaced and seemingly the job has been successful - or at least the car does not make that deafening noise any more!
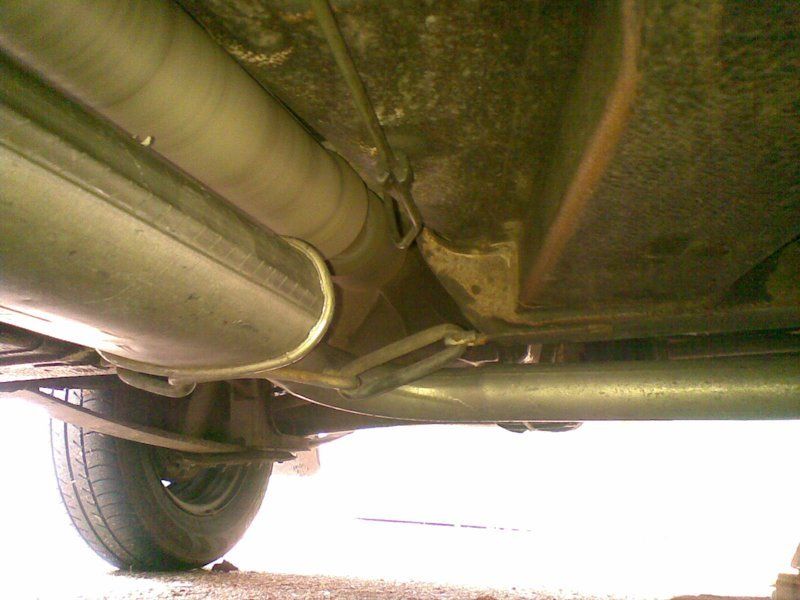

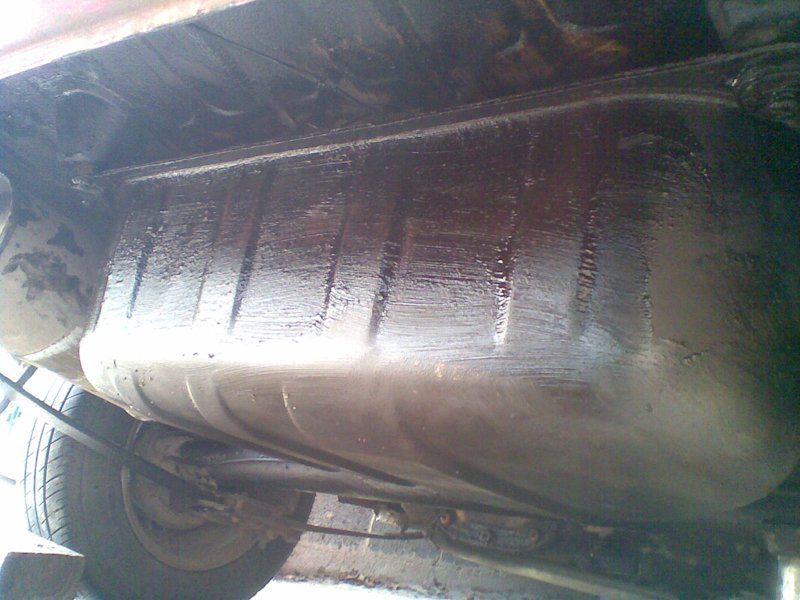
Things are starting to move on the Red Ness front with the engine starting and running extremely well after a long rest and some wire brush work has been done to the underside in readiness for a coat or two of waxoyl.
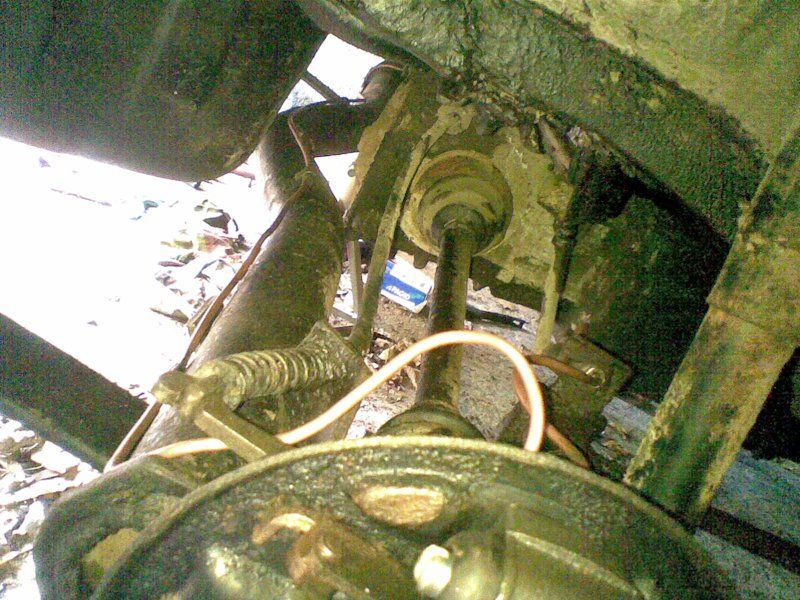
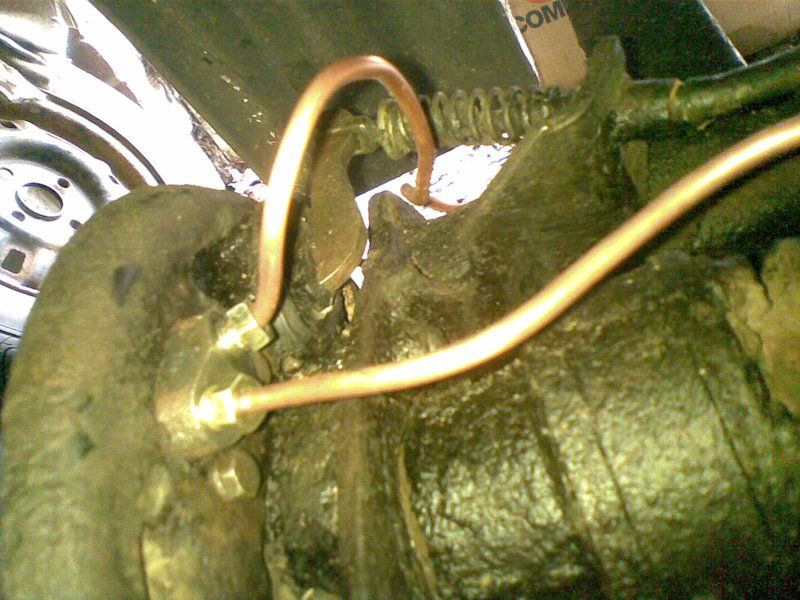
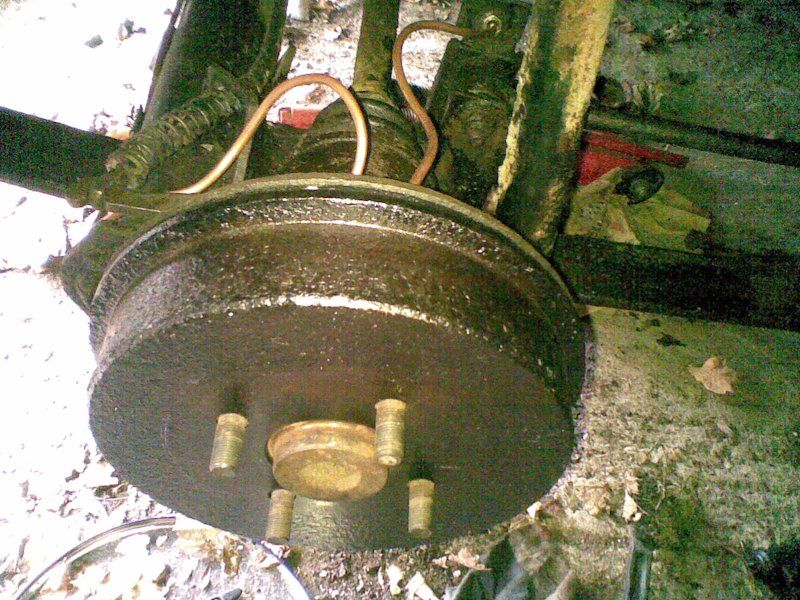
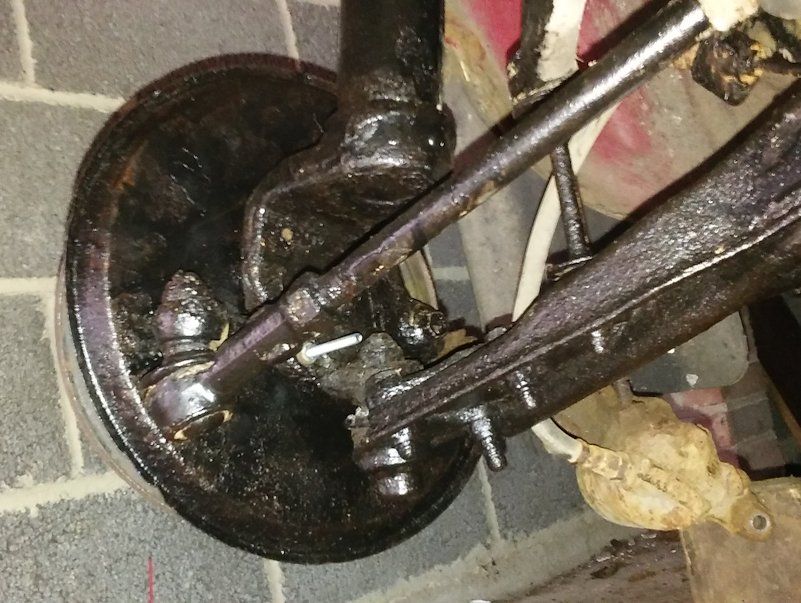
As can be seen, there is some surface rust but its not too bad at all, really. I think the brake line across the back axle will need renewing with a bit of copper pipe and the handbrake mechanism will probably need freeing-up where it passes through the backing plate and inside the drum.
Anyhow, at the end of April 2016, the waxoyling is starting to make some progress.
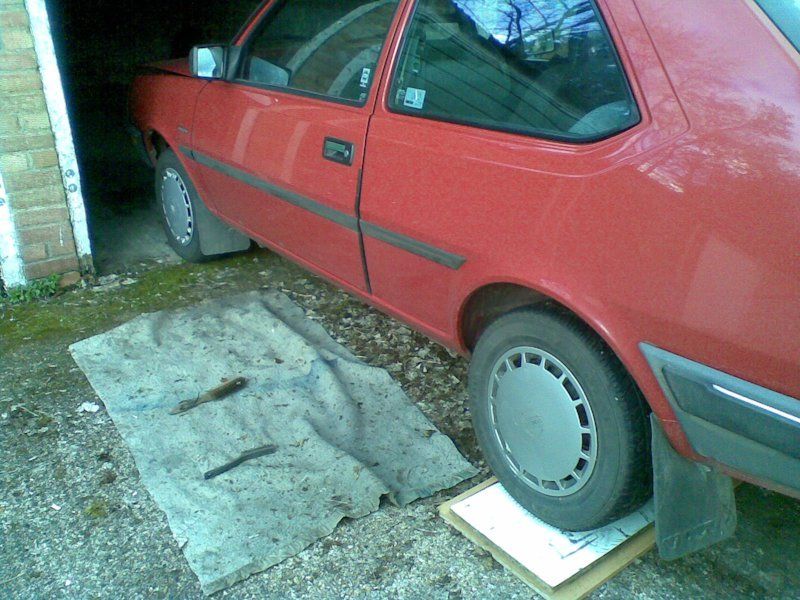
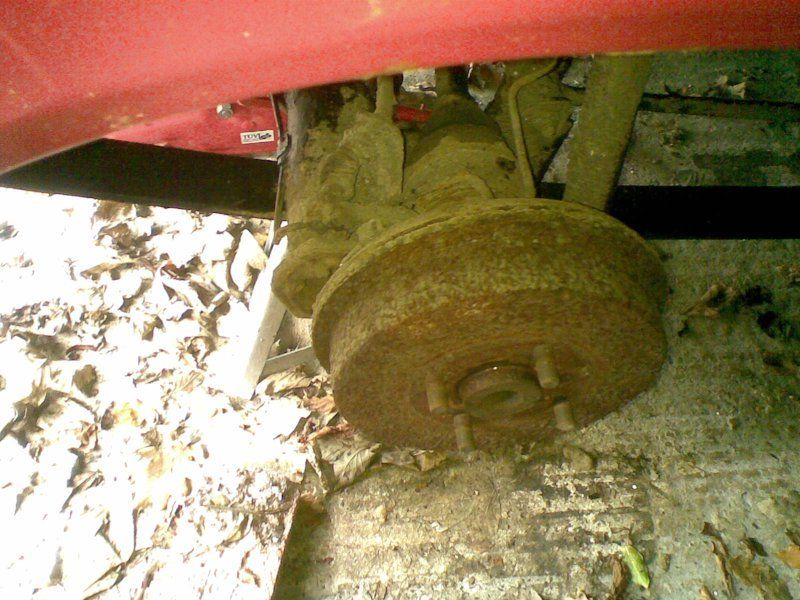
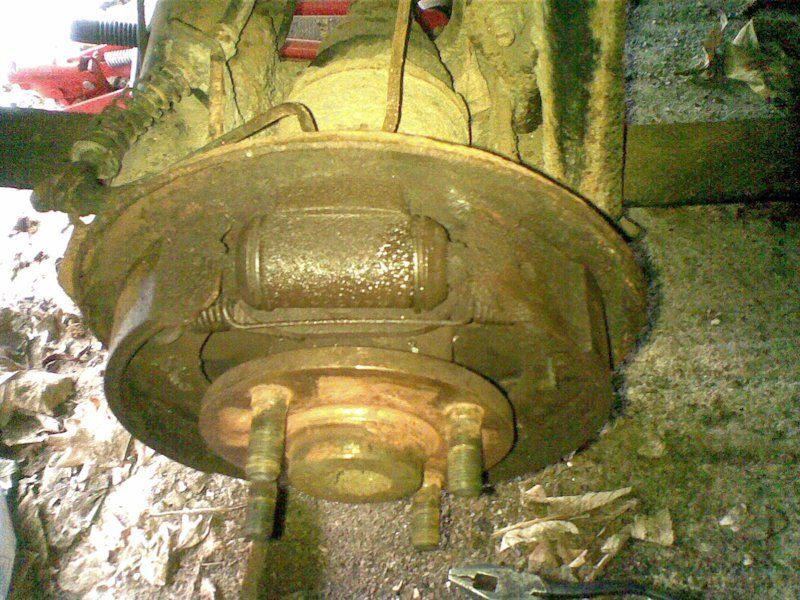
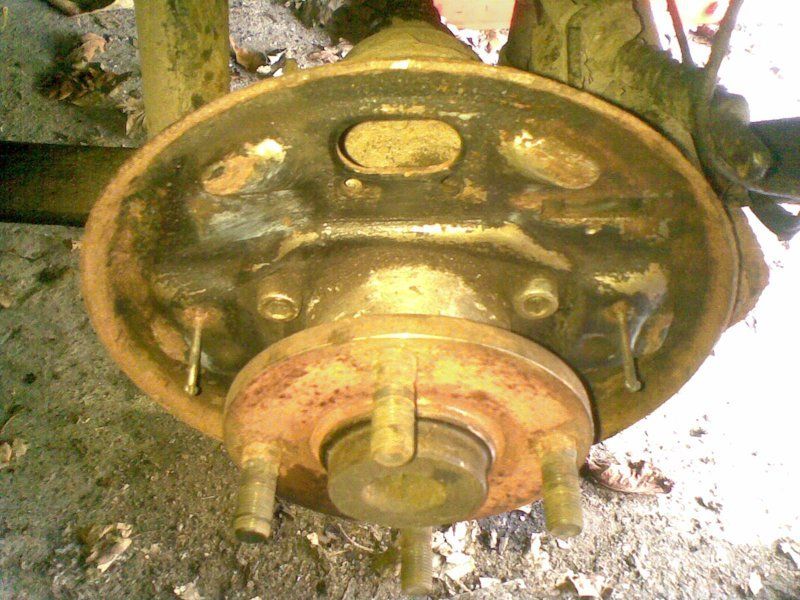
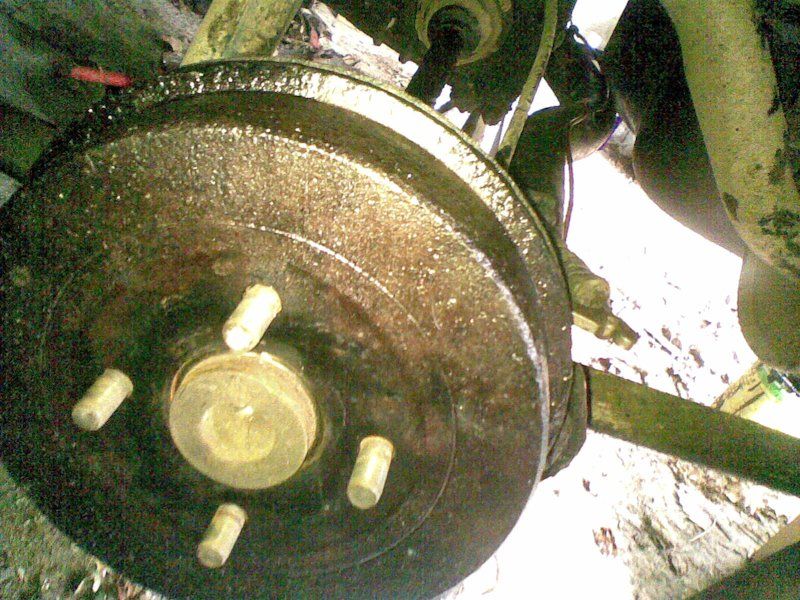
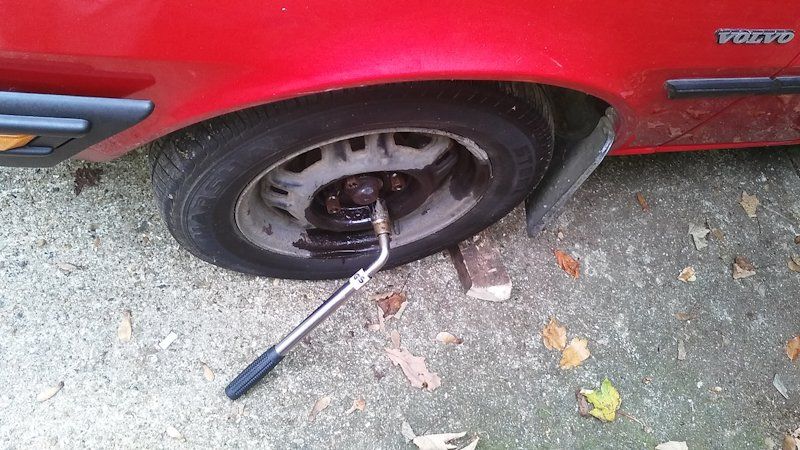
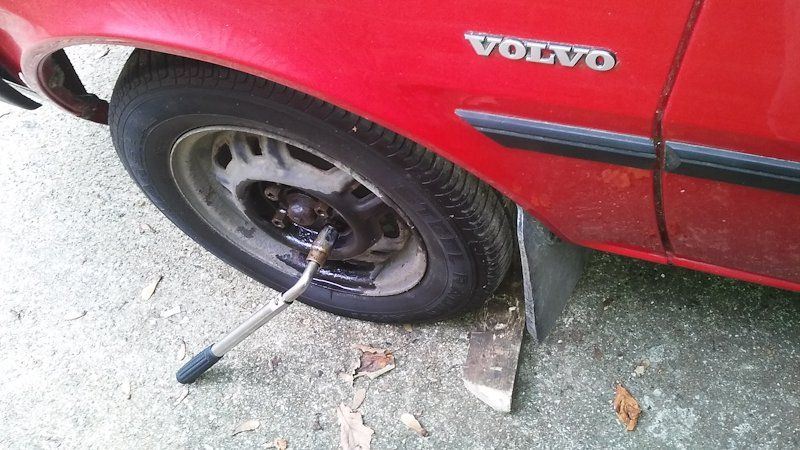
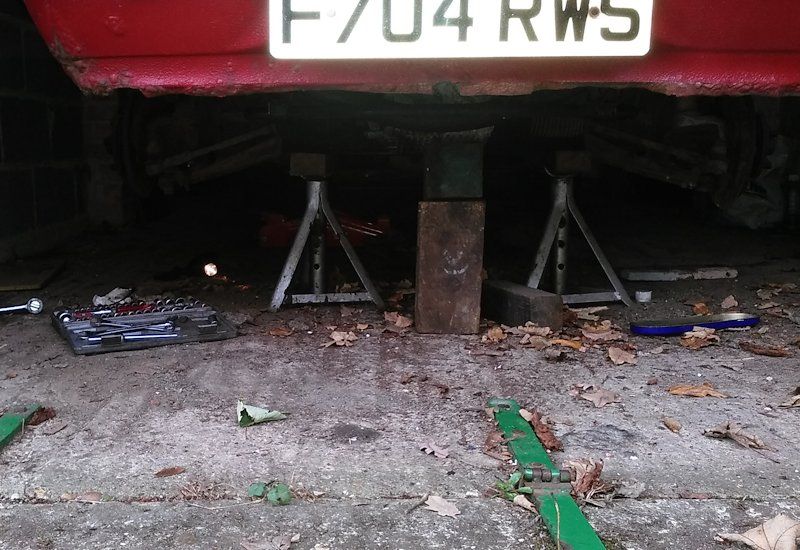
Early May 2016 has seen the rear end of the red one raised up on axle stands for some more waxoyling and the rear wheels removed for tackling the brake drums which seem a bit sticky. The drums appear to have had a fairly hard life in the rust-friendly environs of Shropshire.
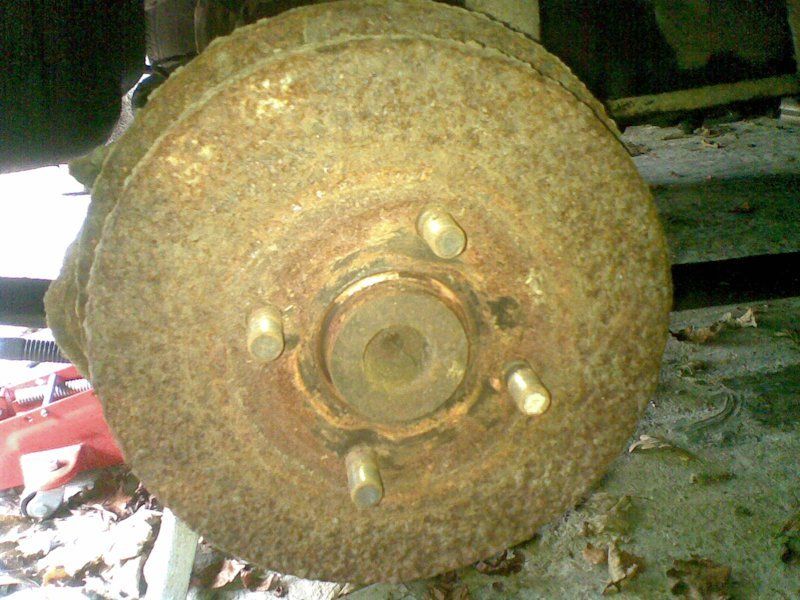
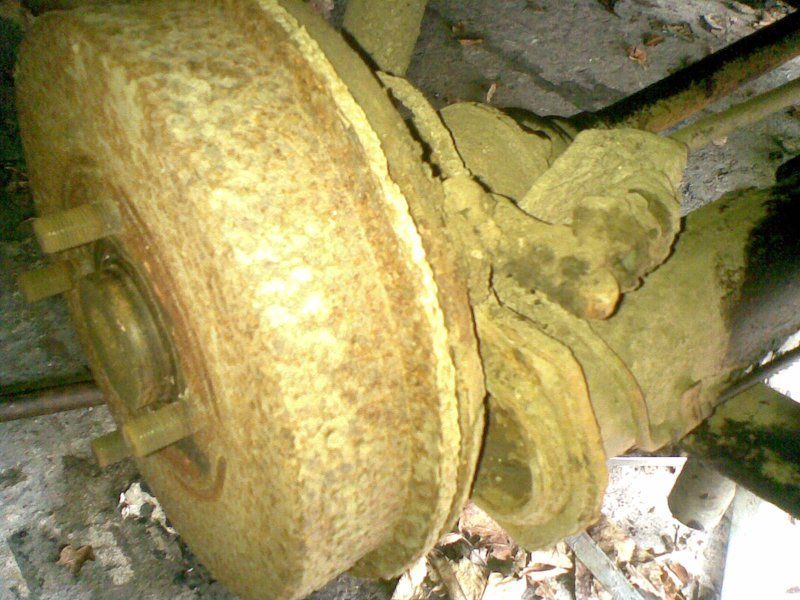
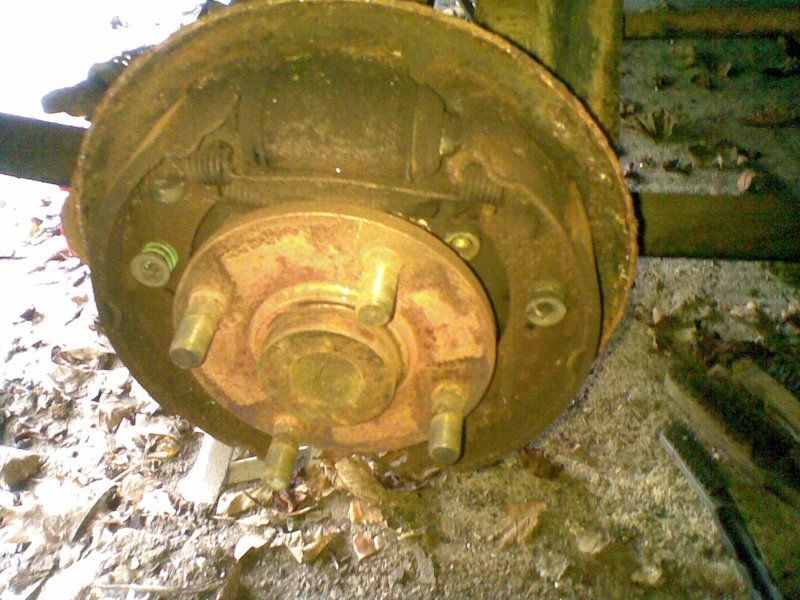
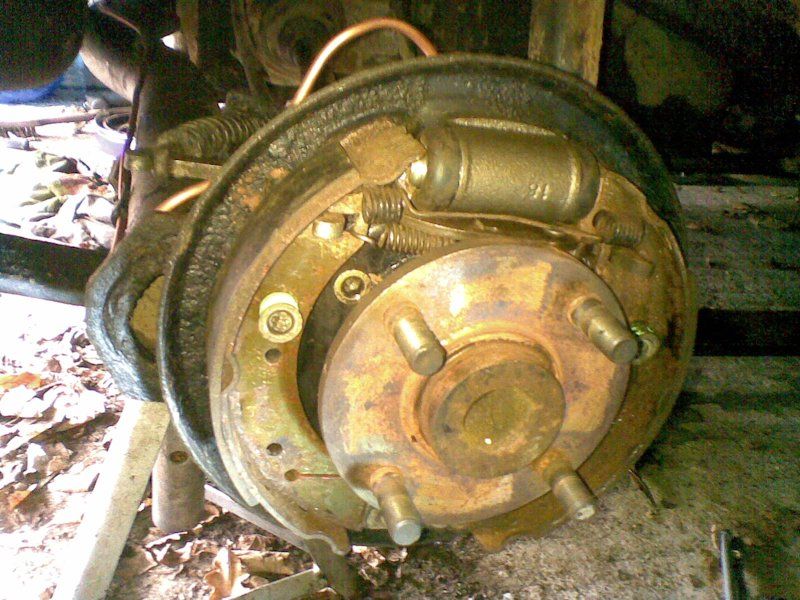
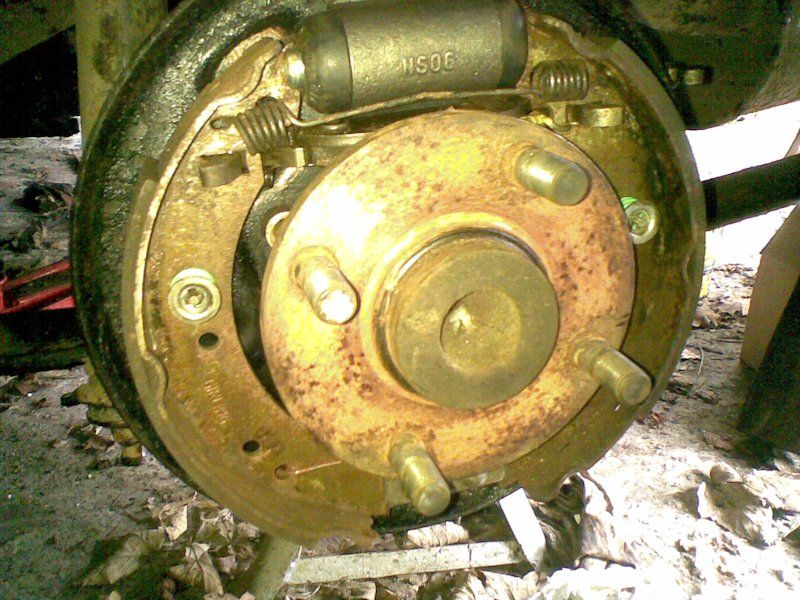
Anyhow, the drum on one side came-off alright in the end after loosening the hand-brake cable and some tapping and prising work on the drum itself. The inside looks pretty good and will be cleaned-up and dismantled to check the lever device that goes through the backplate which is awesomely good at getting seized-up with rust. The drum will need a rotary wire-brush with a drill and a bit of grinding to remove the lip which develops on the inside due to wear caused by the brake shoes. The shock absorbers will need replacing due to the outer sleeves rusting through but everything else seems to be pretty good. I think the brake pipes can be rescued with a bit of paint to keep the surface rust at bay.
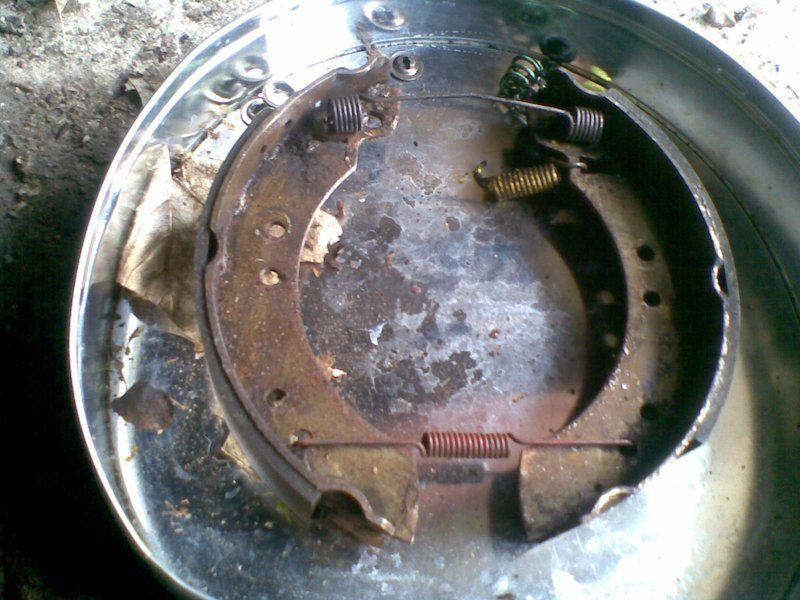
A few days later the paraphernalia within each of the brake drums is inspected and it is found that the seals on the cylinders are leaking quite a lot now that they don't have so much pressure on them. The little circular springs also seem to be missing. Anyhow its looking like new brake cylinders, or at least new seals, are on the cards.
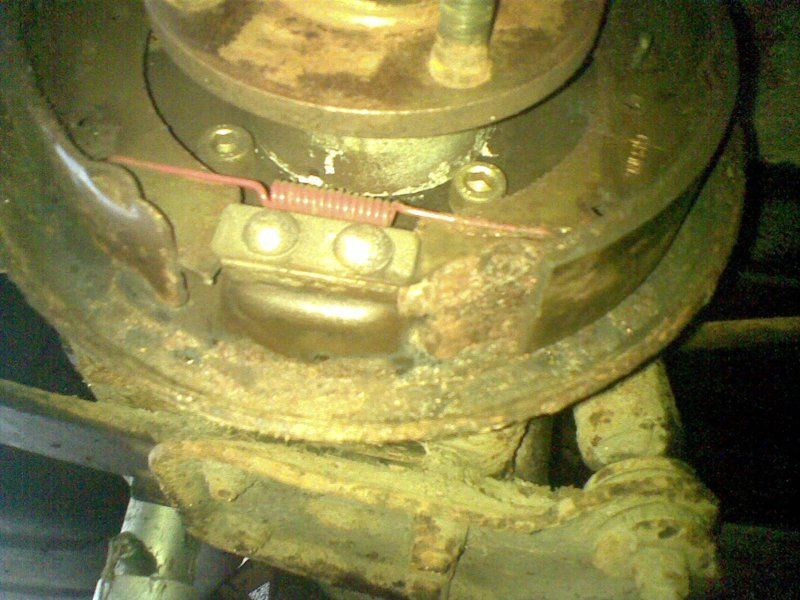
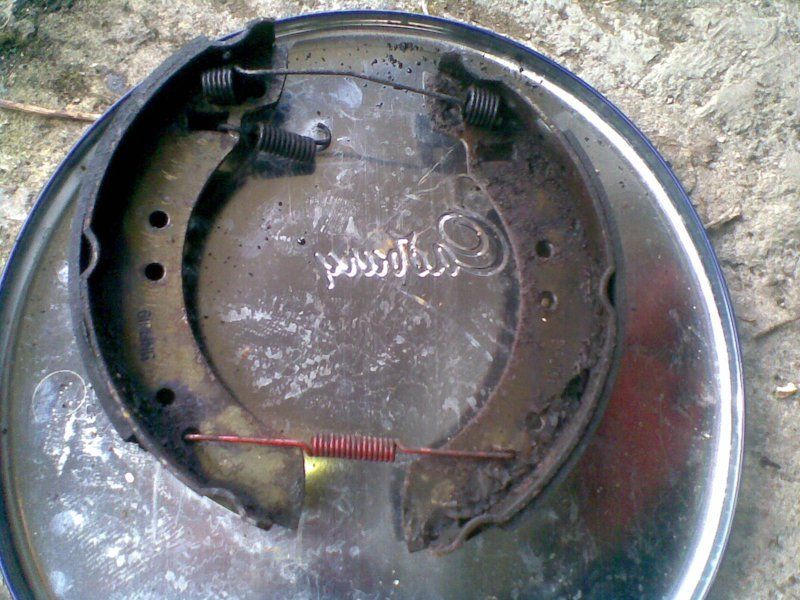
The shoes and springs are removed and stored for safe-keeping and, hopefully, ease of reassembly!!
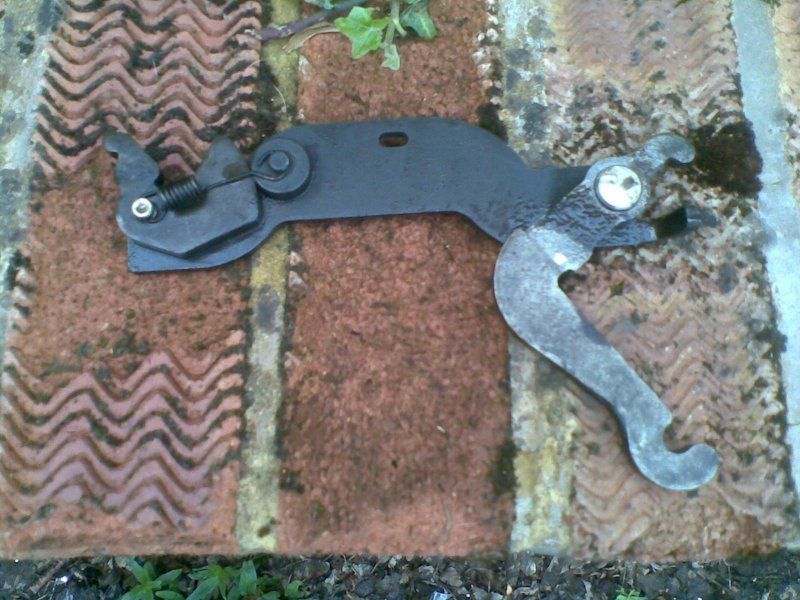
The pipes on the back of each brake cylinder refuse to unbolt so the pipes, sadly, have to be cut through with a hacksaw, but they will all be replaced anew. The cylinders themselves unbolt relatively easily and this allows removal of the self-adjuster lever mechanism which was seized at both ends, on both sides of the car.

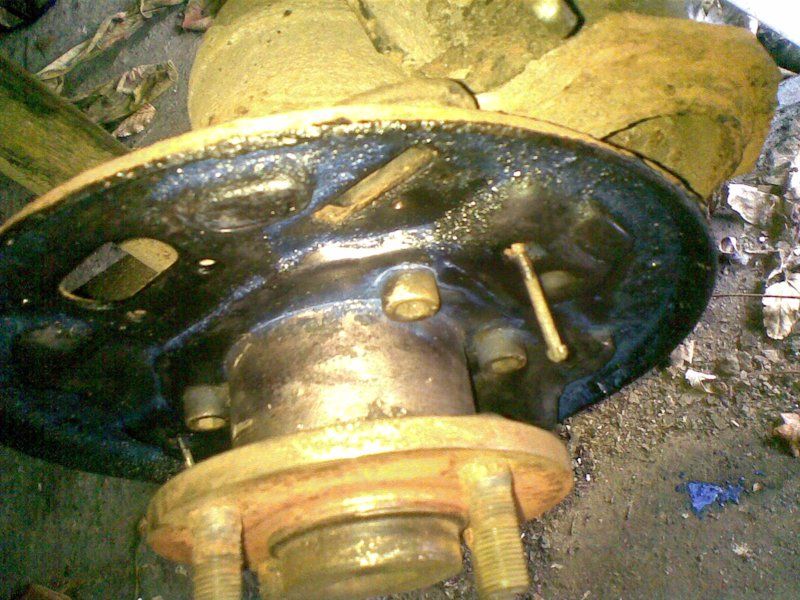
A bit of wire brush work on the drum back plates will allow them to be painted with a bit of Kurust so perhaps we are beginning to make some progress.
During May 2016, some work is done to paint the inside of the rear brake back-plates with Kurust, to reasonably good effect, I hope.
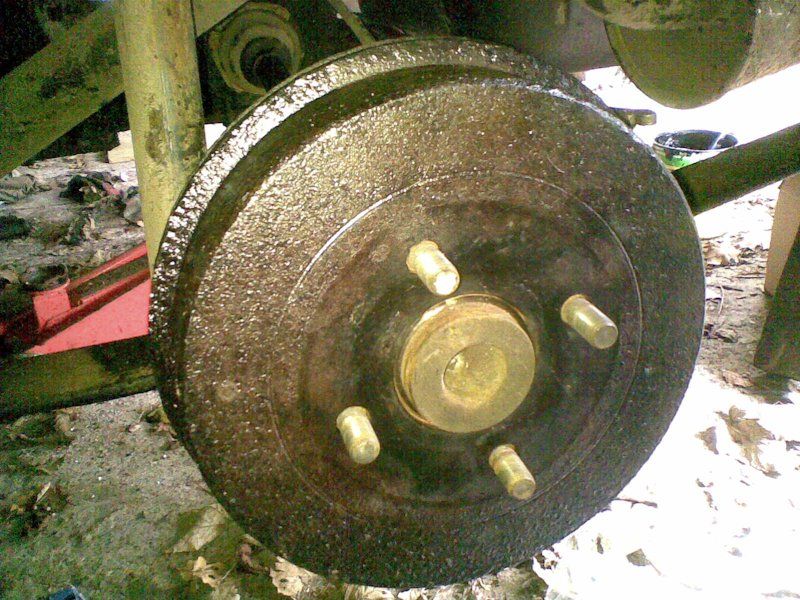
Some more waxoyling is done on the back-axle and the drums themselves are rubbed-down, their ridges ground-off and their outsides given a dose of Kurust. Slowly, new copper pipes and brake cylinders are fitted in place on the back axle.

After much struggling, the brake shoes and springs are refitted on one side with a smear of copper-ease for lubrication on the backplate where the sides of the shoes rub. Its all going a bit more slowly than I had hoped, but some time is being spent on another of my ruins ;-0
Finally, after a monu-mental struggle to get the final brake-shoe retaining spring into place, the job is done on the other side of the car, too, and the Kurusted drums are replaced, the brake pipes tightened-up and the wheel arches given a light wire-brushing in preparation for some more waxoyl.
Now in early June 2016 and Red Ness has had some of the dried mud under her rear wheel arches wire-brushed away in readiness for some waxoyl.
So far, two coats of waxoyl have been applied to reasonably good effect and the old shock-absorbers have been removed.
New shock absorbers are fitted and everything looks awesome again.

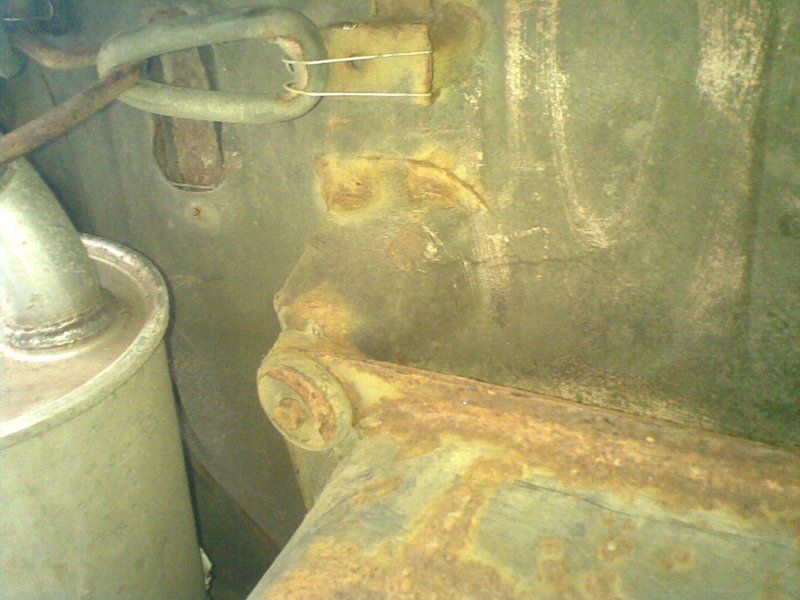
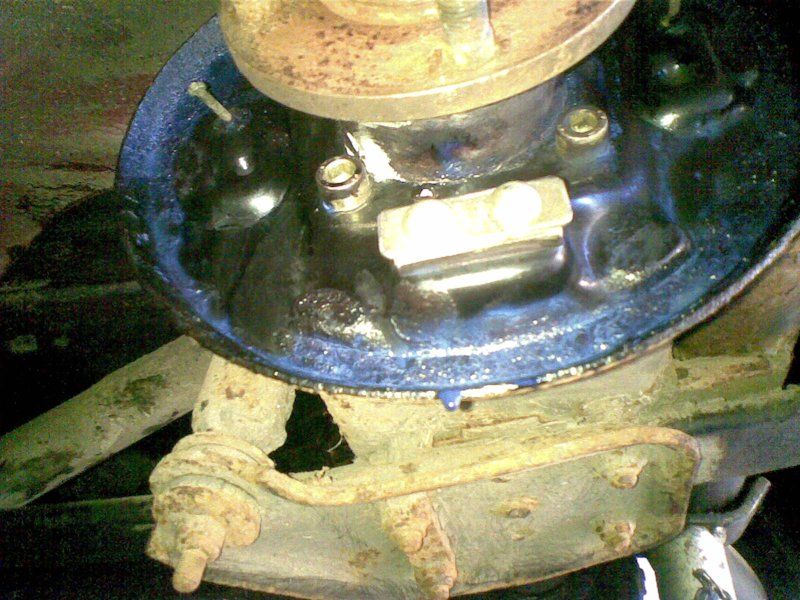
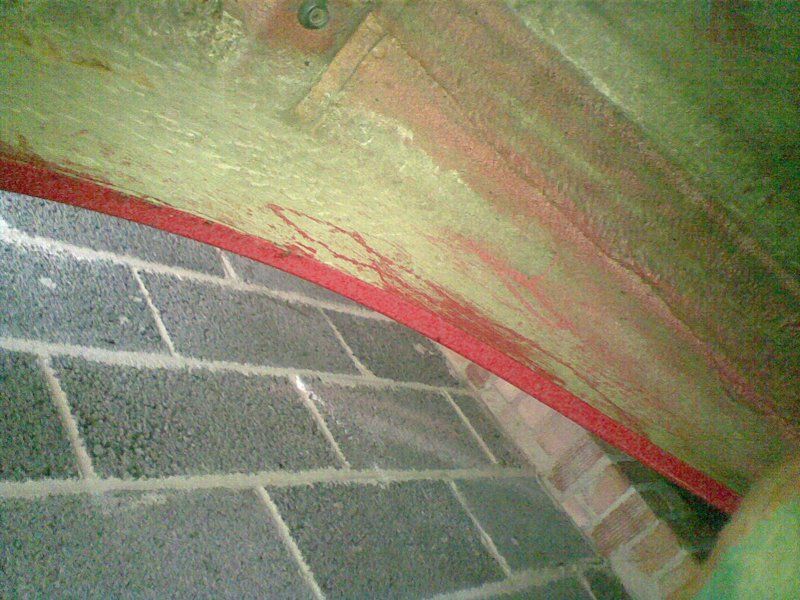
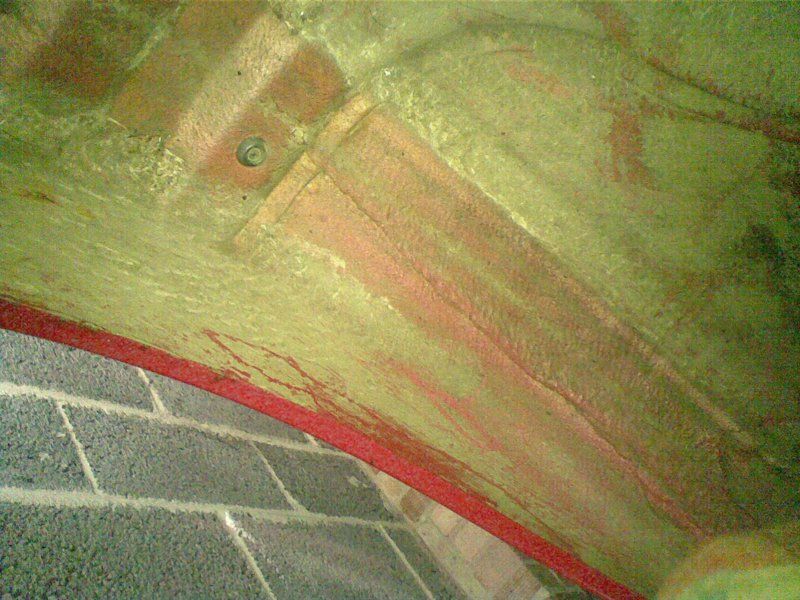
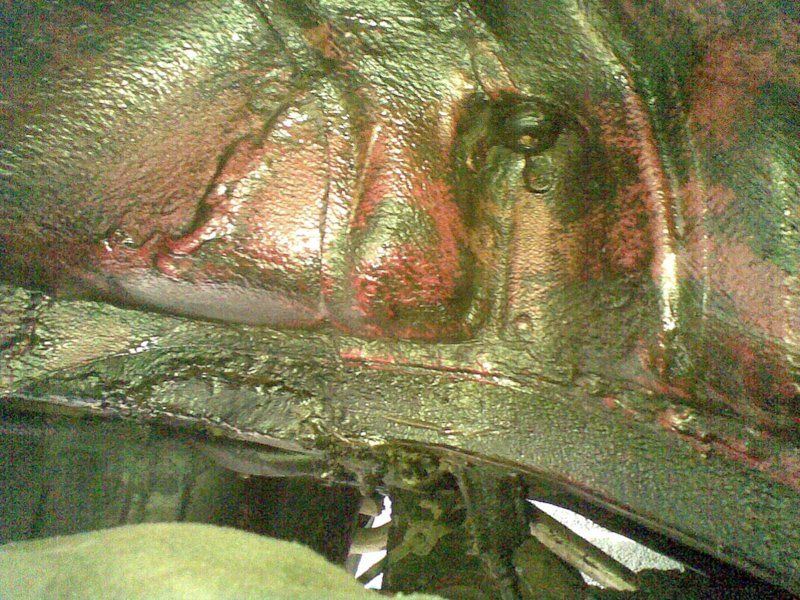
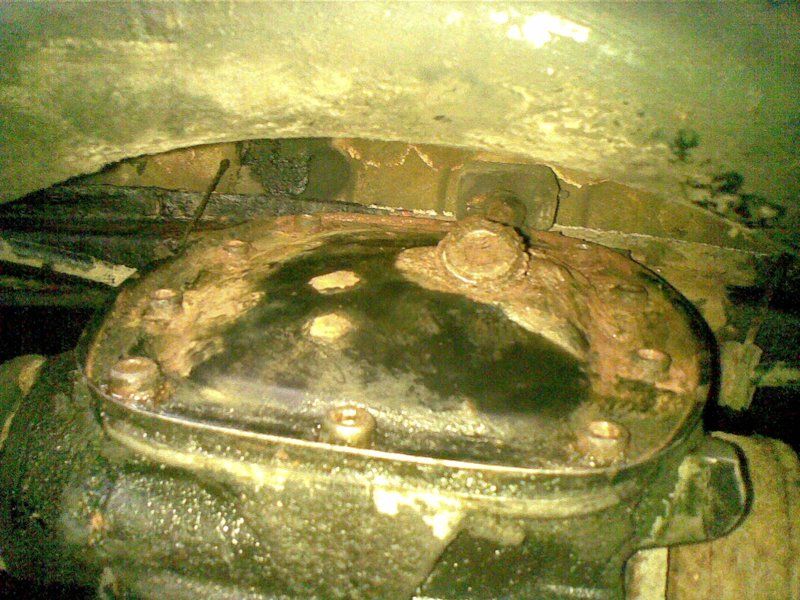
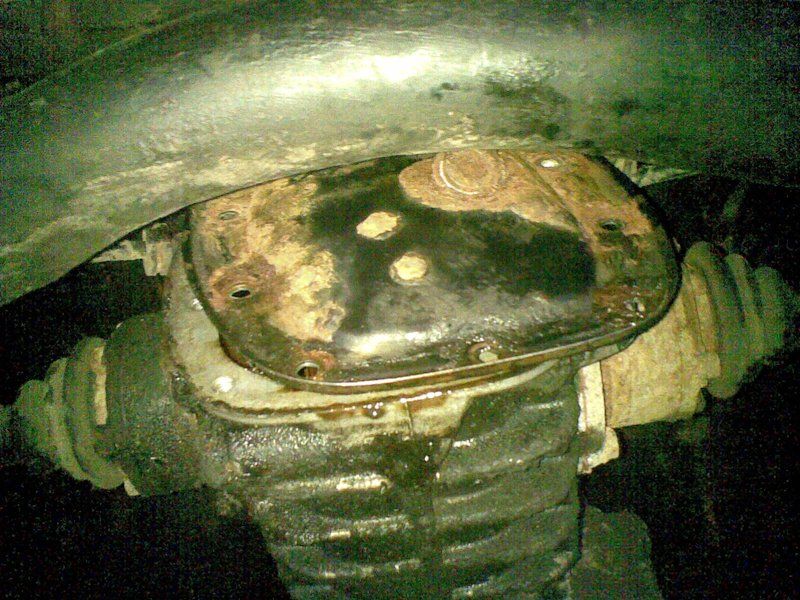
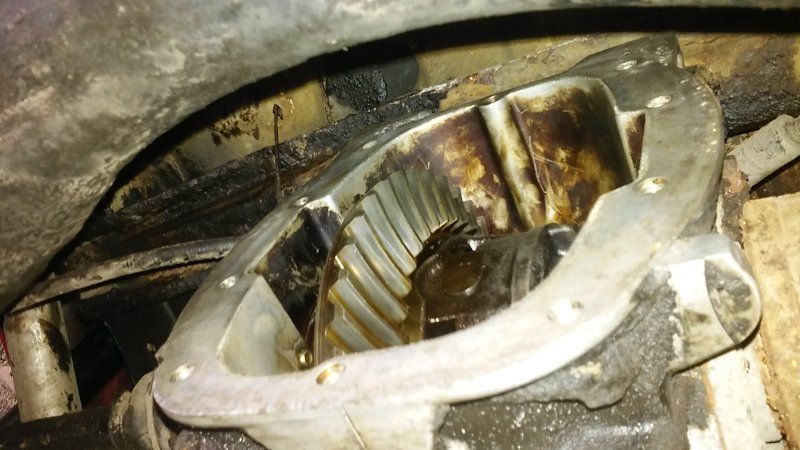
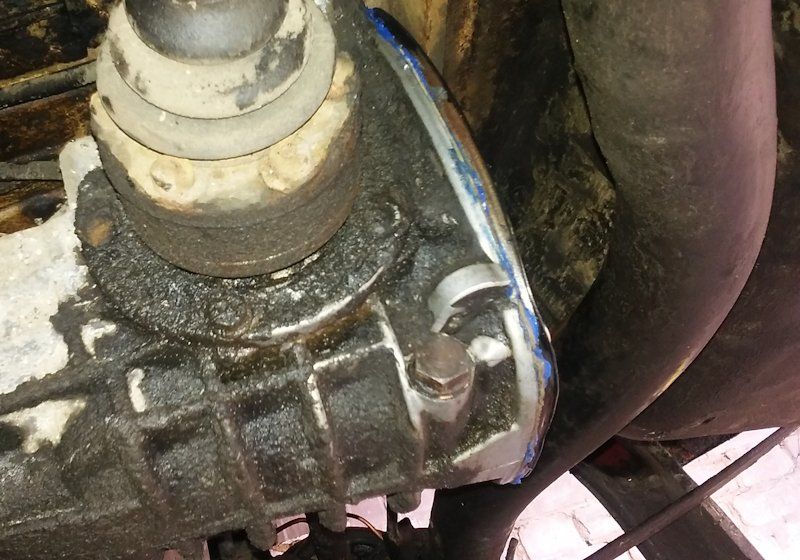
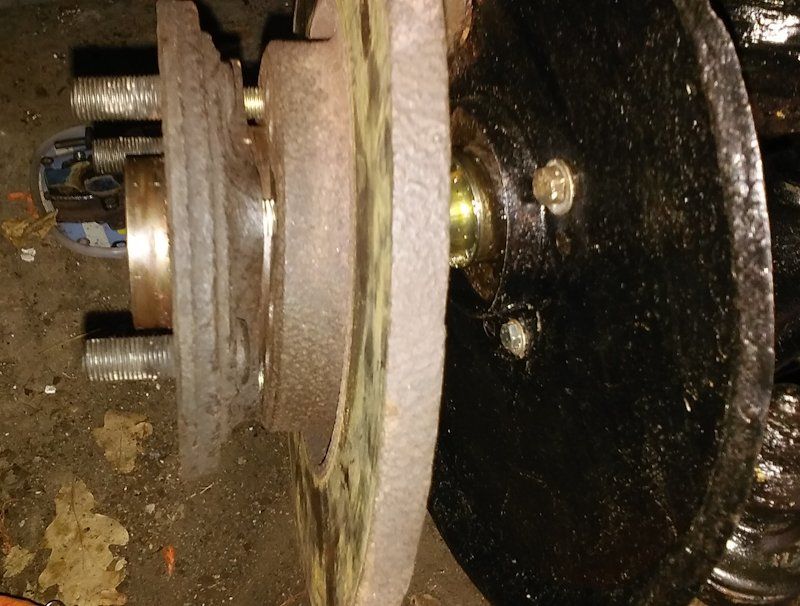
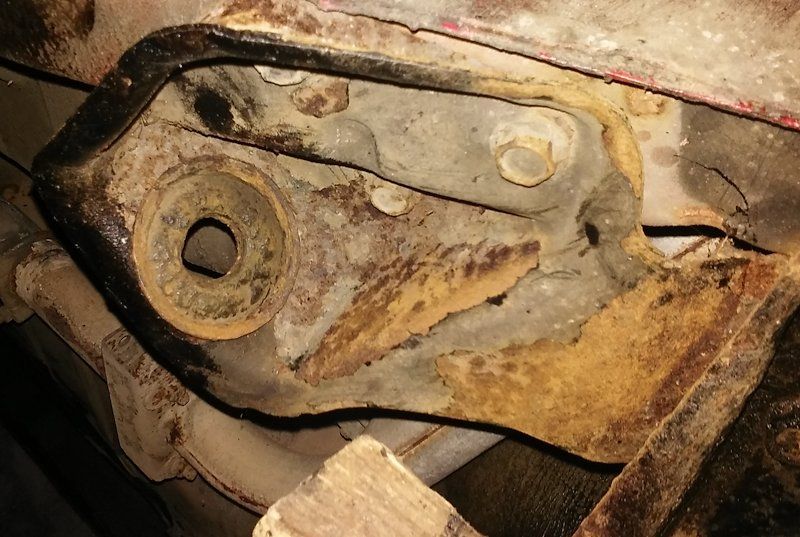
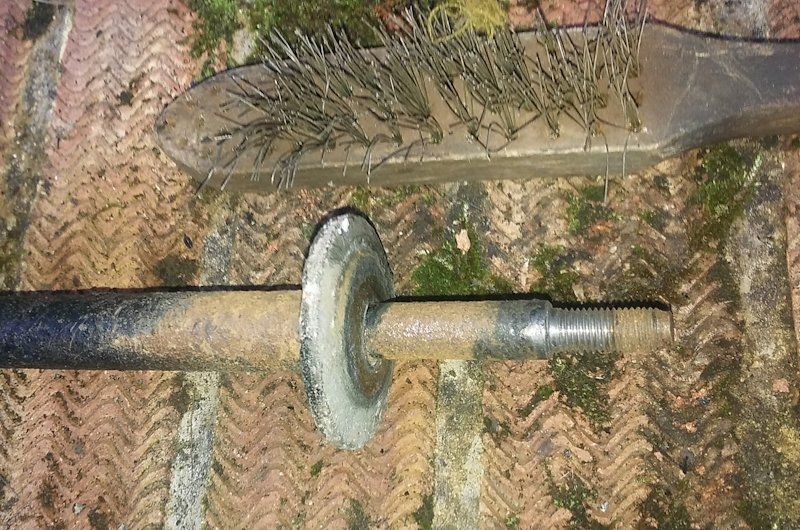
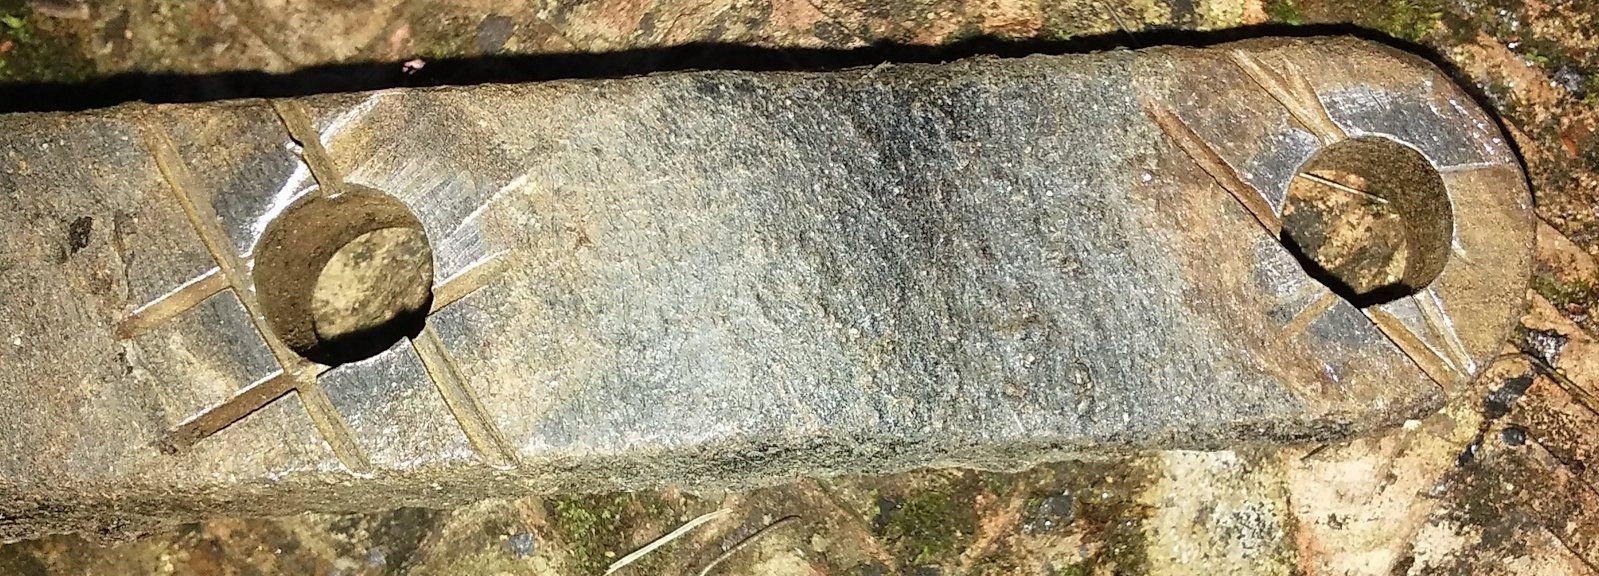
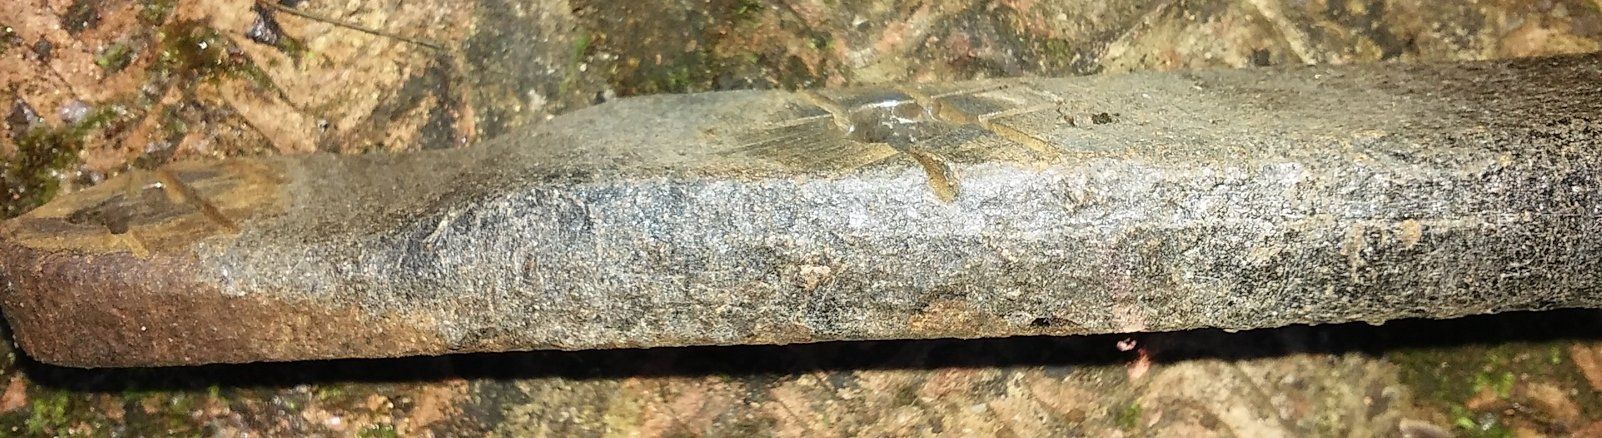
Following these successes things take a slight turn for the worse since efforts to check the differential oil level by removing the filler plug result in the diff-backplate tearing, as (just about) shown below. Ok, it was tight so I had to use the jack to try to undo it, but it wasn't budging. Hence the backplate will have to be removed and probably will be taken to the welder for repair, but this will have to be done on a slightly slower timescale since other tasks leer their ugly heads.
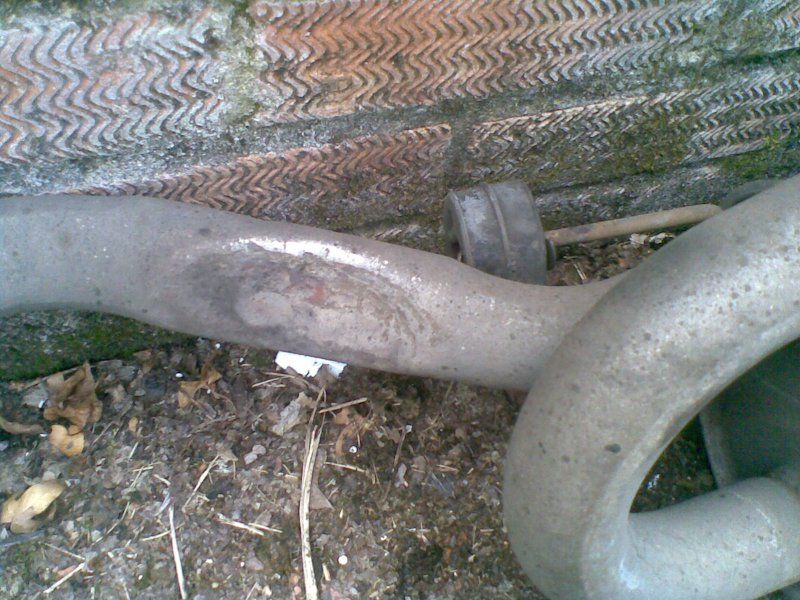
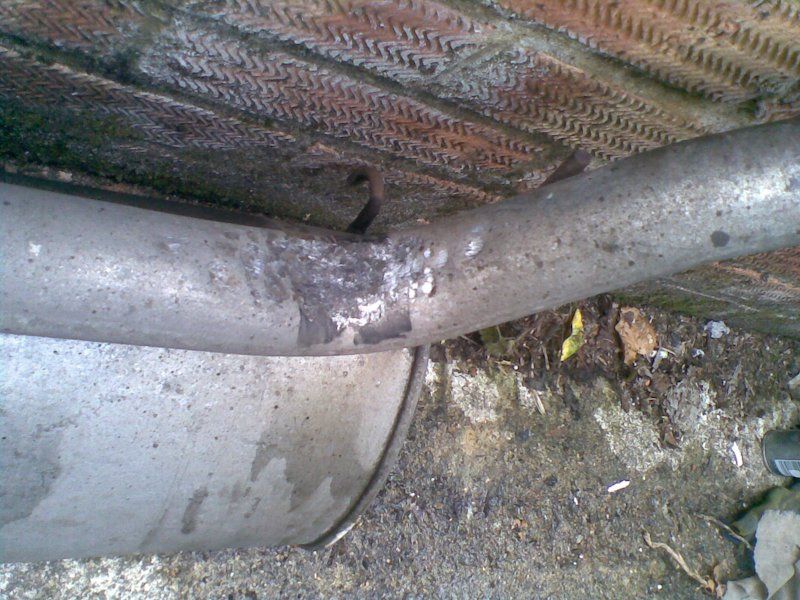
One such task is created by my eventual loss of patience with the banging exhaust pipe on the 360. I had previously got my annoyance to manageable levels by fitting two ultra-strong polyurethane hangers from Classic Swede and these worked well at stopping the knock. However, wherever there is competence, there is ambition, and these two excellent bushes made a bid for freedom and were never found again, despite my walking about two miles along the offending country lane where they escaped. Anyhow, I replaced these with two strong rubber ones which also worked well in cold weather, but now the warmer weather is with us, they became considerably more flexible and therefore do not prevent the exhaust pipe banging any more. To save my sanity, everyday transport is shifted temporarily to the beautiful blue 1.7 and off comes the 360's rear silencer for attention. Indeed, fully independent and verifiable proof of my transition to driving the 1.7 is kindly provided by Kingston Council following my errant excursion into one of their lovely yellow boxes and yet another fine ensues, bah humbug.
Meanwhile, some smithy work with a blow-lamp and a heavy hammer eventually got the 360 exhaust pipe beaten into a state where, finally, on re-fitting it to the car, I find that it does not bang anymore when going over bumps and dips in the road. That really is an outstanding breakthrough of inestimable proportions and allows me to return to working on the underside of the red 1.7.
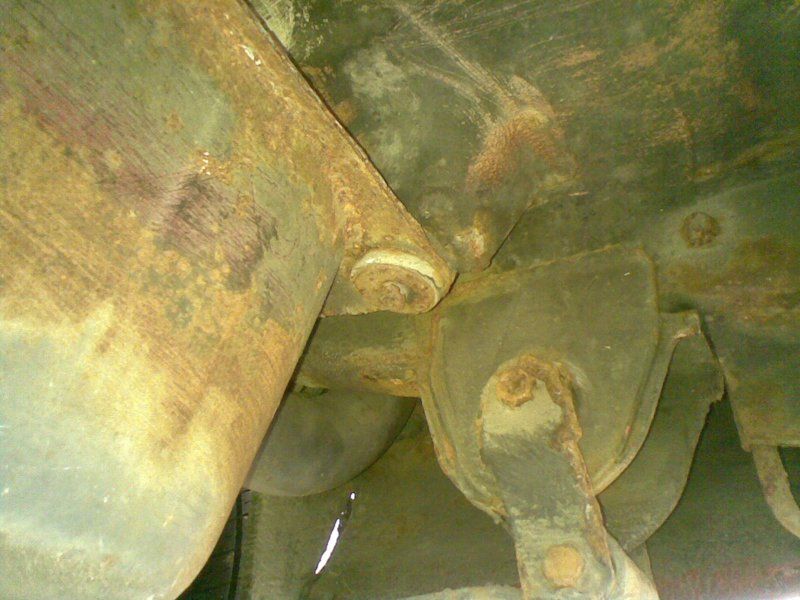
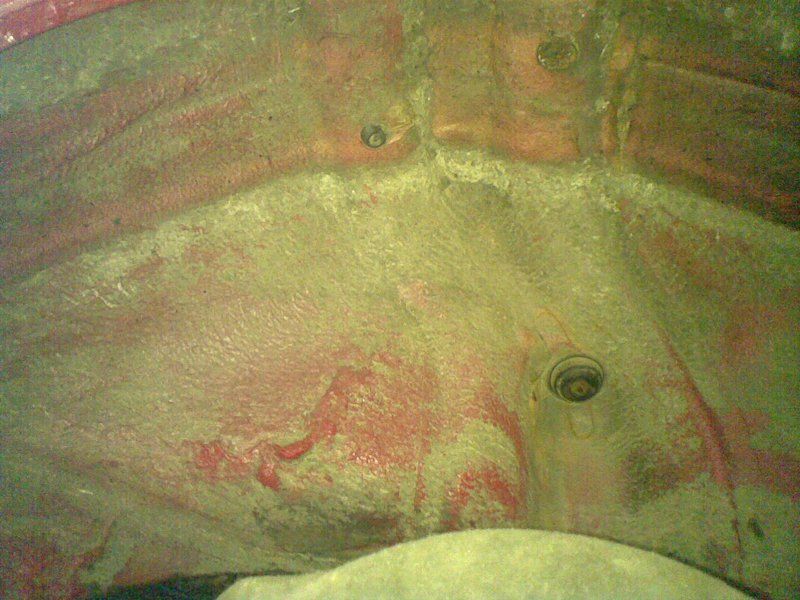
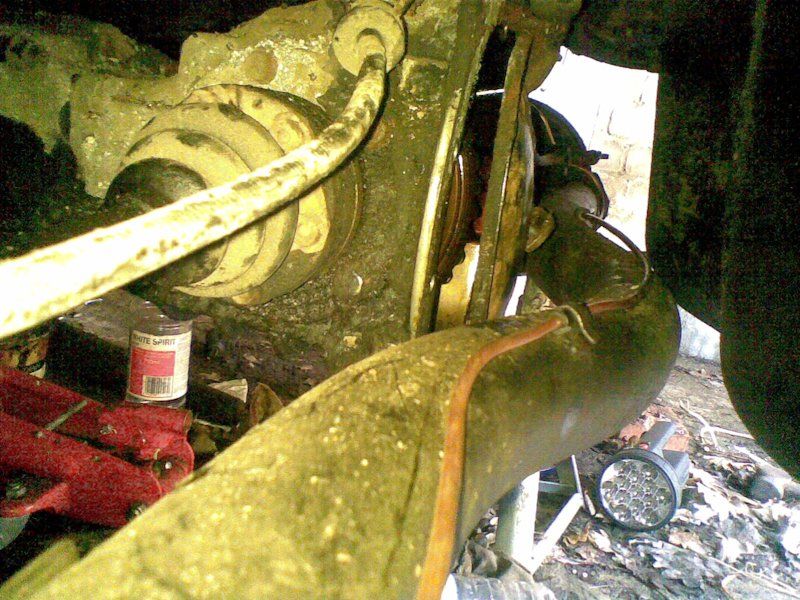
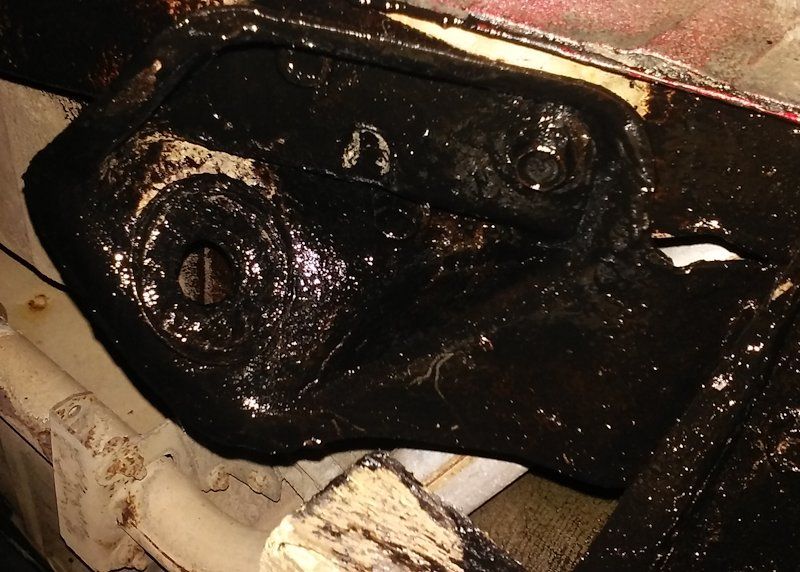
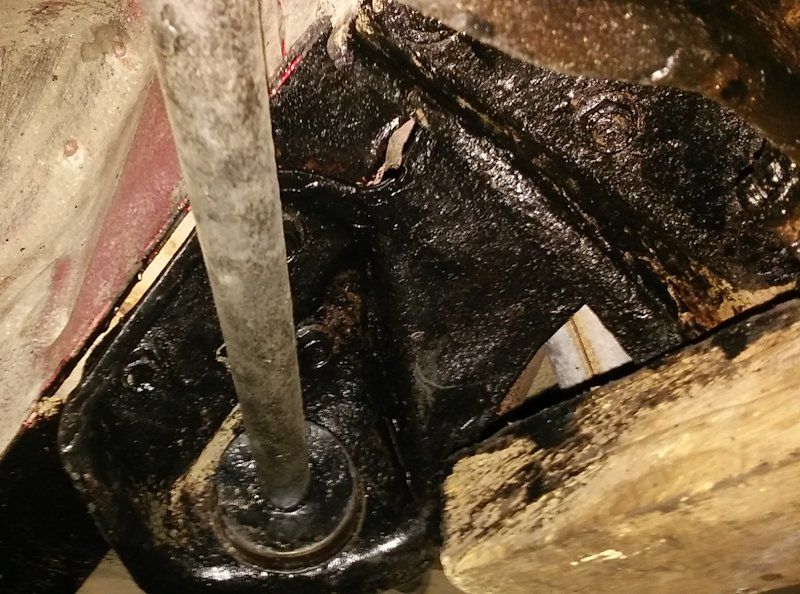
A wire brush and a bit of paint has also been applied to both of Red Ness's rear wheels while I waited to get started on the diff-backplate, a glance at which shows some prominent rust.
After several visits and much brain-aching about which trick to try next, the backplate is finally removed in late June 2016.
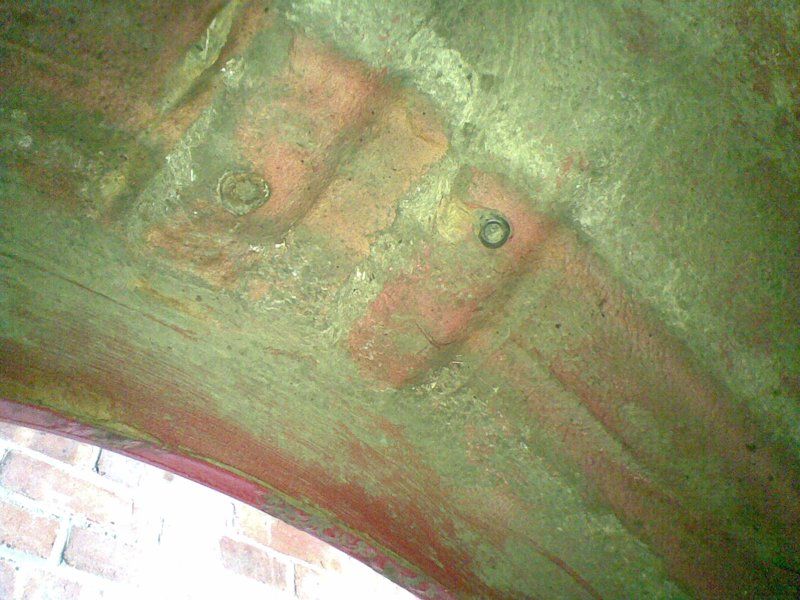
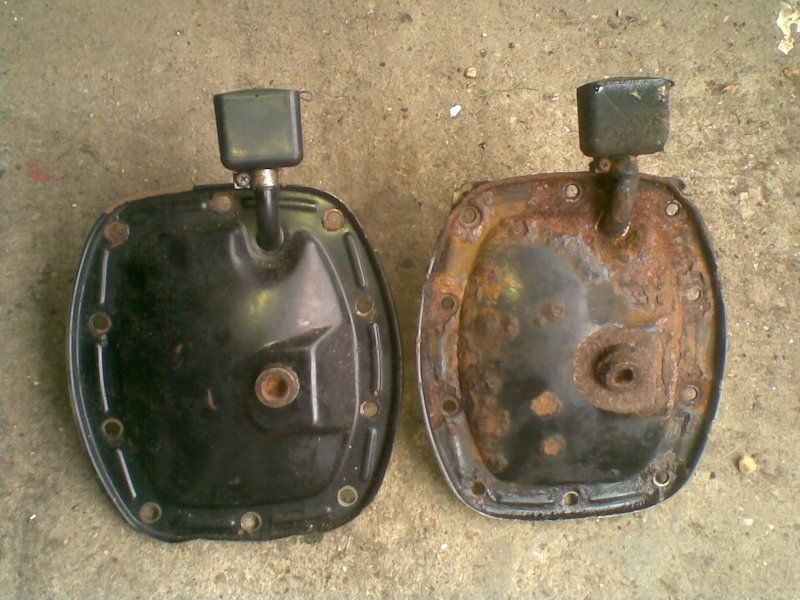
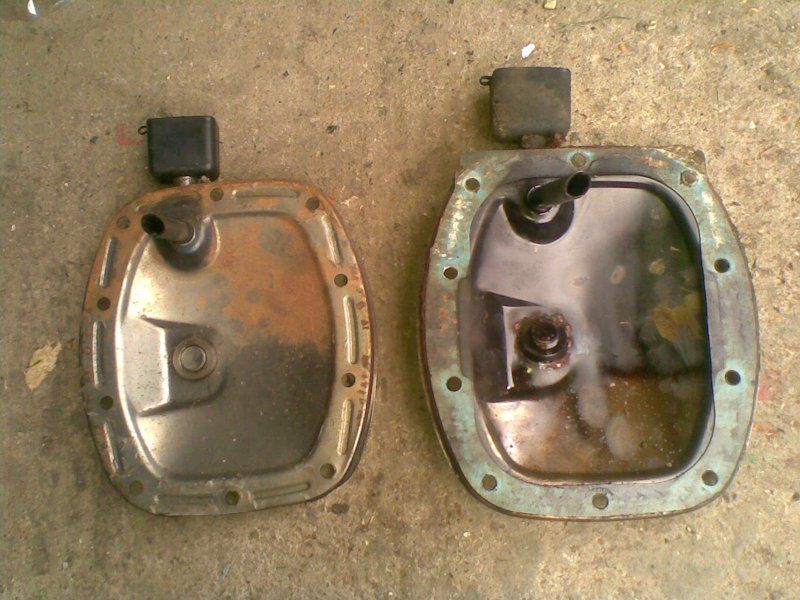
On removing the diff cover plate, it is pretty clear that it is quite badly rusted and I have a memory of a spare being somewhere in the roof and this is duly found. The two side by side now show that it is definitely going to be better to replace the old one so a new gasket is ordered.
Now getting towards the last week of July 2016 and there hasn't been much time that I can spent on the 340 due to self-inflicted pressure to sort out my other ruin, but the 360 is used as daily transport for ferrying bits of woodwork in various states of repair for said ruin, as the photos below will show. Shame that a welder decided to remove this veneered panel with a crowbar - I know its beauty is only skin deep, but it only takes about a couple of hours to remove it non-destructively!
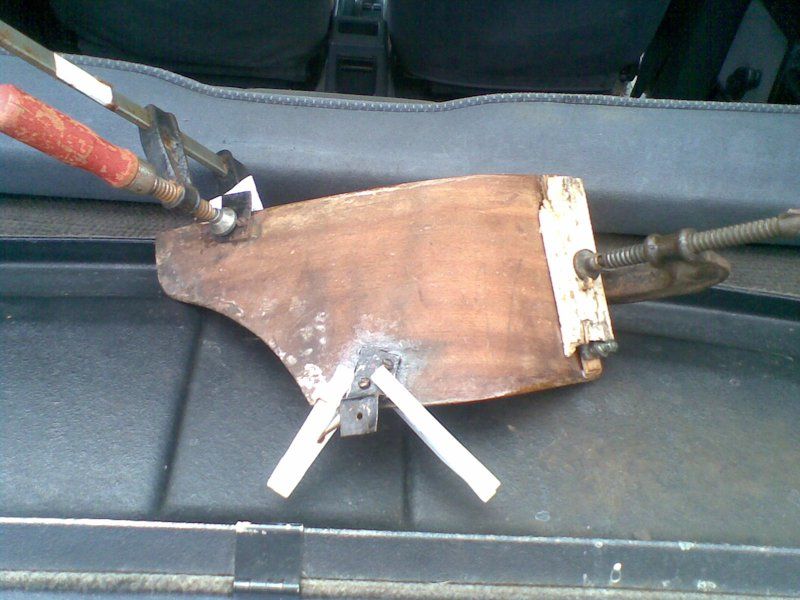
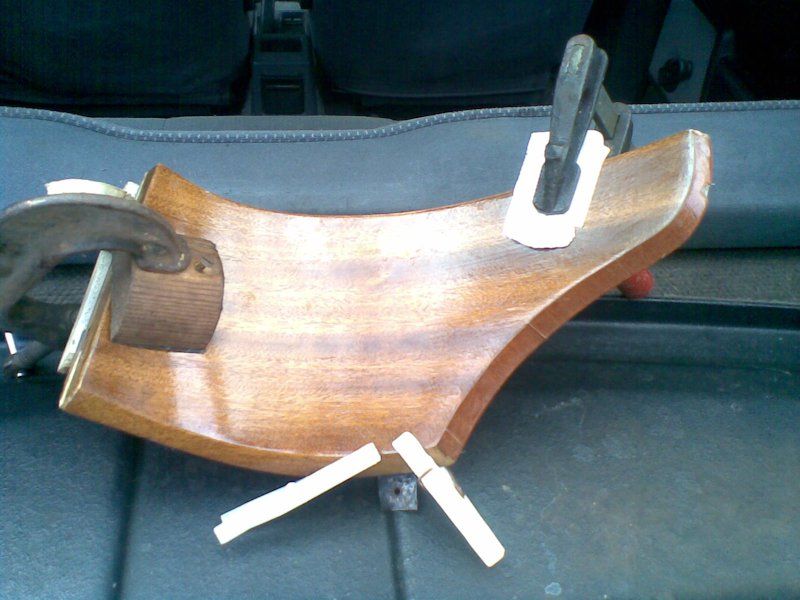
Anyhow, I should be back on track with the 340's in a few weeks.
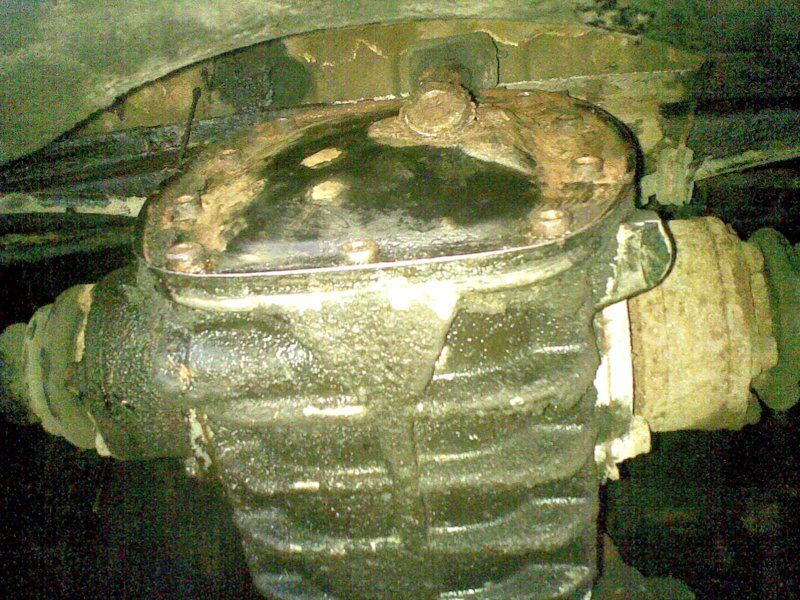
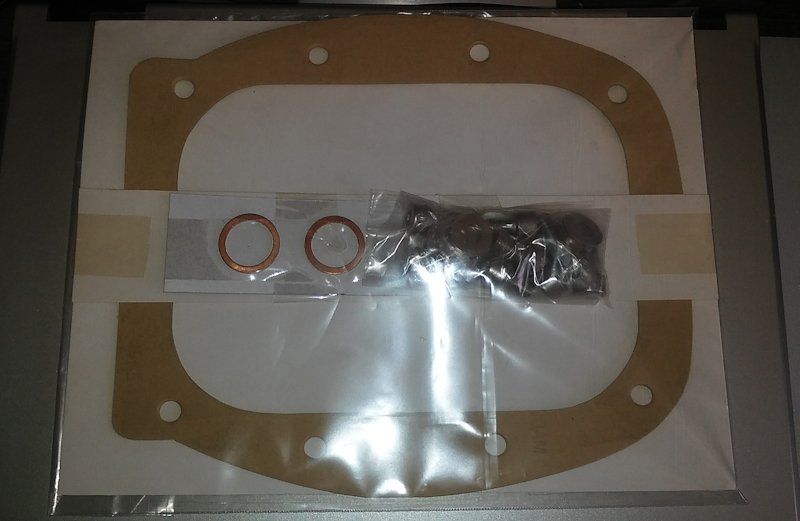
It is now mid-August 2016 and I am getting progressively closer to re-starting restoration work on the red beastie. Hopefully this is evidenced by the arrival of an excellent Mac gasket set for the differential cover plate and by the application of a coat of Hammerite black paint to said diff cover whilst closely supervised by Socks in the cat department. As the instructions say, I must remember to clean out the breather box.
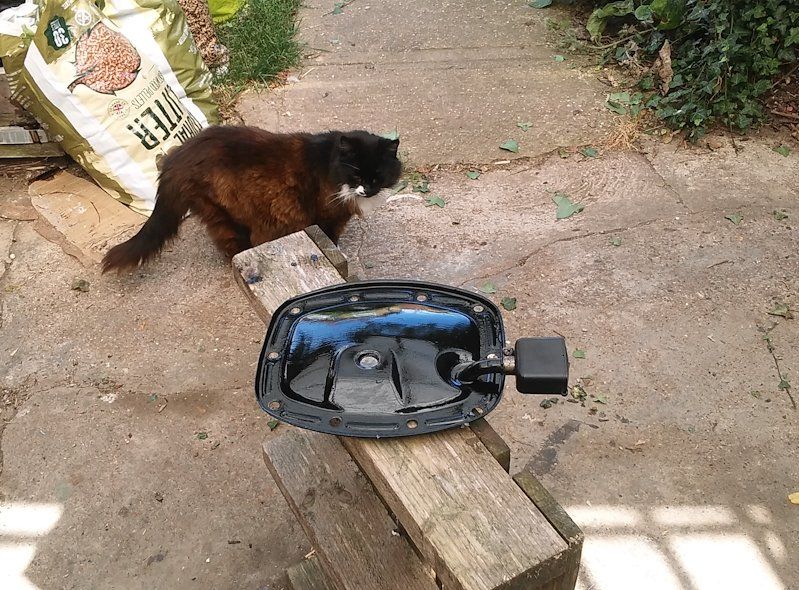
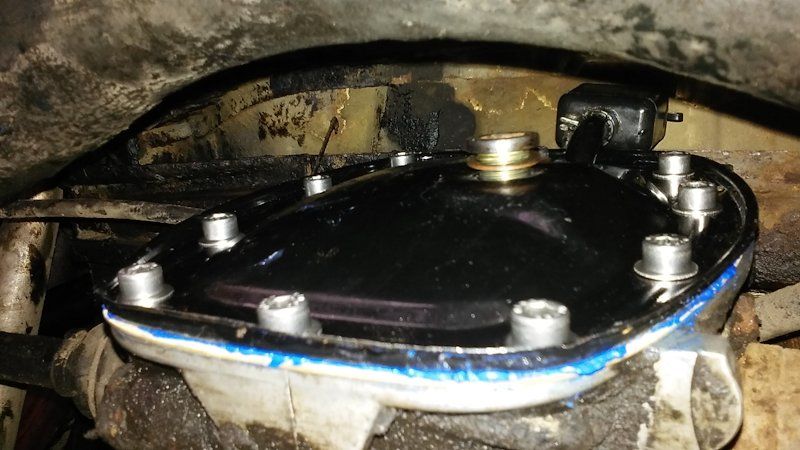
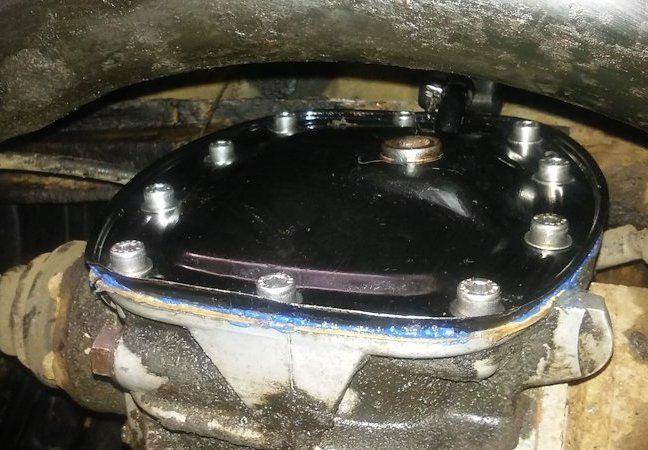
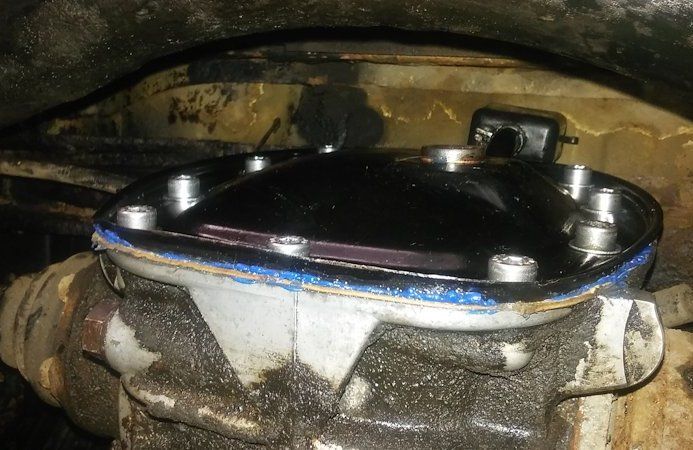
Indeed, the breather box is checked and found to be clean so the diff coverplate is given a bit blue sealant around the seams and the gasket is given a light coat of it, too. The mating-face on the diff itself is found to be clean (I must have done that before) as well as being given a bit of sealant and everything is bolted-up loosely (finger-tight with the allen key) to let the sealant set a bit before the bolts are tightened to the right torque and any oil is added. The plan is to leave it for a week or two to let the sealant set.
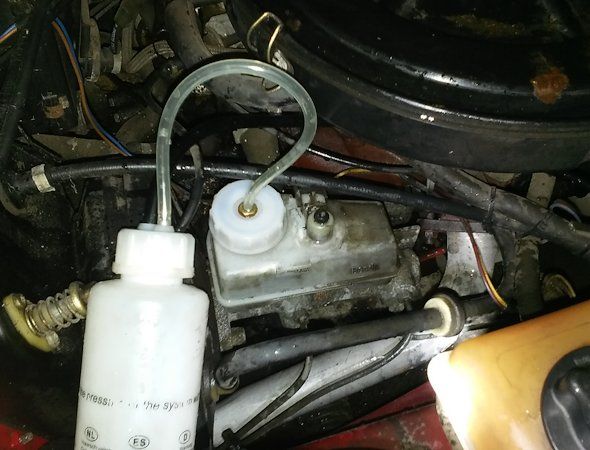
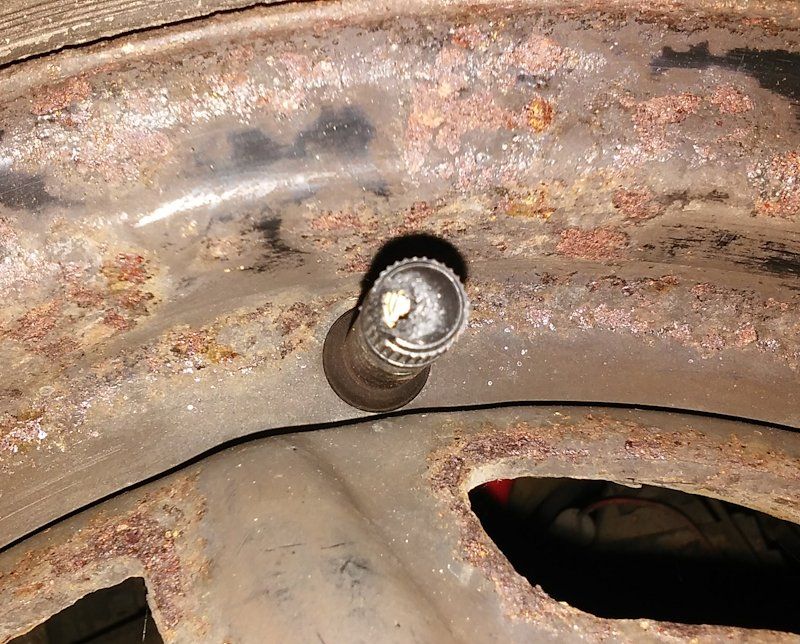
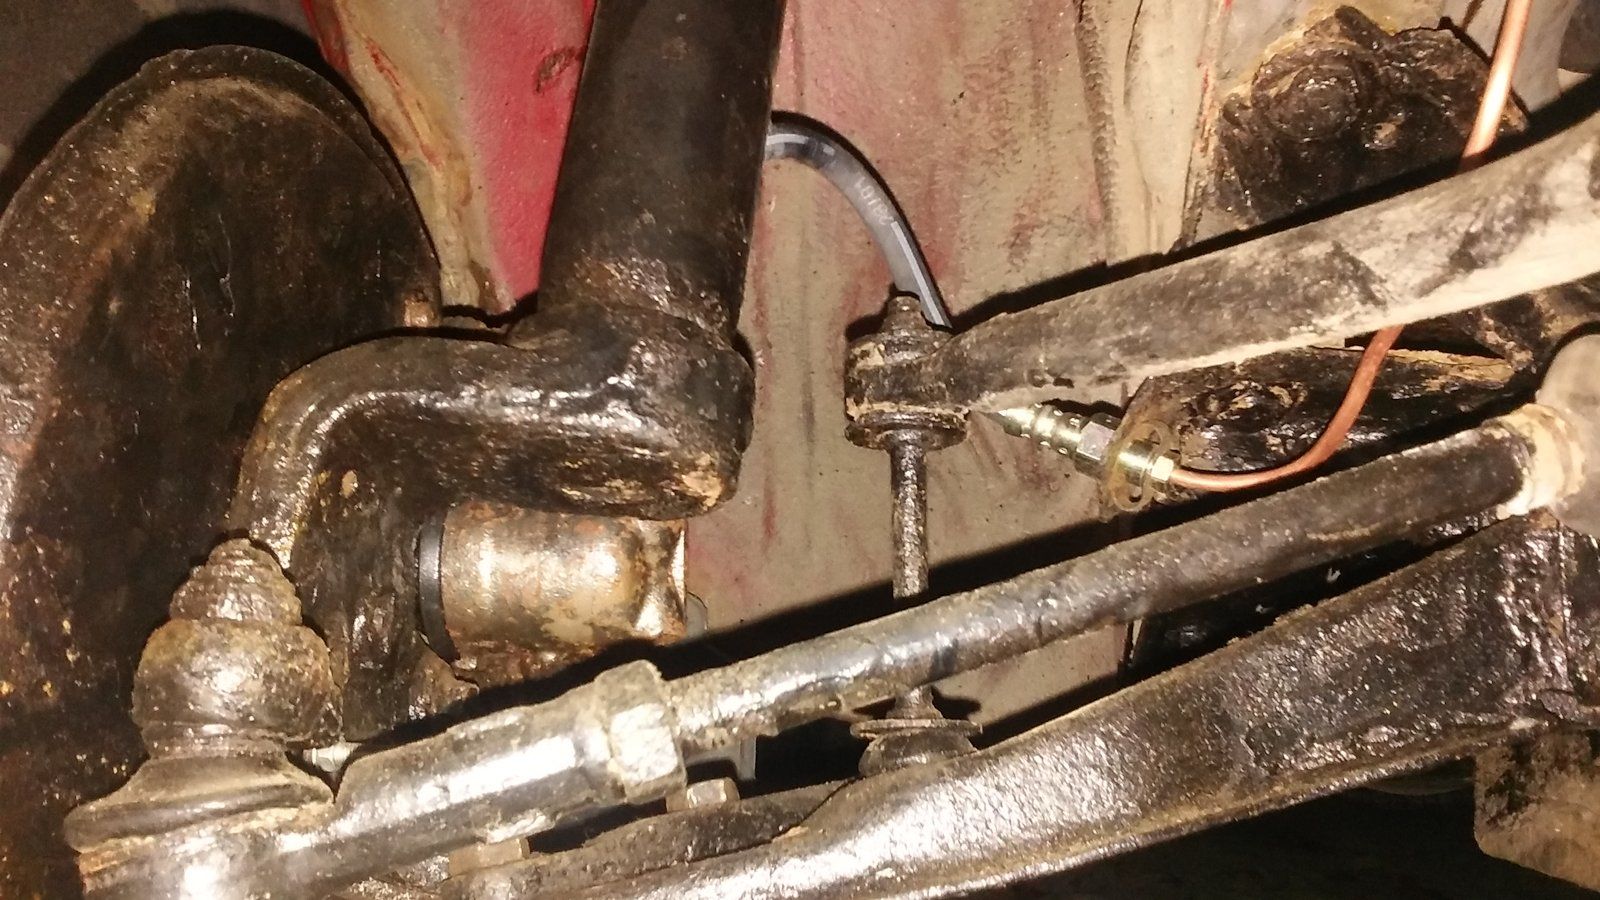
Meanwhile, the plan is to get the brakes bled-through so that the car might eventually be put back on the ground and reversed out of the garage to allow things to start at the front. However, on attempting to pressure-bleed the system, I see and hear a fine-jet of brake fluid escaping from the plastic brake fluid reservoir that sits on the servo. A closer look shows that someone or something (maybe even a mouse) has worn away at or chewed through a little black rubber seal on top of the reservoir and this therefore looks like another candidate for replacement. That area of the engine bay is given a copious flush down with water to minimise the chance of any paintwork being damaged by the brake fluid and eventually a suitable spare reservoir is found in the roof. You can just see the offending part which leaked (it looks like some sort of valve device) right in the middle of the picture.
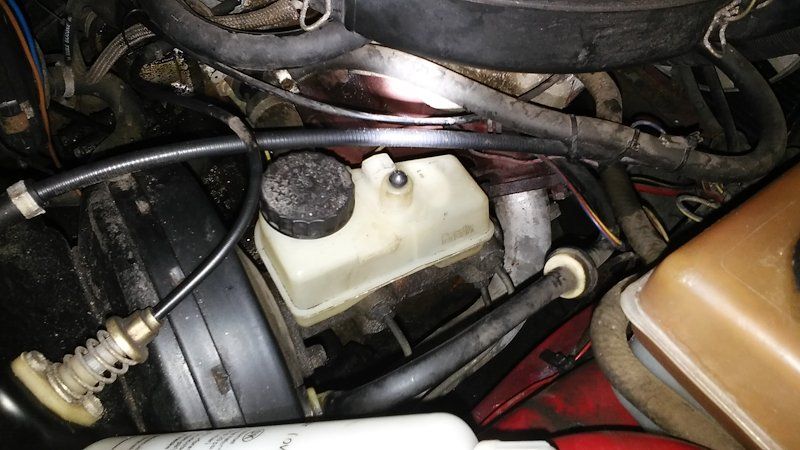
The spare reservoir is given a bit of a clean-out, fitted and re-filled. Thankfully, it seems to work fine since it allows the rear brakes to be pressure-bled and applying pressure to the pedal seems to do the right thing. Forever forensic, I make an 'interesting' discovery that the dust-cap on the spare wheel has been nibbled away in exactly the same manner. There must be a wild-life expert who can recognise those chew-marks but I am thinking.... mice.
Anyhow, after a bit less than a week, the bolts on the diff cover are tightened-up to 22 Nm and then its left to sit for a bit. A couple of days later they are checked again for tightness and the diff is refilled with EP80/90 oil. A few days later it looks as though its not leaking so awesomeness really abounds. As can be seen, none of this is concours class stuff - its aimed at getting a working car that is reasonably well rust-protected and the metalwork tidy, etc.
Consequently, the rear brakes are given another quick pressure bleed to be sure they are OK, some wire-brushing and waxoyling are done where needed, the rear-wheels are fitted again and the car is lowered back onto the ground. Refitting the now charged-up battery allows the engine to start and run awesomely such that a quick run-around the garage yard allows the (slightly dusty) car to be put back into the garage with the front facing out so that work can commence in this department asap. Meanwhile will contemplate the rusty front valance and the inner wings which will probably be left for a few months (to save money ;-) while I tinker with a few bits and bobs in the engine bay, dashboard, trim, etc.
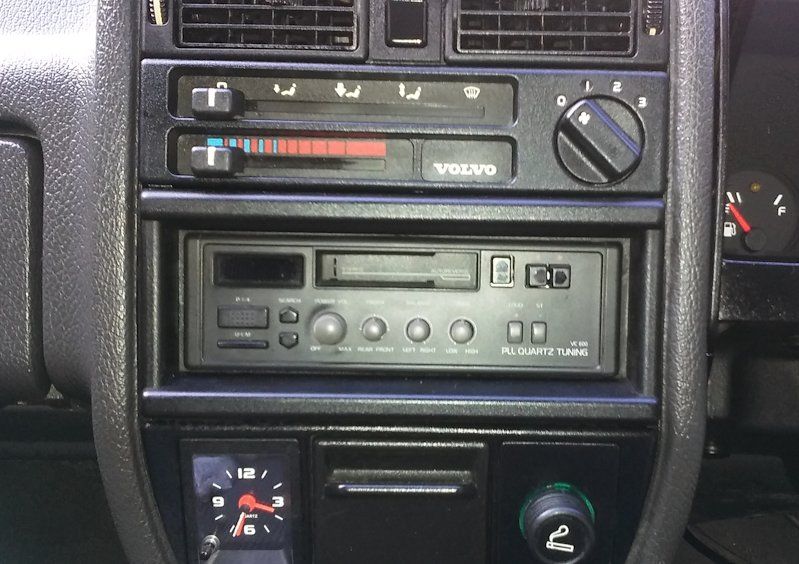
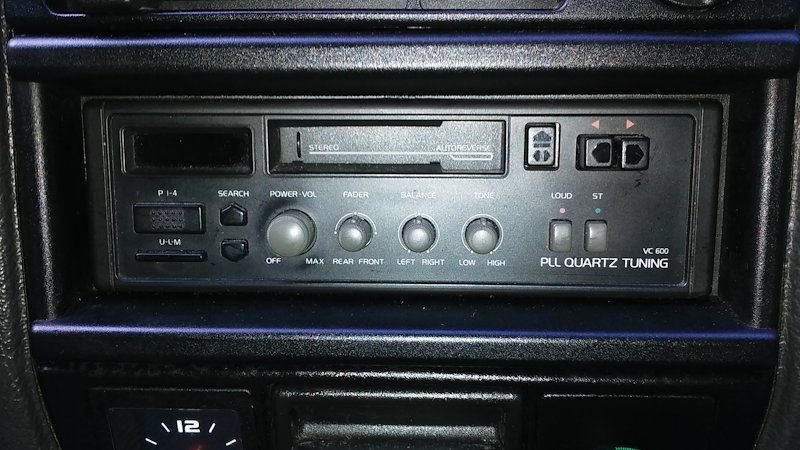
Now into early Sept 2016 and a few cosmetic-style jobs are done such as cleaning the dashboard and replacing the radio with a new one from MAC on the volvo300mania site which has all the knobs present and correct. It works, too!
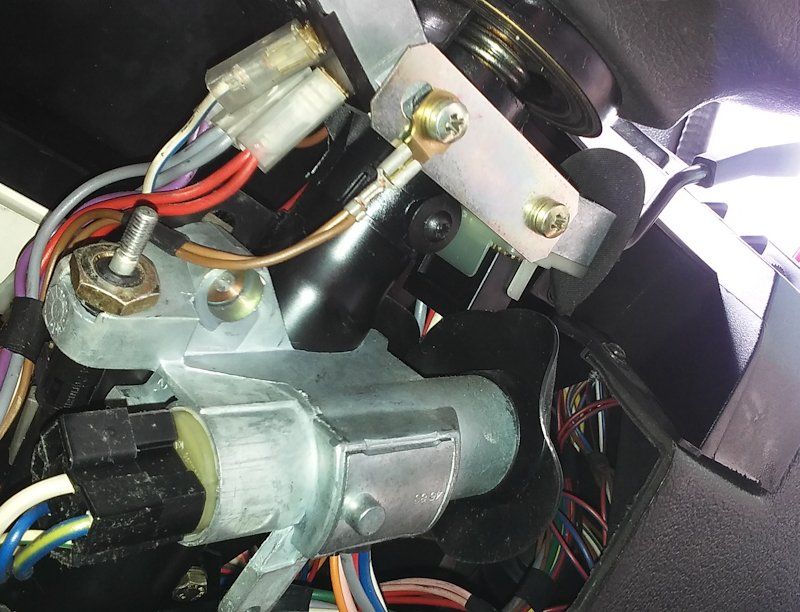
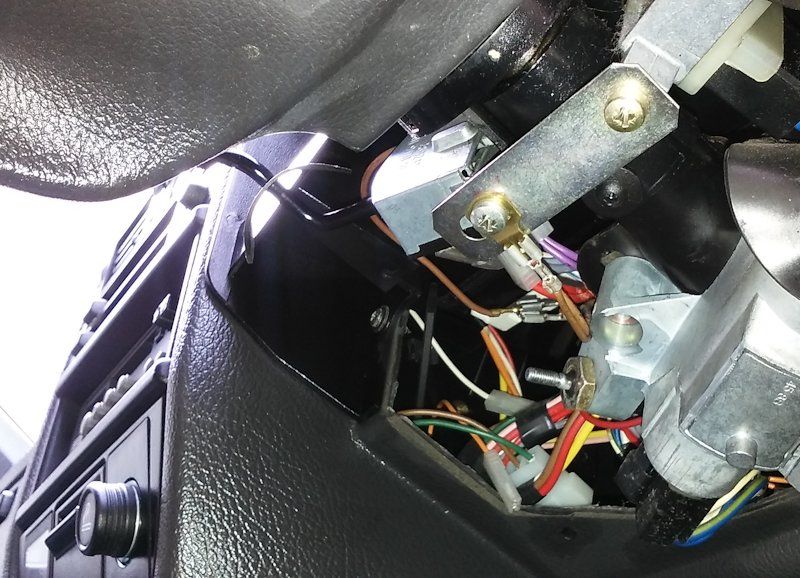
By driving the car a bit at the garage, I was reminded that the switches on the steering column feel a bit loose, so the shroud beneath the steering wheel is removed and the screws on the expertly-repaired mounting panel, as well as the ones at the top, are tightened to brilliant final effect.
I also remember that the car needs some new door seals to cure the wind-whistle, so a procurement in that department will be looked at over the next few weeks while I sort out more running issues with a much worse ruin hidden away elsewhere.
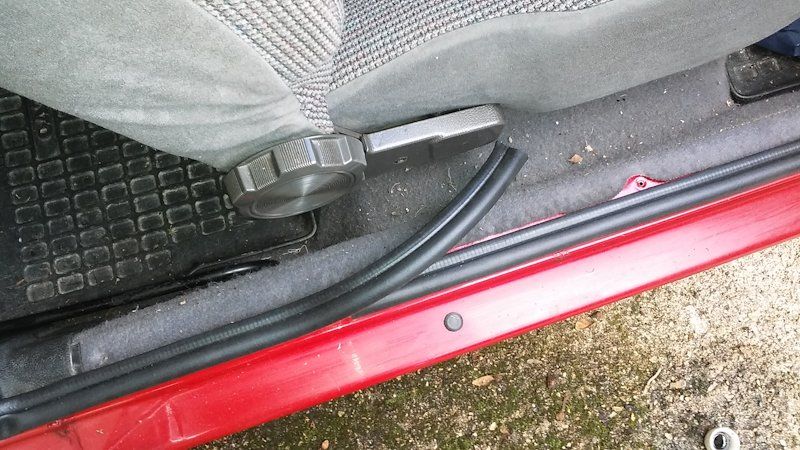
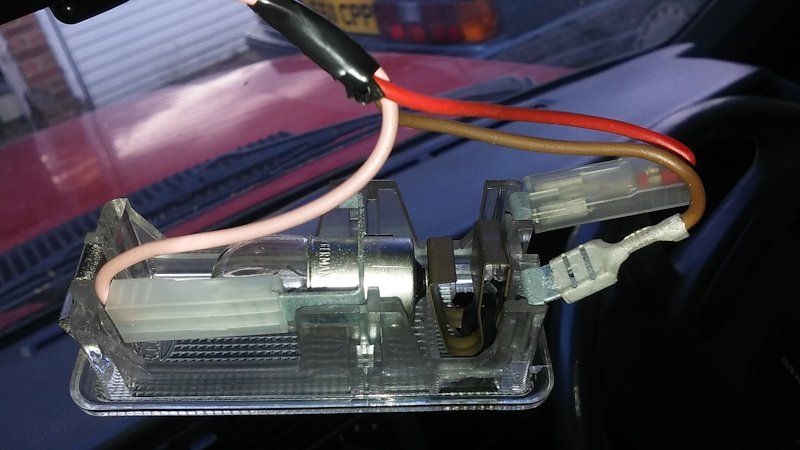
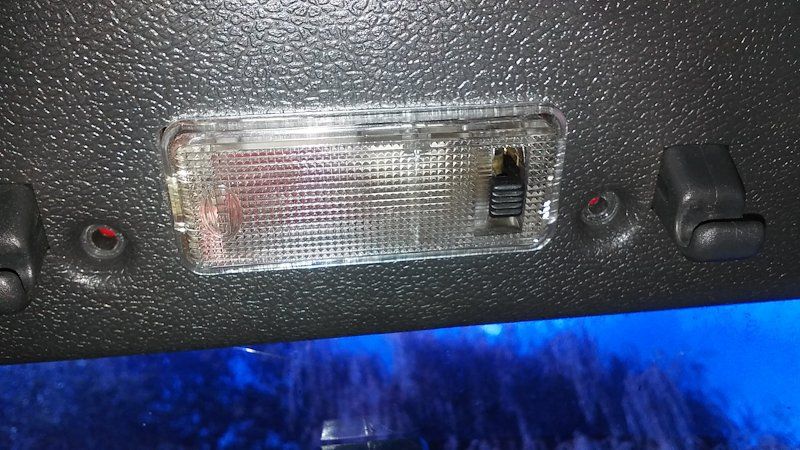
Its now mid-October 2016 and back on the red 340 again with the purchase of a new 3-door door seal which was fitted, as shown below, but was found, alas, to make the process of closing the door almost impossible, even after repositioning both the lock and catch. Thus it seems that the rubber of the new seal is probably a bit too stiff and bulbous, so a thinner alternative is sought from the web.
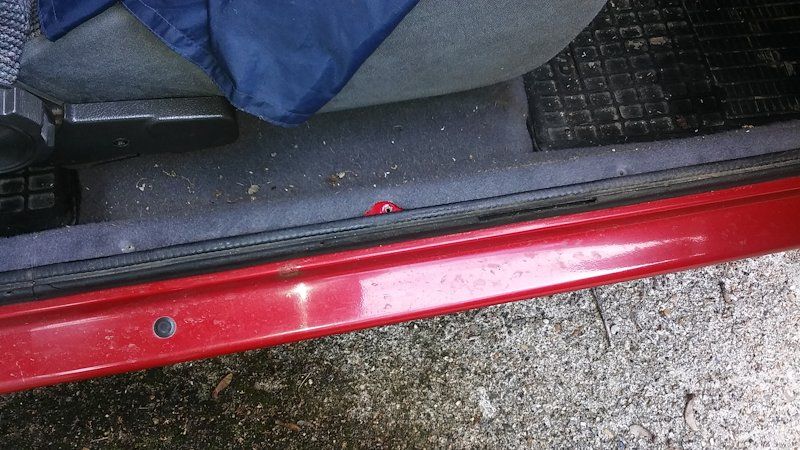
Meanwhile a bit of an issue with the falling-out-ness of the interior light switch is resolved with a clipped-off bit of cable-tie slotted into the right place. This seems to have done the job OK.
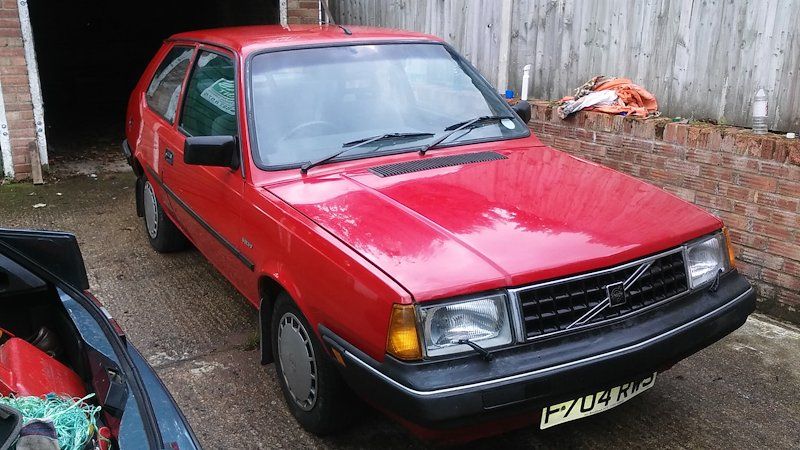
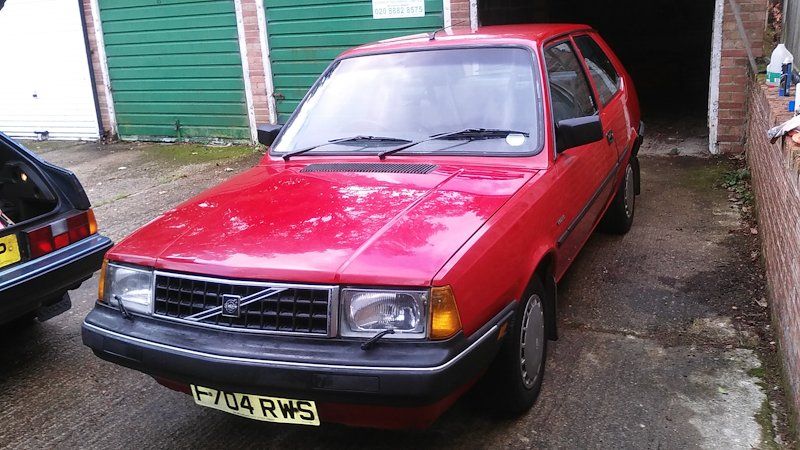
Also, while waiting for the new, new door seal to arrive, the car is given a bit of a clean and polish to inimitably awesome effect, in my wholly unbiased view.

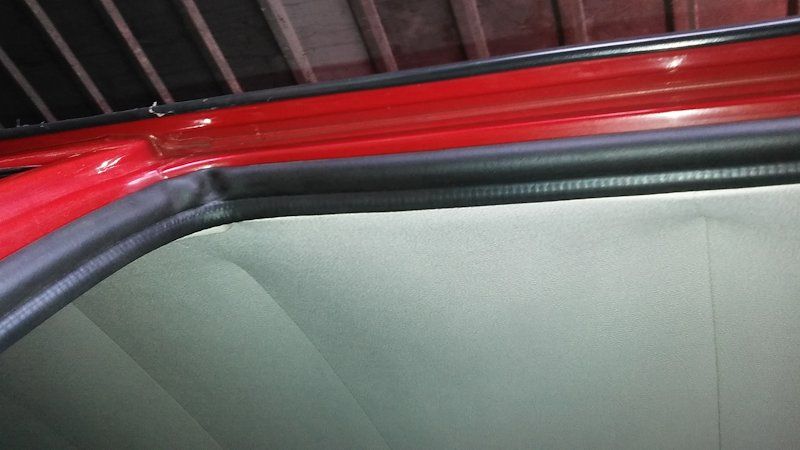
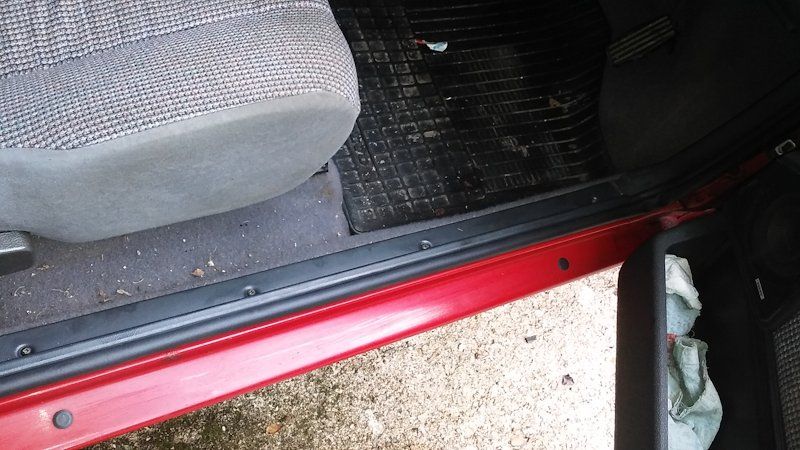
Okay, so the thinner door seal arrives and with a bit of a struggle it can be made to fit pretty well and allows both doors to close very easily. By testing with an old till-receipt I can feel that the passenger side door is sealed well all around but the driver's door seems to have a hairline gap at the top even after re-adjusting the lock and catch positions. I have a plan which is to try and ever-so-slightly bend the window frame inwards using bits of wood, the garage wall and thick blankets to protect the paint work (with the window wound-down, of course). Whether it will work, I do not yet know as I currently have no way of seeing into the future, so this phase is still... a mystery, yet to be revealed.
A bit of bending about of the driver's door does seem to have improved the situaish a bit, at least according to the till-receipt test, so lets hope that, when the car is mobile and able to go along the bypass, there isn't an excessive whistle-down-the-wind sound. Indeed, independent verification of my visits to the car to continue work on it are kindly provided again by Kingston council, due to my inability to judge how much space will be left for me when moving forward into that very same yellow box as before.
And they have even added a bit of Ealing Cinema-style comic film noir atmosphere to very good effect, too.
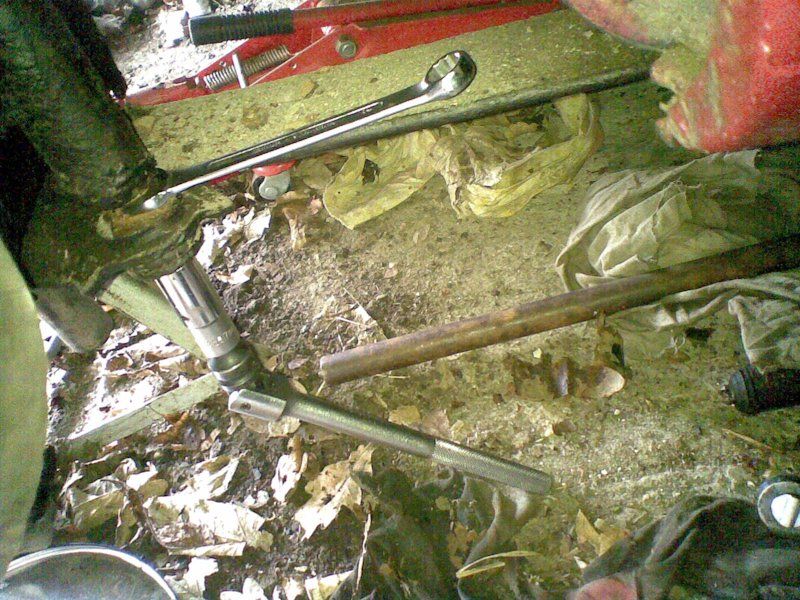
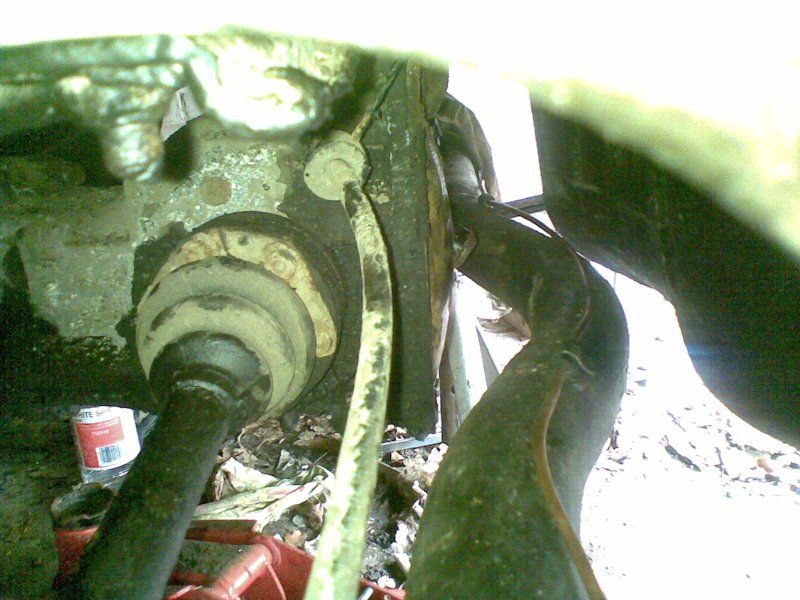
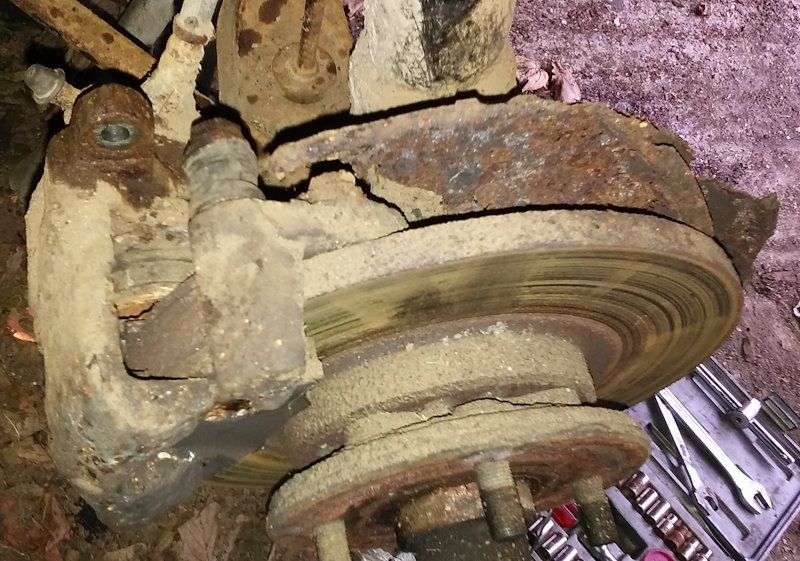
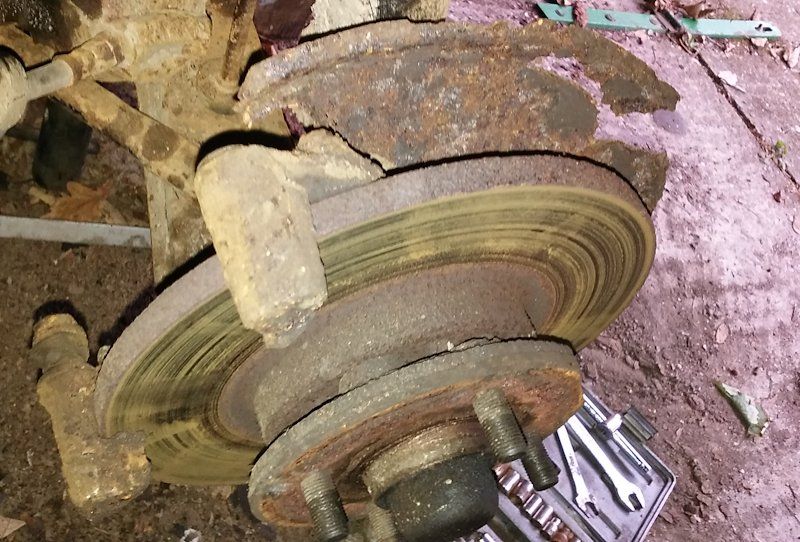
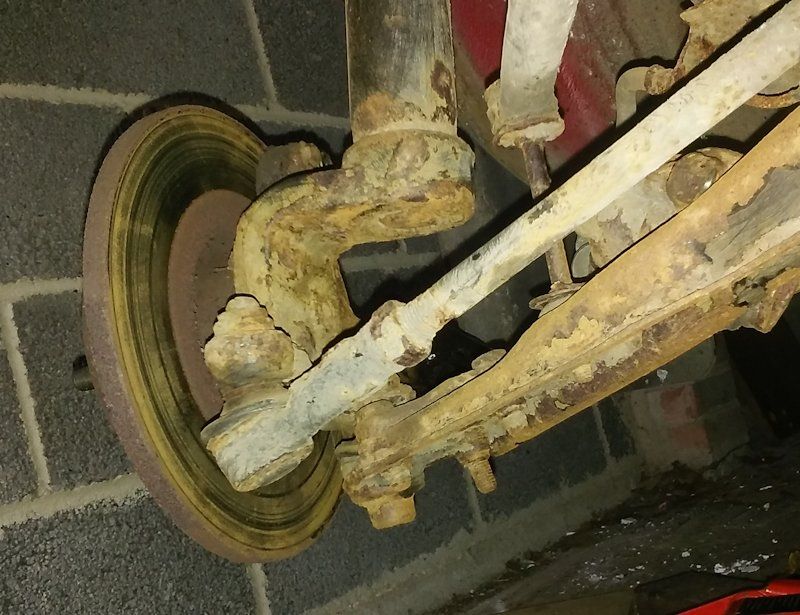
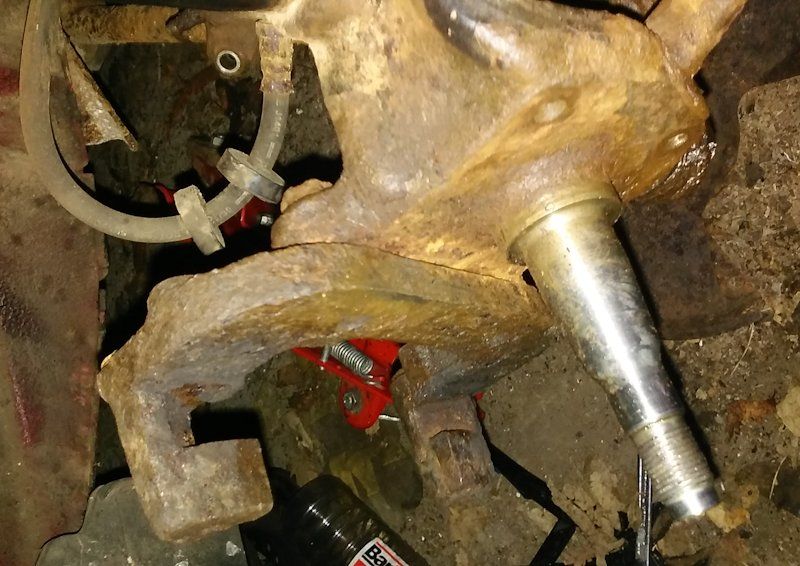
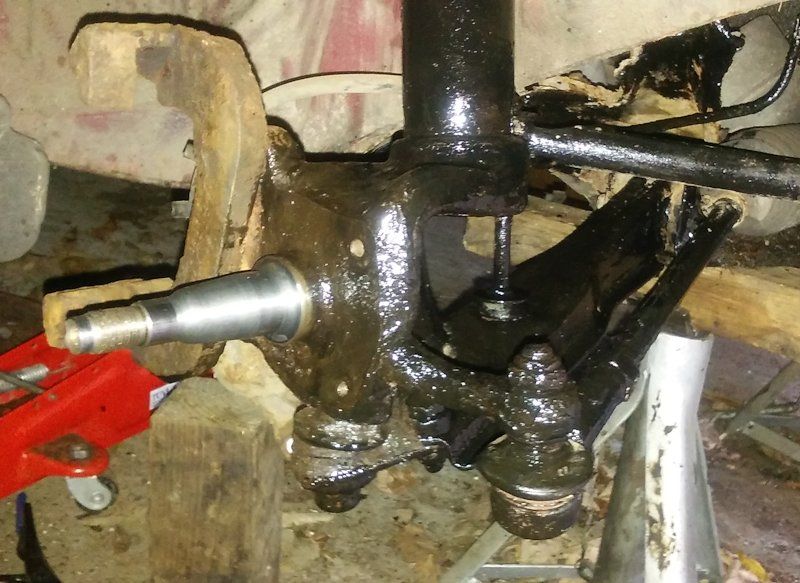
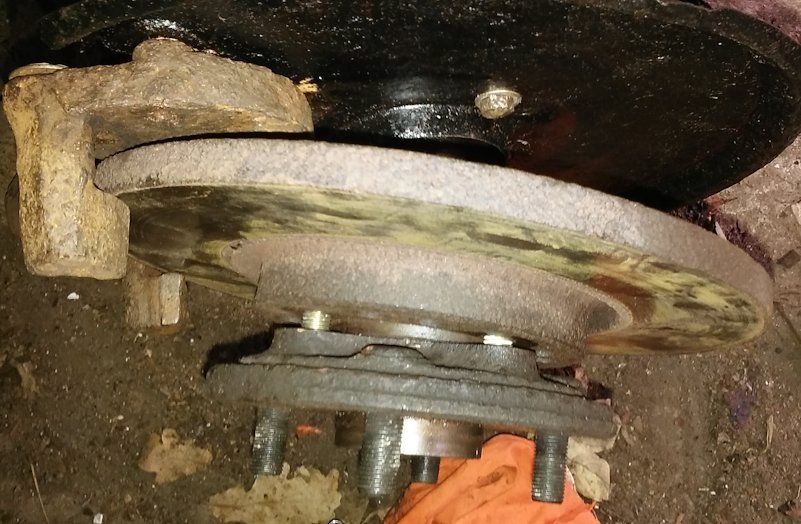
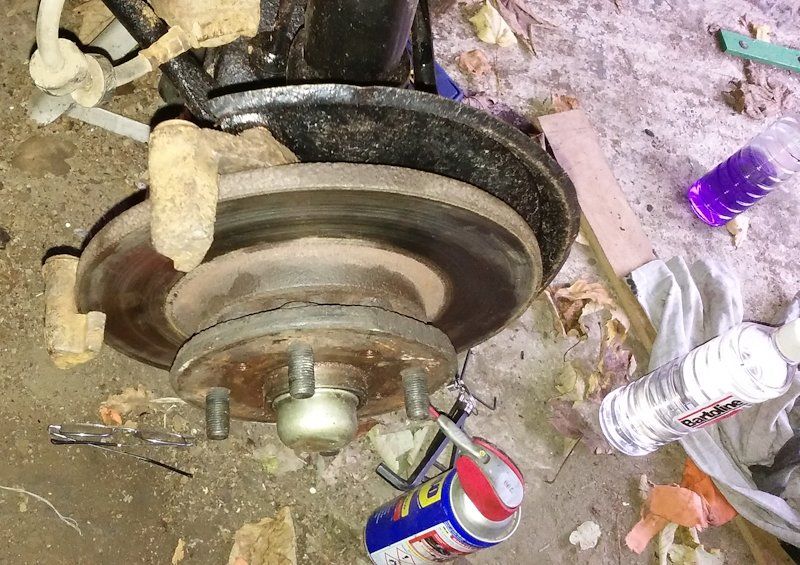
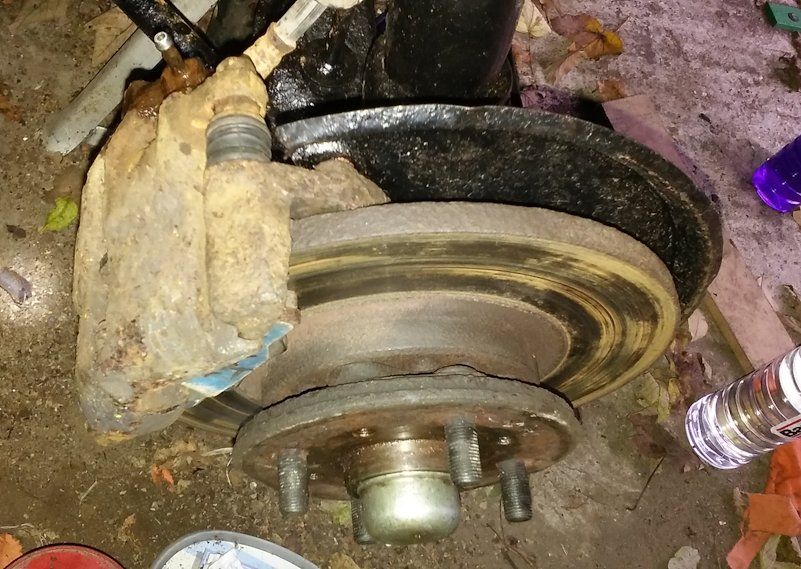
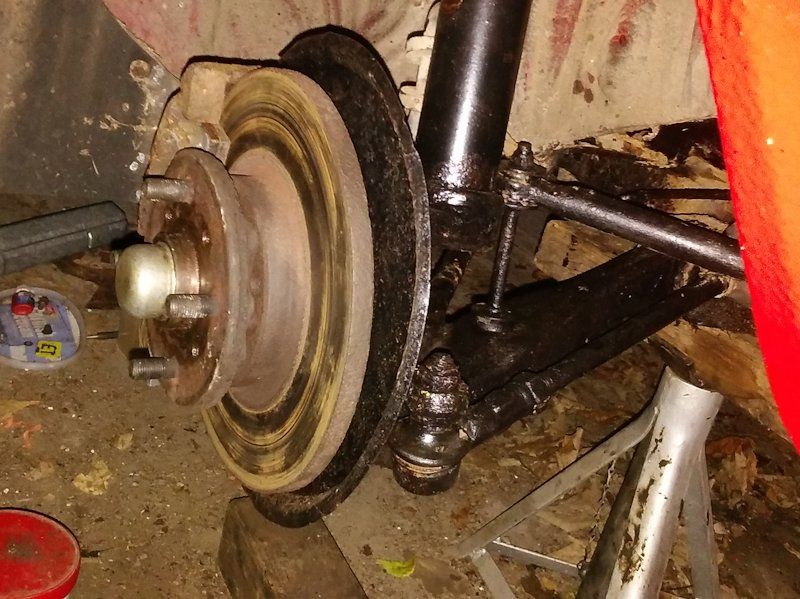
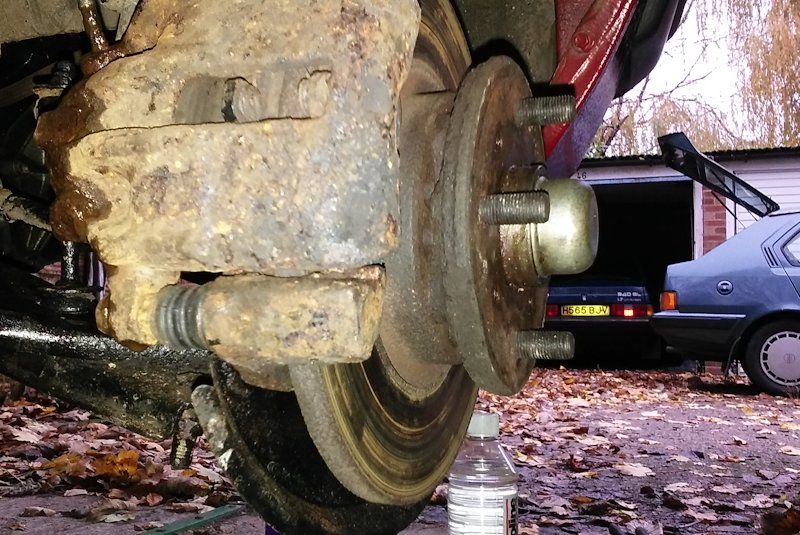
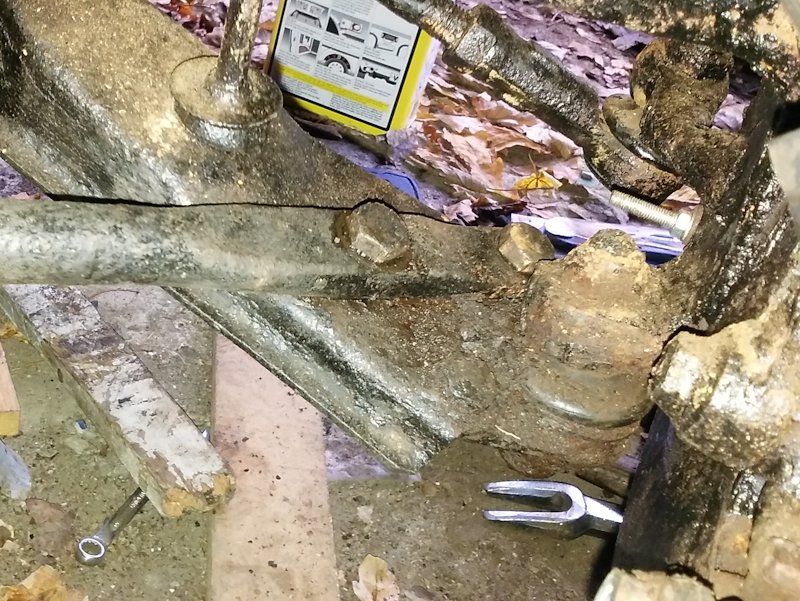
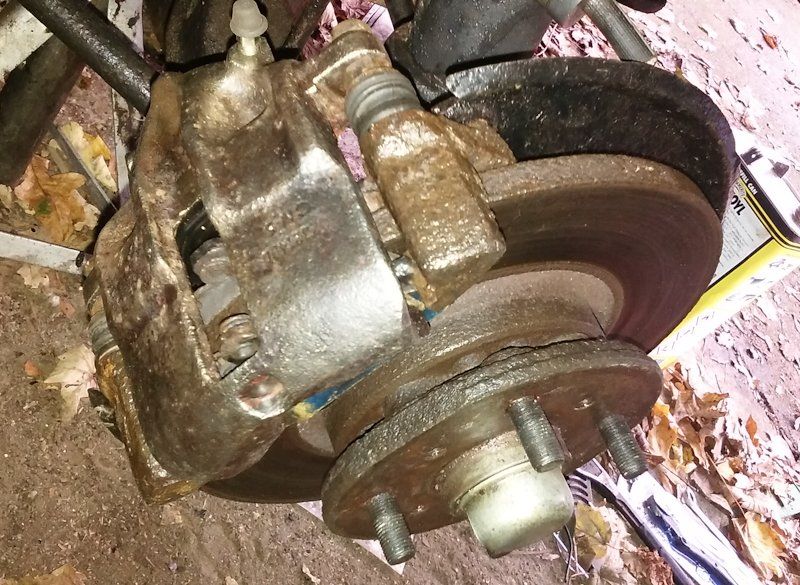
Anyhow, we are now at the end of October 2016 and Red Ness has been raised-up on axle-stands at the front and had her front wheels removed for some wire-brushing underneath to remove dried mud and rust. Removing the wheel-nuts was a fairly difficult task, breaking several tools, but eventually they came undone. The brake disks seem a bit scored but they may be OK. The biggest thing that has happened is that brake-disk backing-plate has disintegrated on the driver's side, but I have at least one satisfactory spare and maybe a very good one somewhere - but that may be a false memory.
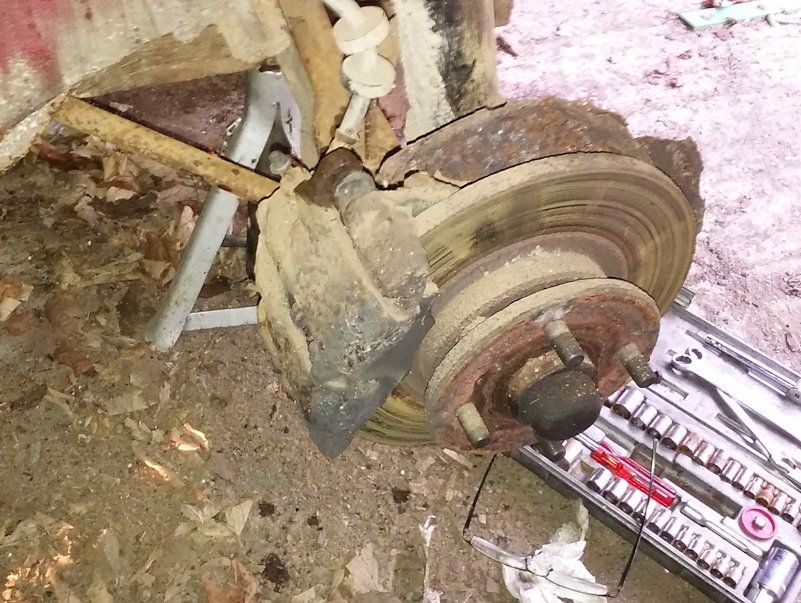
The driver's side calliper is eventually removed as are the pads. Generally the disks are a bit irregular but not too bad, I hope, and the pads are a bit seized onto it but I hope they can all be cleaned-up and copper-eased to good effect without having to renew anything, apart from that damned backing plate which has well-and-truly disintegrated in my hands.
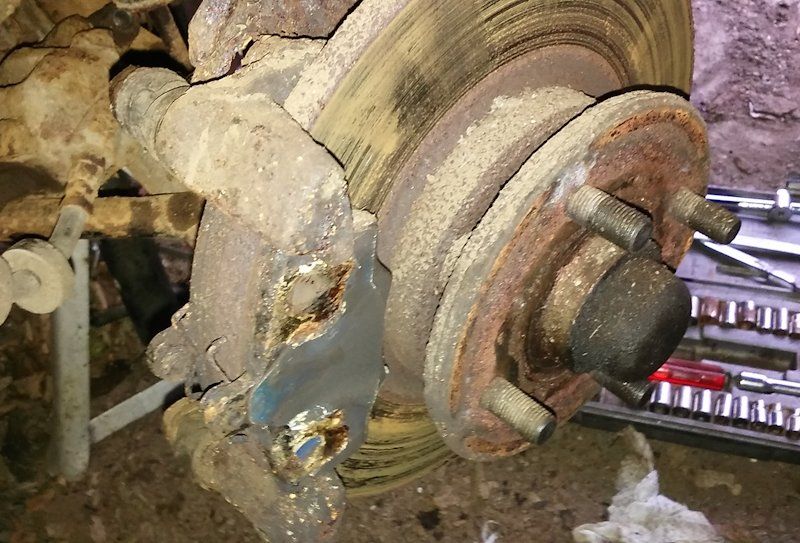
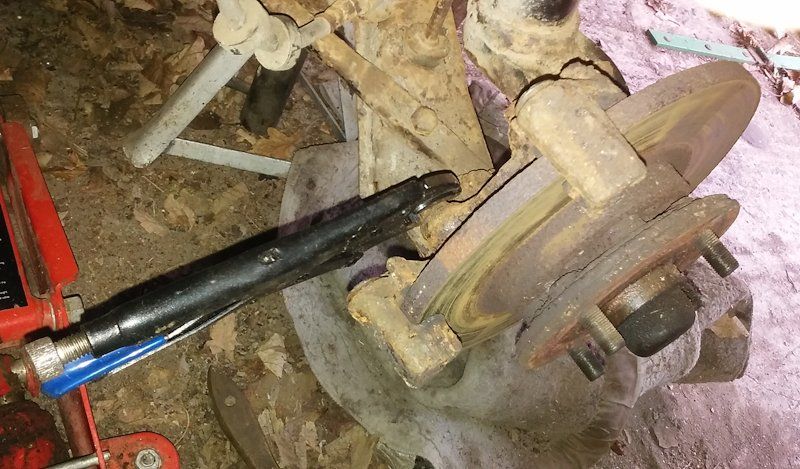
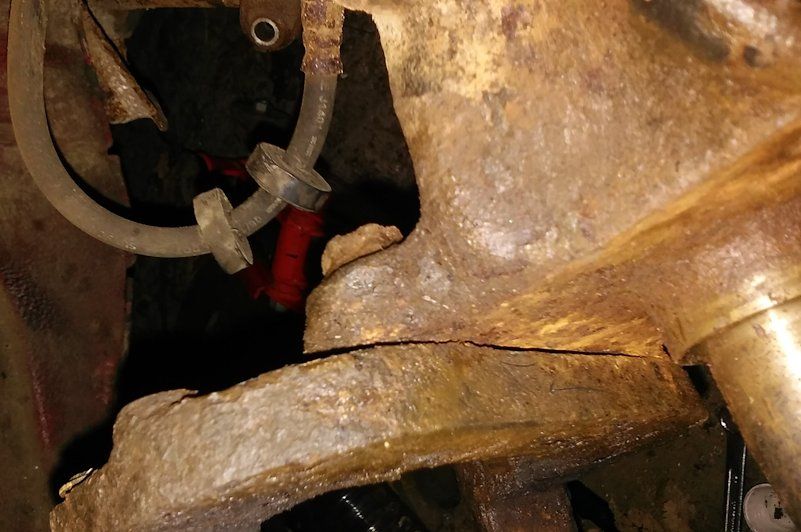
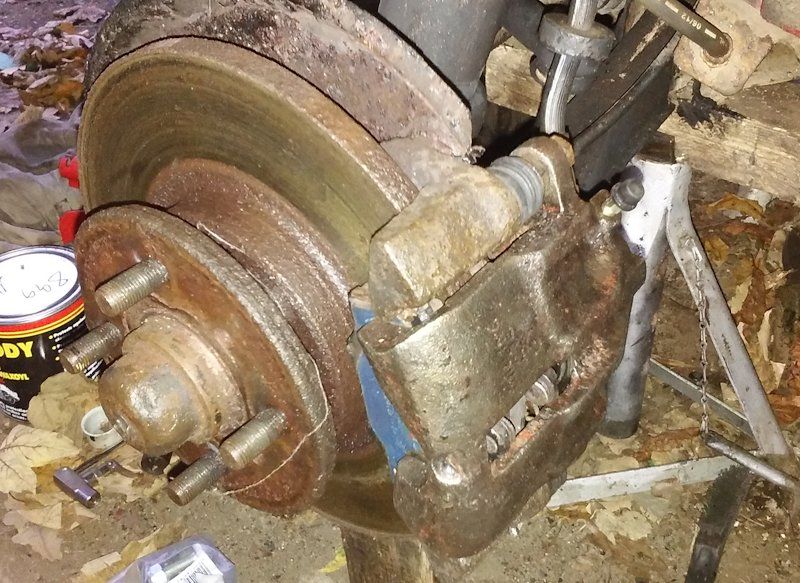
A few presses on the brake pedal confirm that the calliper itself is working fine so if we can remove everything necessary to replace the backplate, I am hoping that there won't be too much to do beyond a bit of wire-brushing and painting work. However, efforts to remove the calliper bracket do not work since the bolts are well-and-truly rusted in. Even the Irwin kit and the molegrips will not shift it, so there has to be some other sneaky way to avoid removing the whole strut.
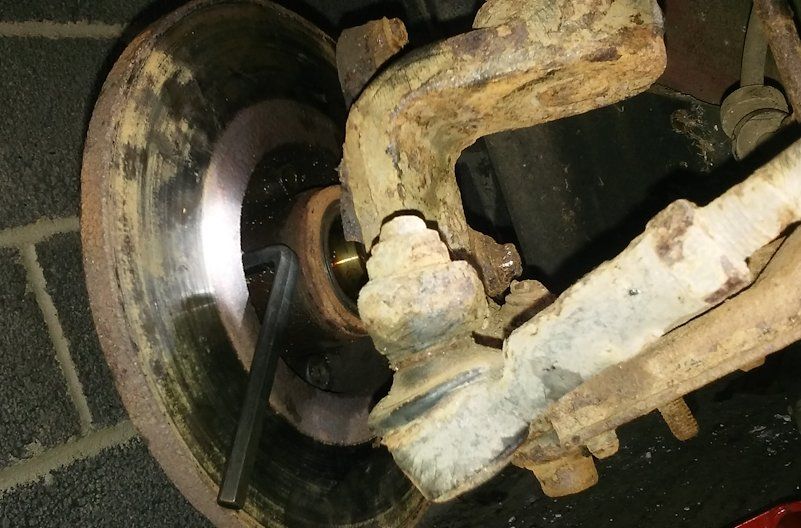
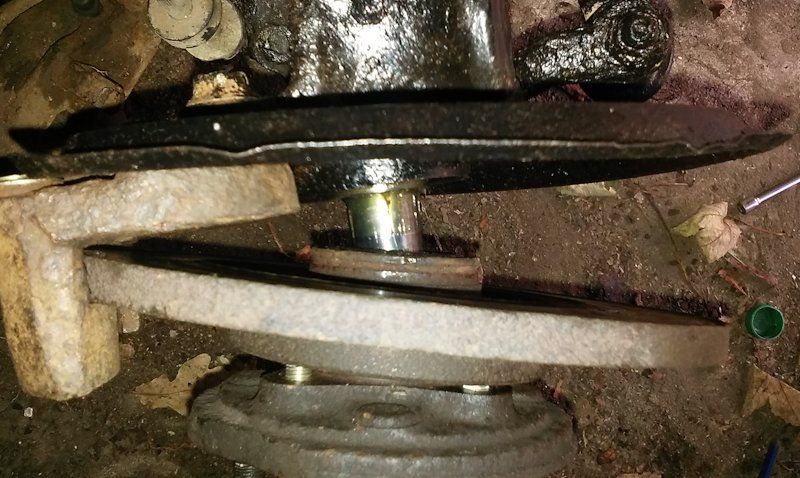
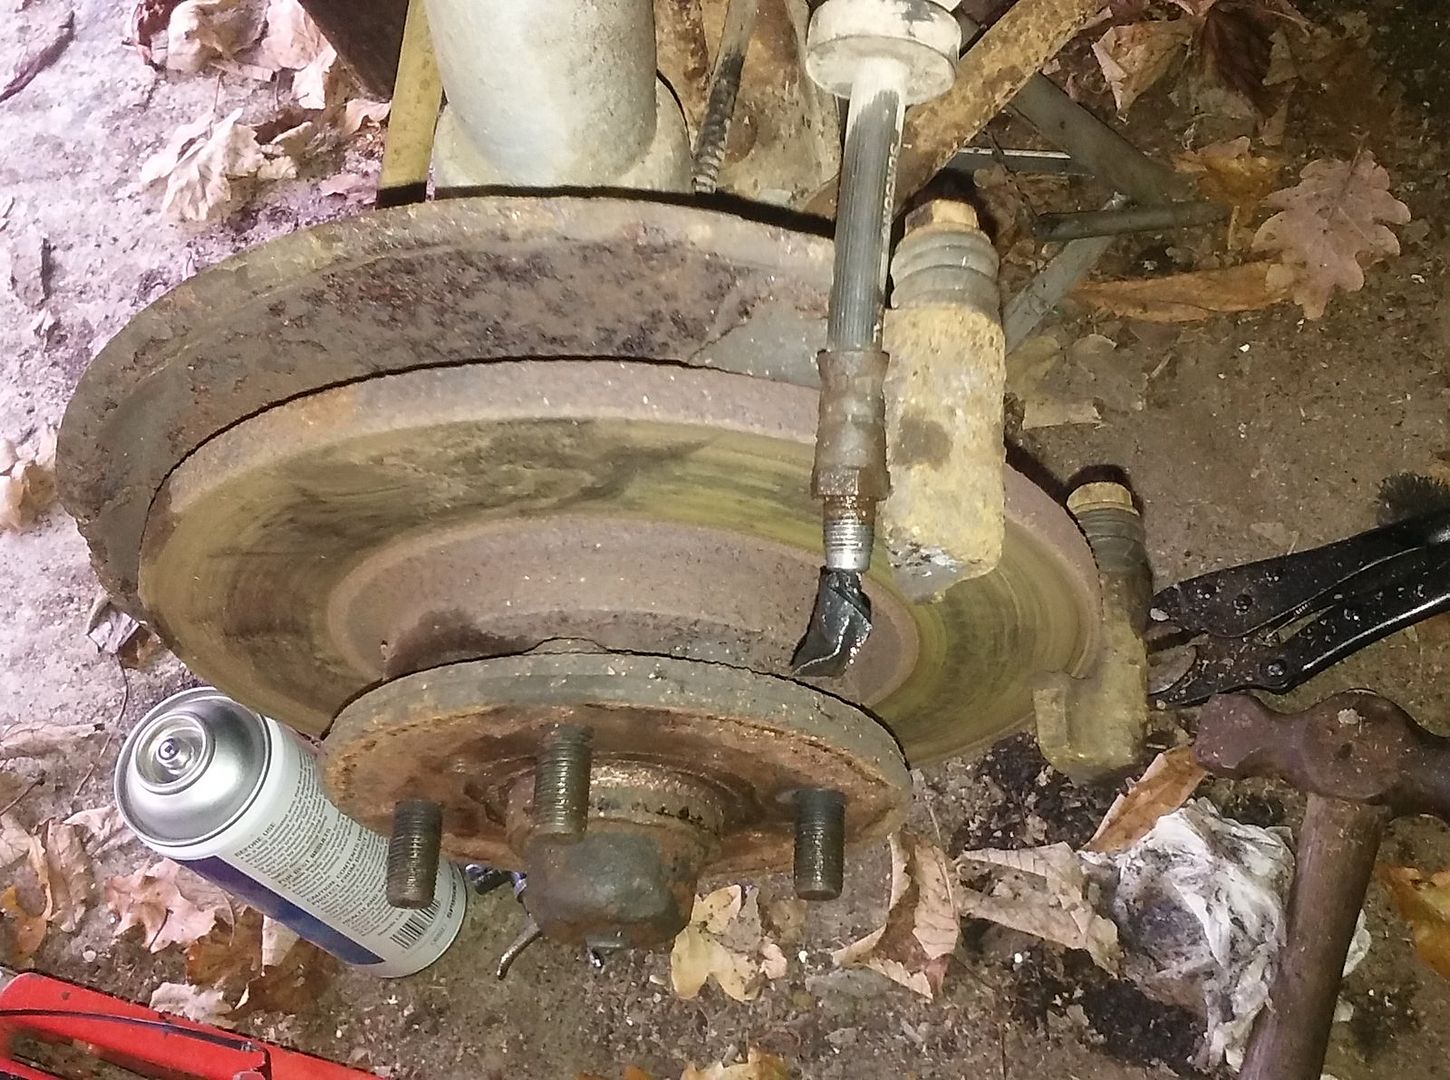
The backplate itself has now completely crumbled away and a peep around the back shows some allen bolts holding the disk to the hub which might be possible to undo, if only I had the right allen key. Now in early Nov 16, removing the grease cap and the hub-nut allows the disk-hub assembly to be substantially loosened-up, but alas not removed fully since the calliper bracket will not let it go. So a few days later, I return with a bigger set of allen keys and, after using an 8mm one to undo the bolts holding the disk to the hub, a bit of hammer-and-chisel work allows me to get it all apart.
Now all I have to do is remove the (very rusty) little bolts which hold the remains of the backing plate in place, so copious amounts of penetrating oil are applied.
Well, in the end it just so happens that three of the bolts came out fine, but the lowest one at the front snapped-off and this required a bit of mid-November 2016 drilling work to be done, by hand for convenience - less hassle than starting my generator and using the leccy drill instead. Quieter, too.
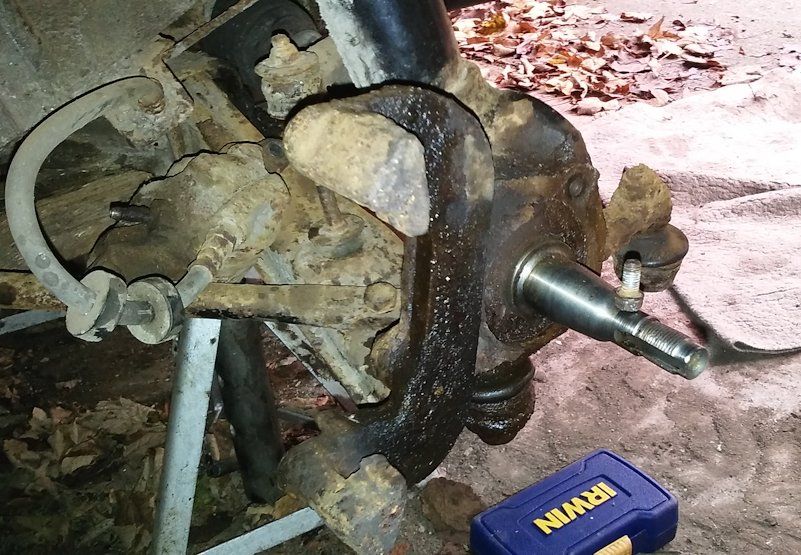
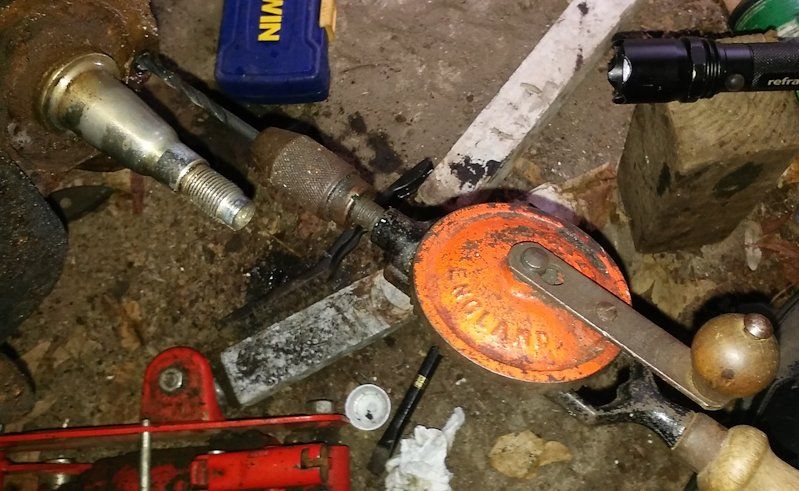
This allows the remains of the back-plate to be removed by scraping away at it with a screwdriver, hammer-and-chisel, wire brush, etc, and this finally reveals the all-important groove between the calliper mounting bracket and the strut itself which the backing-plate slots into. This is quite good news because a trial fit with a spare backing plate suggests its all going to fit back together OK in the end, hopefully.
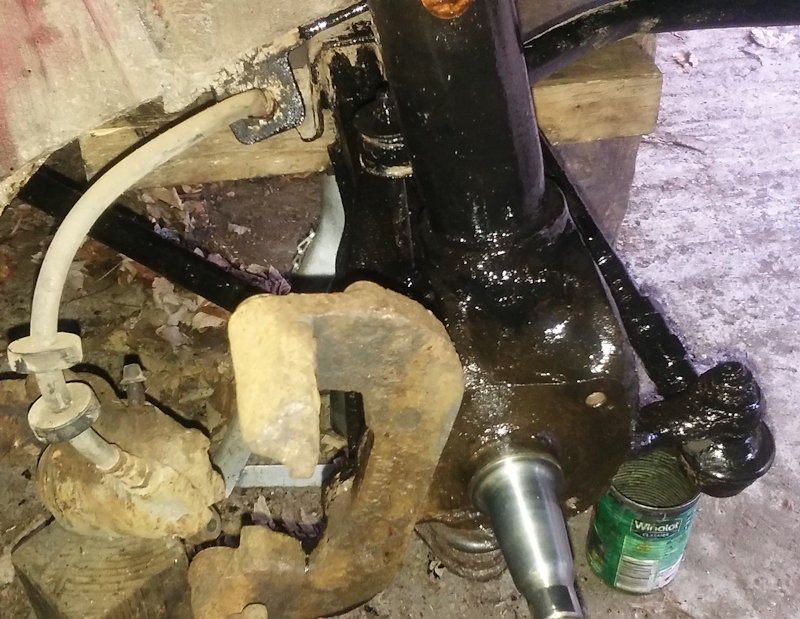
Ok, so here we go with a bit of painting Hammerite onto the strut paraphernalia, but not too thickly because we don't want to block up that groove.
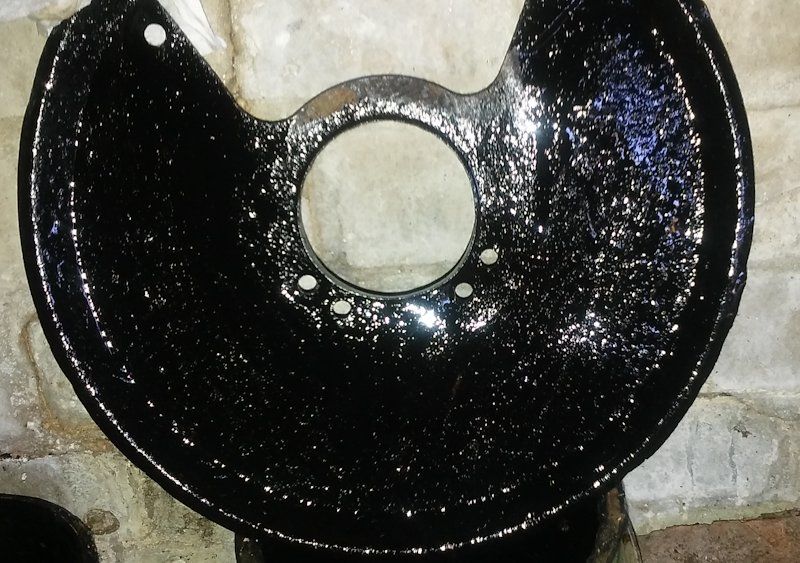
And here is the new backing plate from the roof (thanks, derskine ;-) which has been given a thin coat of Hammerite, too.
Are you thinking "A lot of photographs for not a lot of work"? Well you could just be right there, too.
Getting into the second half of Nov 16 and things have been making progress. The driver's side hub has been muddled back together over a couple of trips to the car which involved many doings-up of the allen-key bolts followed by undoing them, to get it all back together on the stub-axle correctly. There also was a bit of a B&Q solution to the problem of the bolt which had to be drilled-out. Well, I'm not going to re-tap the thread am I!!
A fair amount of grease was put inside the hub itself, the outer bearing replaced, the nut done up to the right torque, then backed-off 90 degrees and peened over (as per Hades manual) and the cap filled with grease and tapped into place again.
Then the brake pads and the calliper were replaced after squeezing the piston in with the special tool and applying a bit of copper-ease to the places where they rub together and a bit of thread-lock to the calliper bolts. The rubber gaitor on one of the calliper bolts in replaced.
A test shows that the setup seems to work OK, releasing the disk fairly nicely when the brake pedal is released. So now its time to start the process of bleeding some brake fluid through that side and this will, of course, involve removing the pesky bleed-nipple which is well-and-truly rusted-up. So it is given a bit of a de-rust with a wire brush and screw-driver blade prior to soaking in copious amounts of penetrating oil for a couple of days.
Well, a couple of days later some cautious efforts were made to remove the offending nipple with molegrips since the hexagonal part of its cross-section had rusted away. Anyhow, it was to no avail since the nipple broke at about half way down. Subsequent efforts resulted in it breaking further down still which then allowed use of a screw extractor but this did not work either since the drill-out part broke-off in the offending nipple. Thus, efforts are made to remove the whole caliper for sending away to have the remains of the nipple drilled-out, but on trying to remove the brake pipe, it all went Pete Tong again since the pipe itself became coiled-up in an amazing twist and the steel pipe to which it is fitted became twisted and broke, too, thanks again to glorious rust. Anyhow, I cut the flexible part of the pipe and will replace these bits anew later on since everything is a bit incurably rusty around here.


Efforts then shifted to the other side to try to remove the other nipple but that too failed, so the caliper is removed, with a bit less damage to the brake pipes, which seemed to be in better condition on this side, but I must check for sure later. Both calipers are now on their way to have their broken nipples expertly drilled-out and thread re-tapped, hopefully.
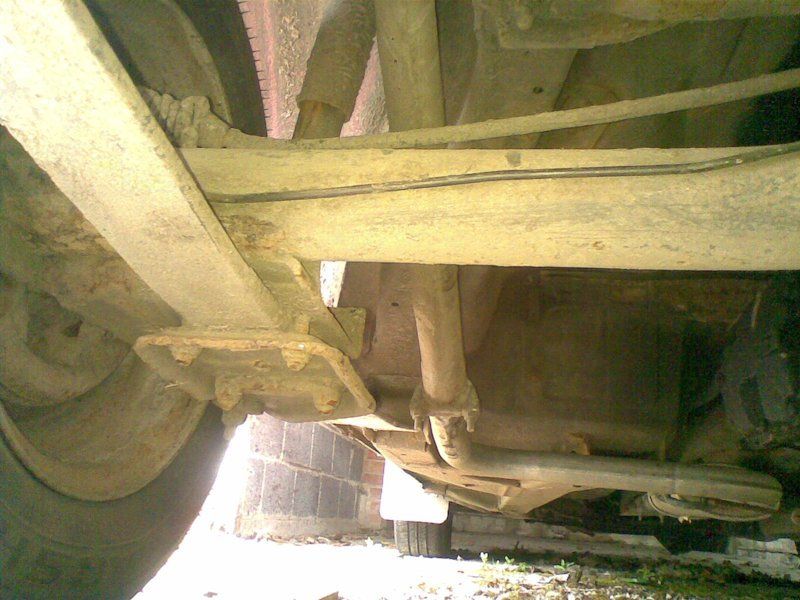
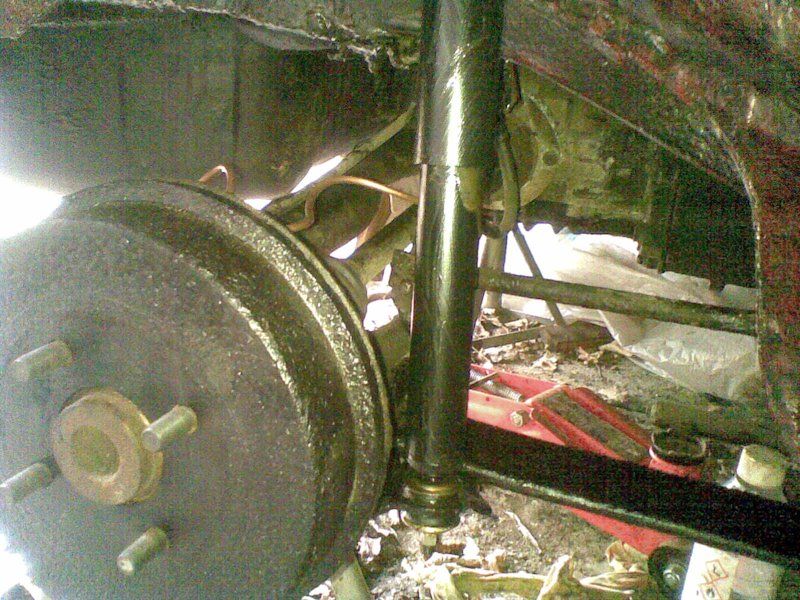
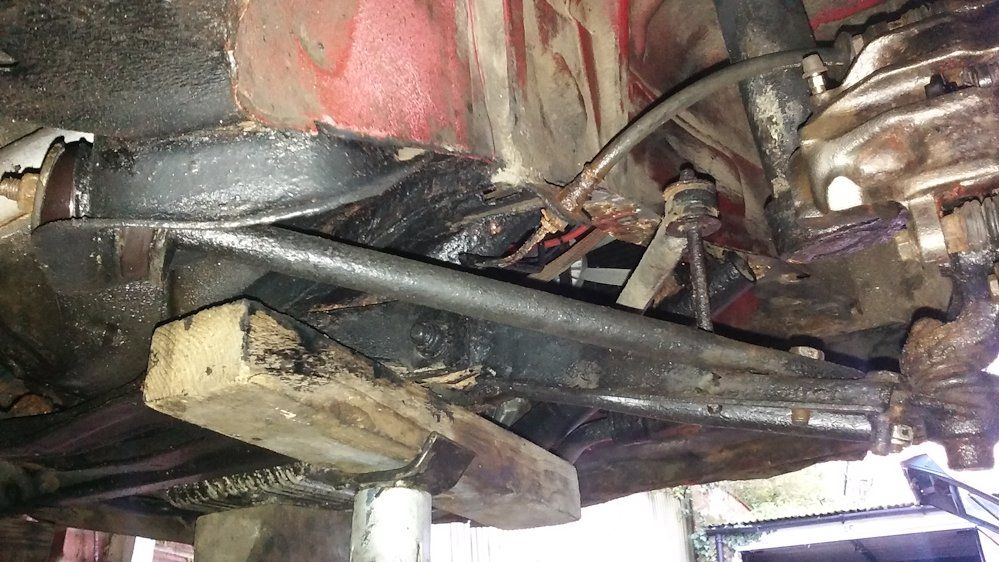
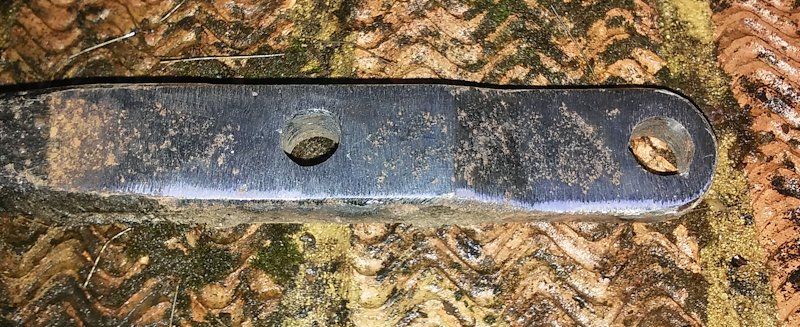
Meanwhile efforts are made to replace the tie bar bushes and the one on the driver's side is removed with a bit of general wire-brushing to remove rust in the area, repainted and refitted.
After putting the new bushes back in place, the bolts on the rod are torqued-up.
Meanwhile the expert engineer (Mac) who tries to repair my calipers by removing the broken-off nipples sends the following pictures showing the scale of the project at hand. Indeed the broken-off nipples continued in their resolute refusal to budge so with the prospect of heat- and acid-treatment being needed to remove them, it became necessary to remove the seals and pistons.
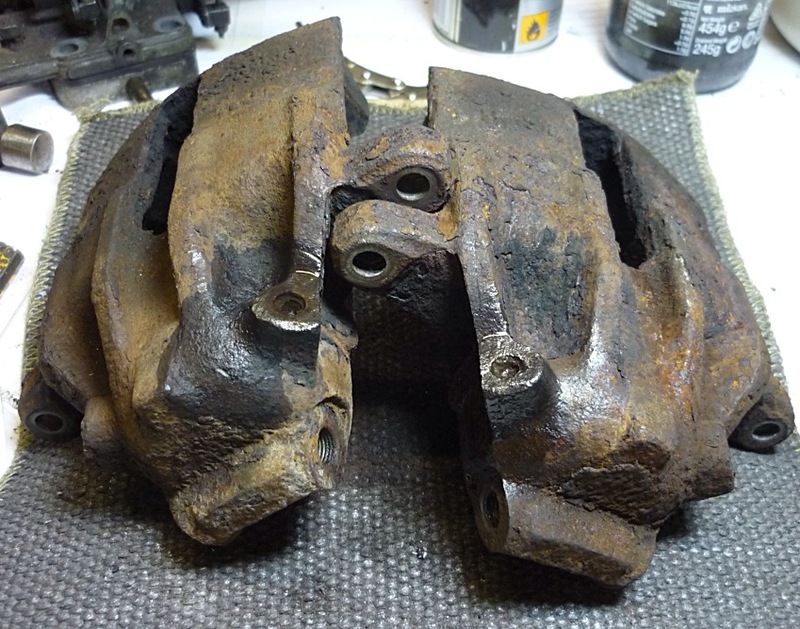
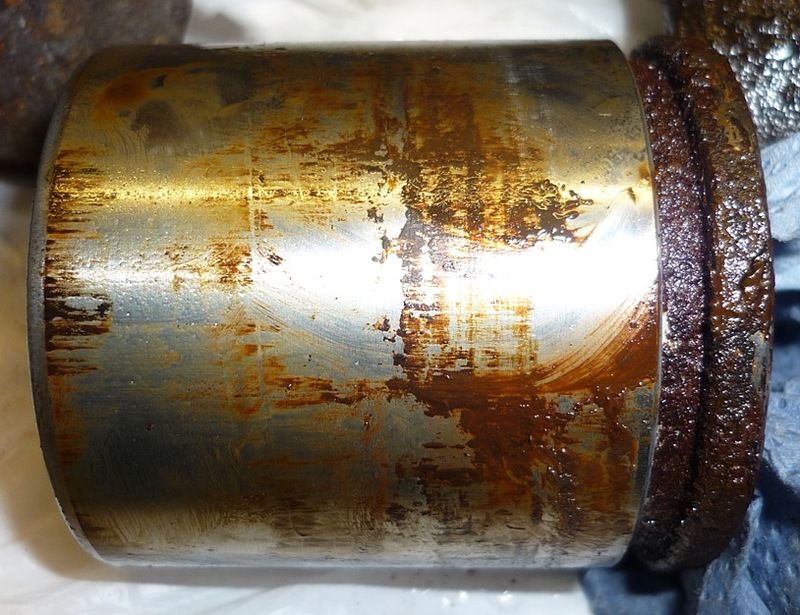
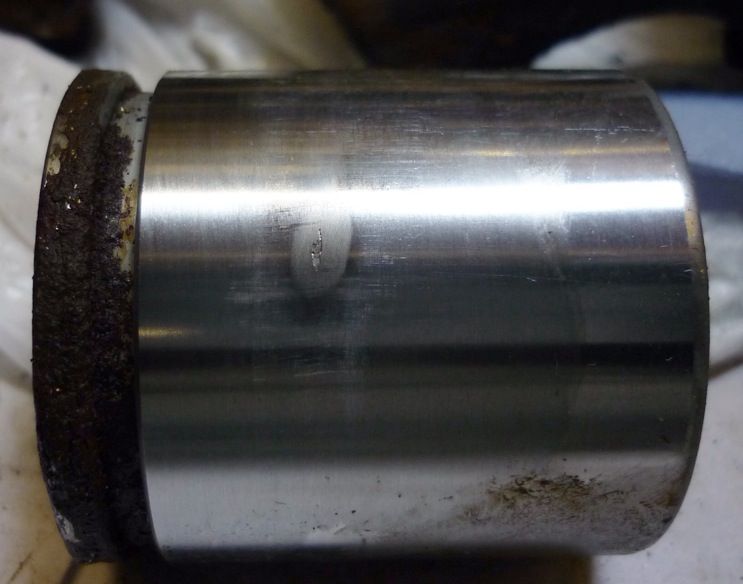
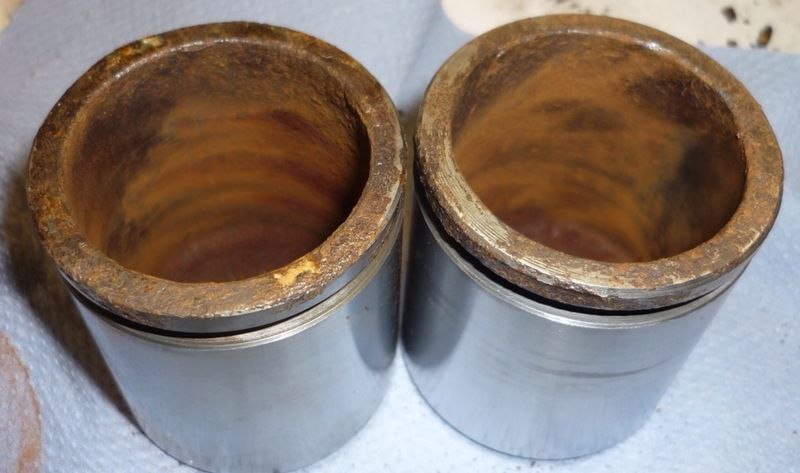
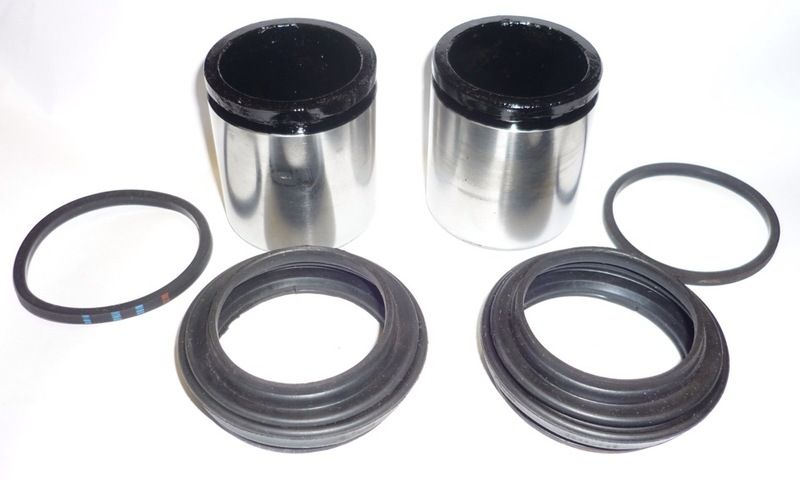
A fair bit of gum was encountered in said process, although the pistons cleaned-up very well in the end and a brush or spray of paint has done absolute wonders. The awesomely expert and kind engineer then decided to use another set of spare calipers since my originals were a bit too far gone.
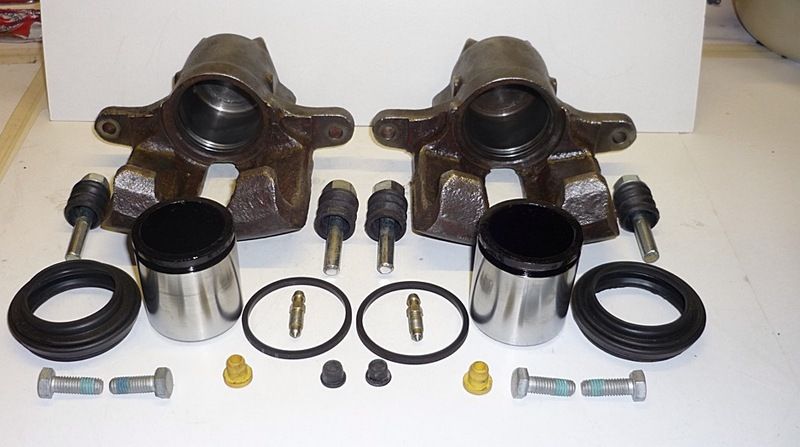
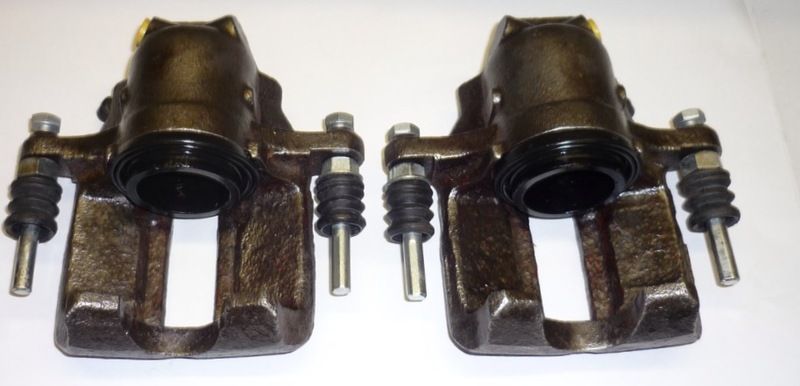
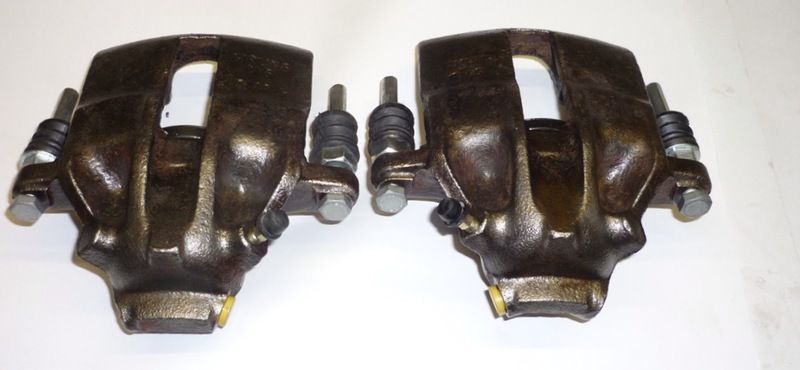
And here is how they look back on the car in early-mid December 2016.
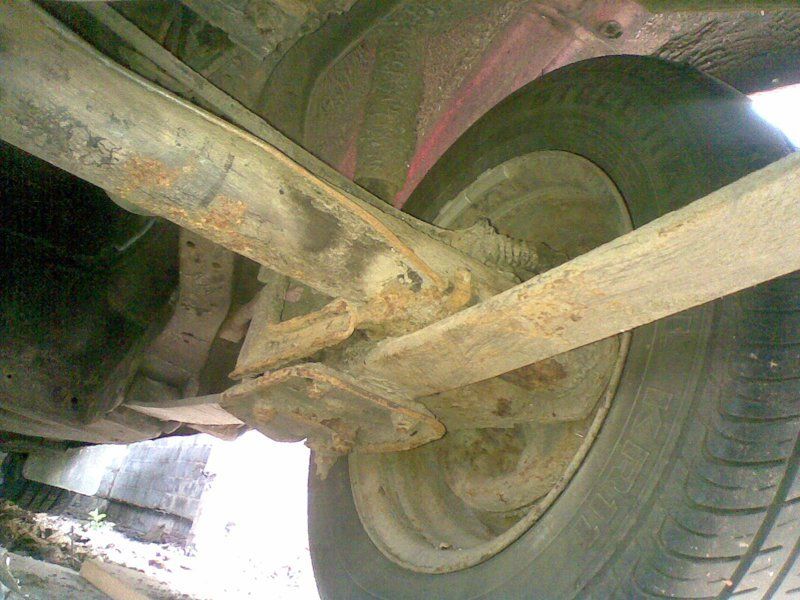
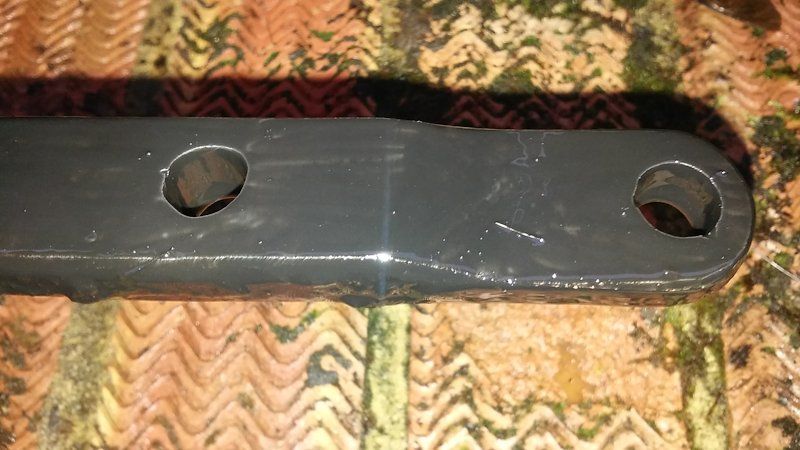
Efforts are made to replace the passenger side tie bar bush but on removing the bar, some quite bad cuts were found in the bar itself.
Anyhow, a trip to the welder and all is repaired allowing the tie bar and bush to be refitted.
A bit of a gap in events in mid-December 16 due to waiting for the flexible brake pipe needed for the drivers side to arrive.
Around about Crimbo time in 2016 and the dodgy front brake pipes (copper and flexible) are replaced on one side, the system bled, tested and bled again and all seems to be awesome so it is given another paint-up with a mixture of waxoyl and underseal.
So, what's next in 2017? top